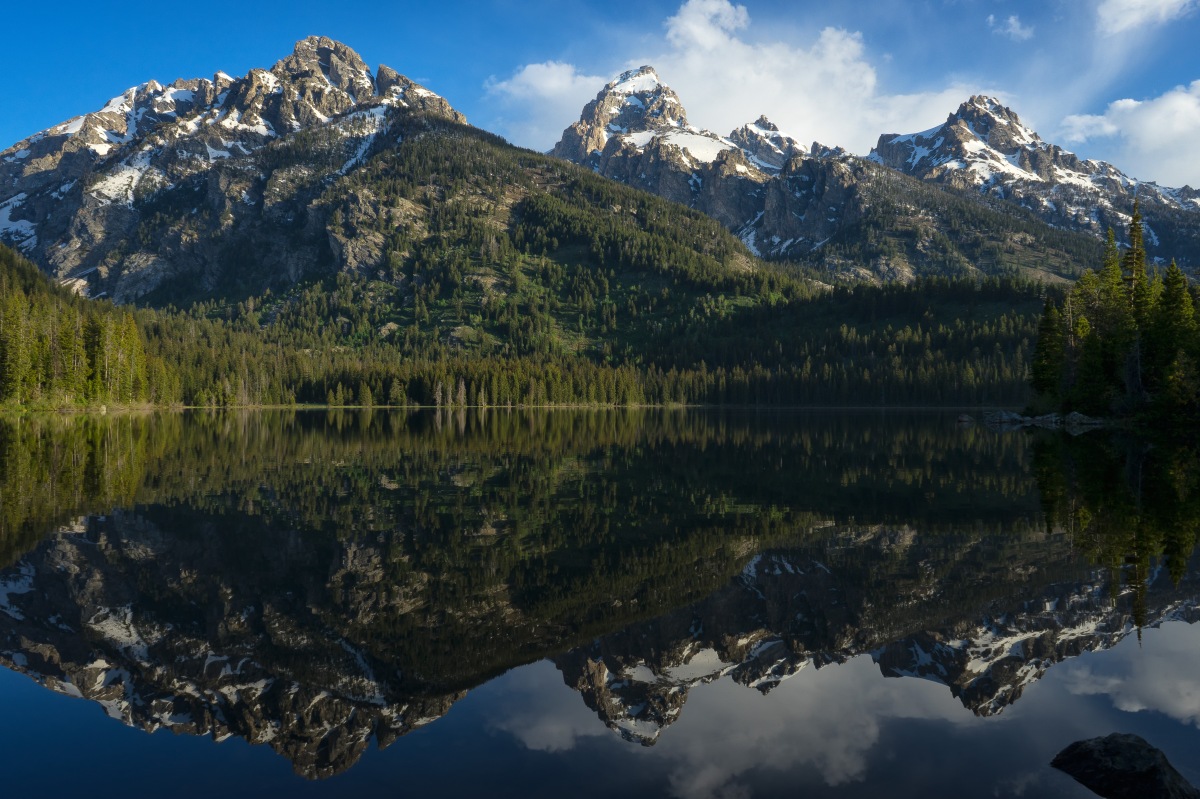
Image

Hiking The Alaska Basin / Teton Shelf Loop Trail From Teton Canyon

By Marc Bowen

Teton Canyon

This is the third time in a month that I have driven up this canyon. I grow to love and appreciate this area more every time I come here. Its beautiful. It’s easy to get to and some of the best hikes in this part of the country are just steps away from the parking lot at the end of Teton Canyon Road.

Getting to this parking lot as I said is not difficult. From Driggs Idaho drive east about seven miles on Ski Hill Road then turn right on the 4-plus mile, mostly gravel, Teton Canyon Road. Drive to the end of the road to the parking area. Parking lot includes restrooms and two trailheads.

TrailheadSign
Photo by: Marc Bowen

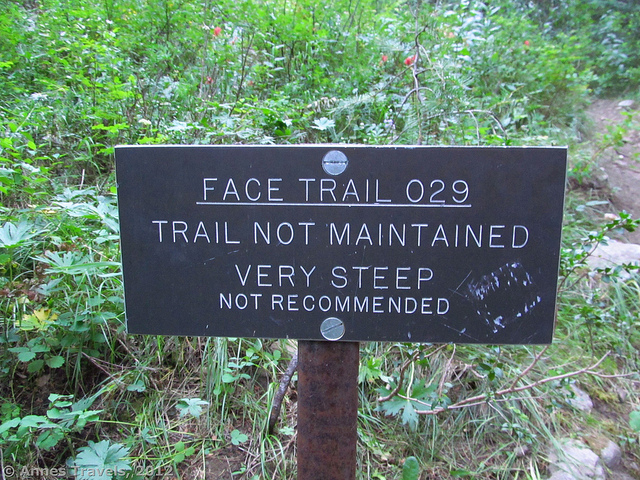
I’ve been in this parking lot two other times in the past month. Four weeks ago in June I hiked from this trailhead about three miles up the South Teton Trail to the Teton Shelf Trail and another mile to the Devil’s Stairs (see my Devil’s Stairs Trail blog post for more about that hike). About three weeks ago I hiked up the Face Trail (which takes off just to the left of the restroom) to the summit of Table Mountain (see my Hiking Table Mountain’s Face Trail blog post to read more about that hike).

Today’s Hike Details

  • Distance (Loop trail) – 17.3 miles
  • Trailhead elevation – 6950 feet
  • Elevation gain – 3018 feet
  • Highest elevation – 9968
  • Difficulty level – very strenuous

My plan this morning was to hike into the Alaska Basin area and scout the lakes there as a possible backpacking destination for me and my son in a few weeks. There are two different routes into the basin from this trailhead. One option is to take the South Teton Trail, which follows South Fork Teton Creek, all the way into Basin Lakes. The other option is to hike 2.7 miles up South Teton Trail, take the right fork onto Teton Shelf Trail continue up Devil’s Stairs and at the top continue to follow Teton Shelf Trail until it connects with Teton Crest Trail. Then take the left fork into the basin.

I had never been any farther up the South Teton Trail than the fork to the Teton Shelf. My only experience with the Shelf Trail was hiking to the top of Devil’s Stairs and then a little farther up the shelf until I was forced to turn back because of deep snow.

I knew that just going into the Basin Lakes and back out using the main trail would take most of the day and I wasn’t sure how much time taking the loop-trail would add to my hike. Since my plans didn’t include a night on the mountain I would need to give myself plenty of time to get off the mountain before dark.

So I decided to just take the main trail into Alaska Basin with the option of returning by way of the shelf-trail if there was time to do so. I headed out on the trail about 6:45am at a brisk pace, feeling good and looking forward to seeing some new country.

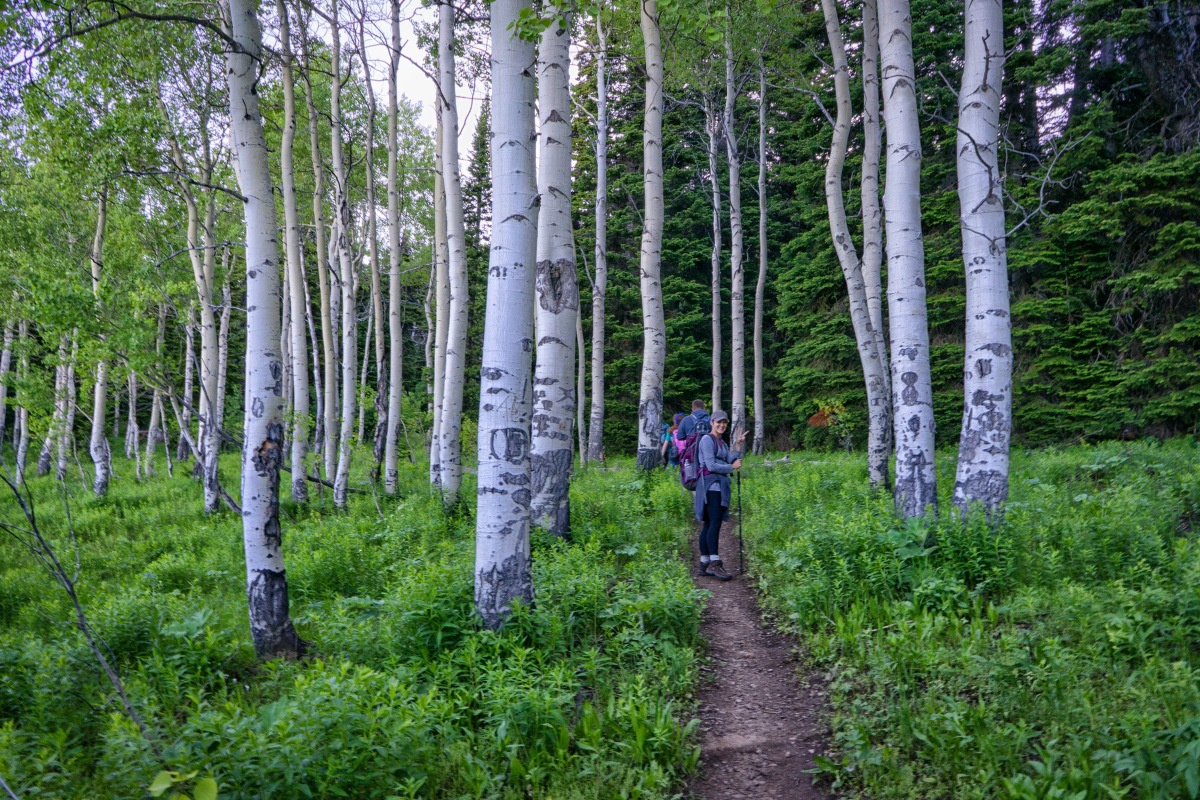
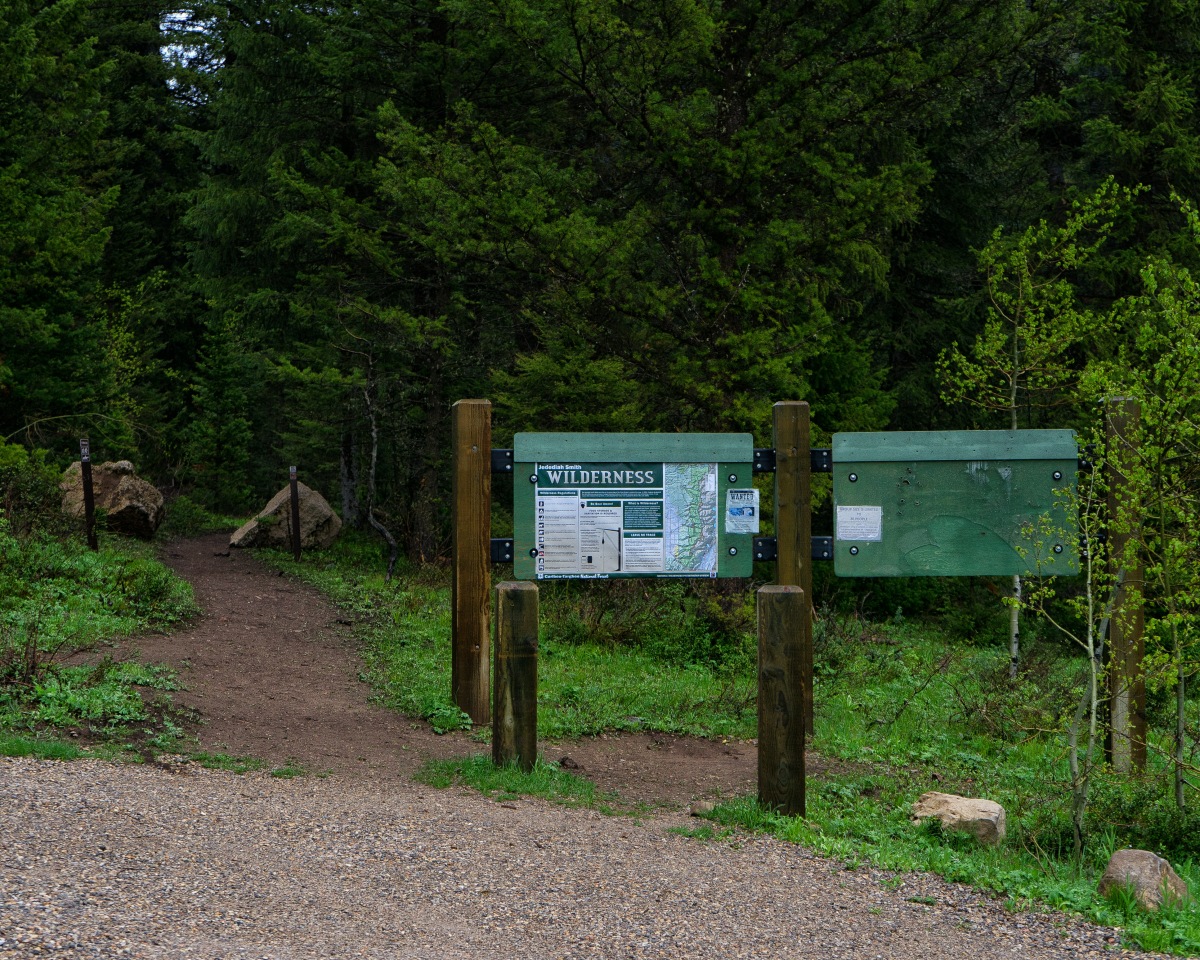
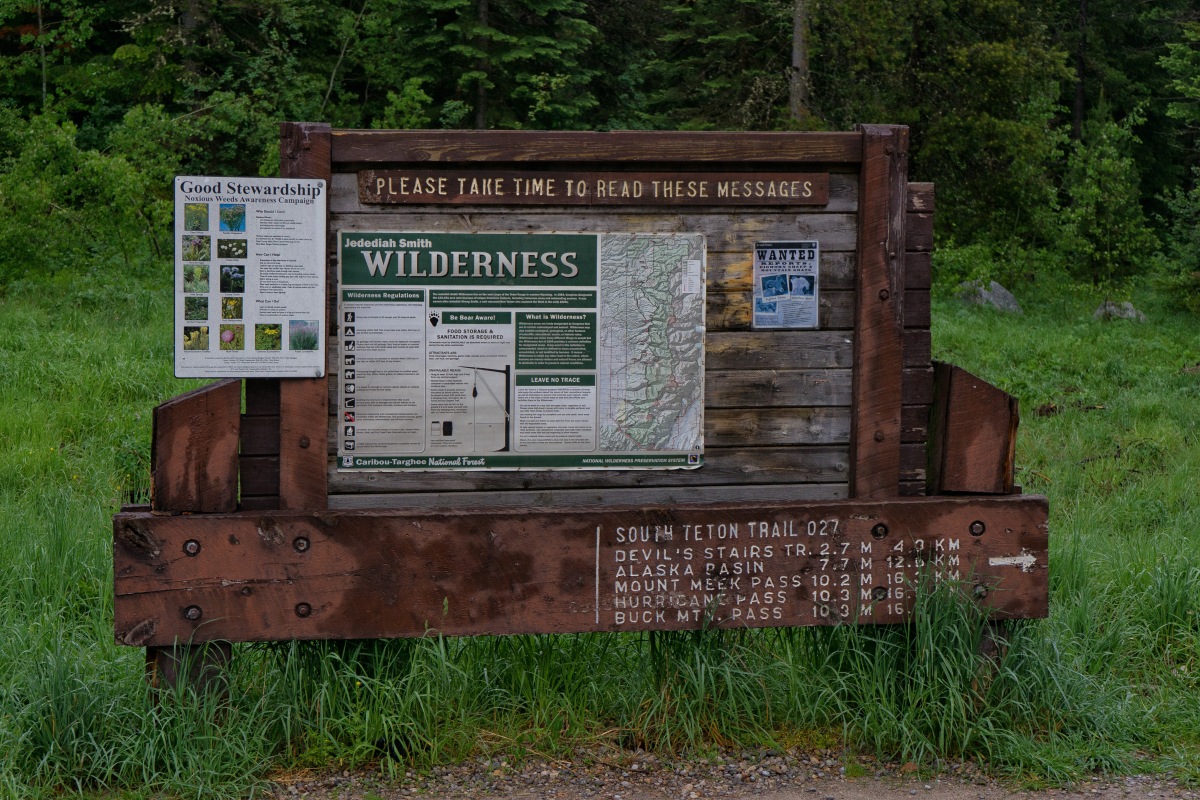
A short distance from the trailhead the trail almost immediately enters the Jedediah Smith Wilderness and the Caribou-Targhee National Forest. The trail eventually crosses Teton Creek through some fairly dense forest broken up by aspen groves.

AlaskaBasinTrailHike1
Photo by: Marc Bowen

The morning was cool and the sound of the creek was very noticeable from the left side of the trail. There was no wind and the foliage was very lush and wet from the previous nights rain.

AlaskaBasinTrailHike2
Photo by: Marc Bowen

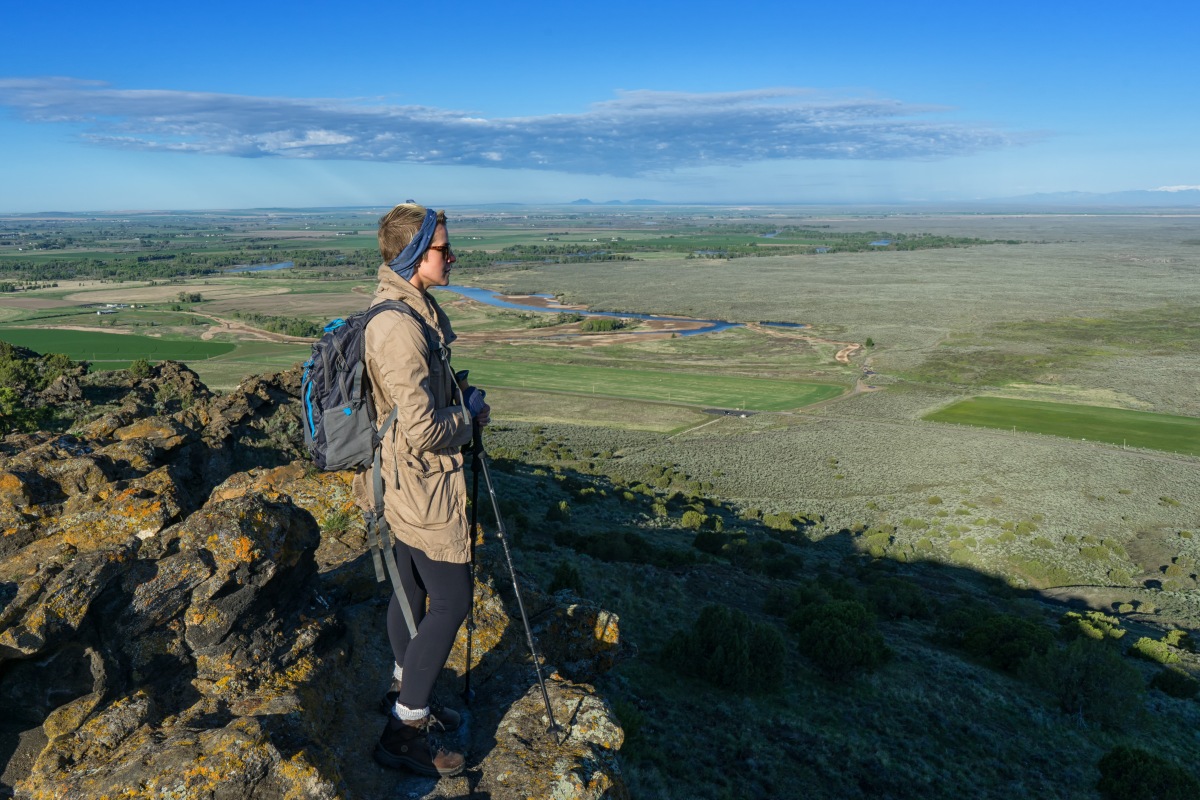
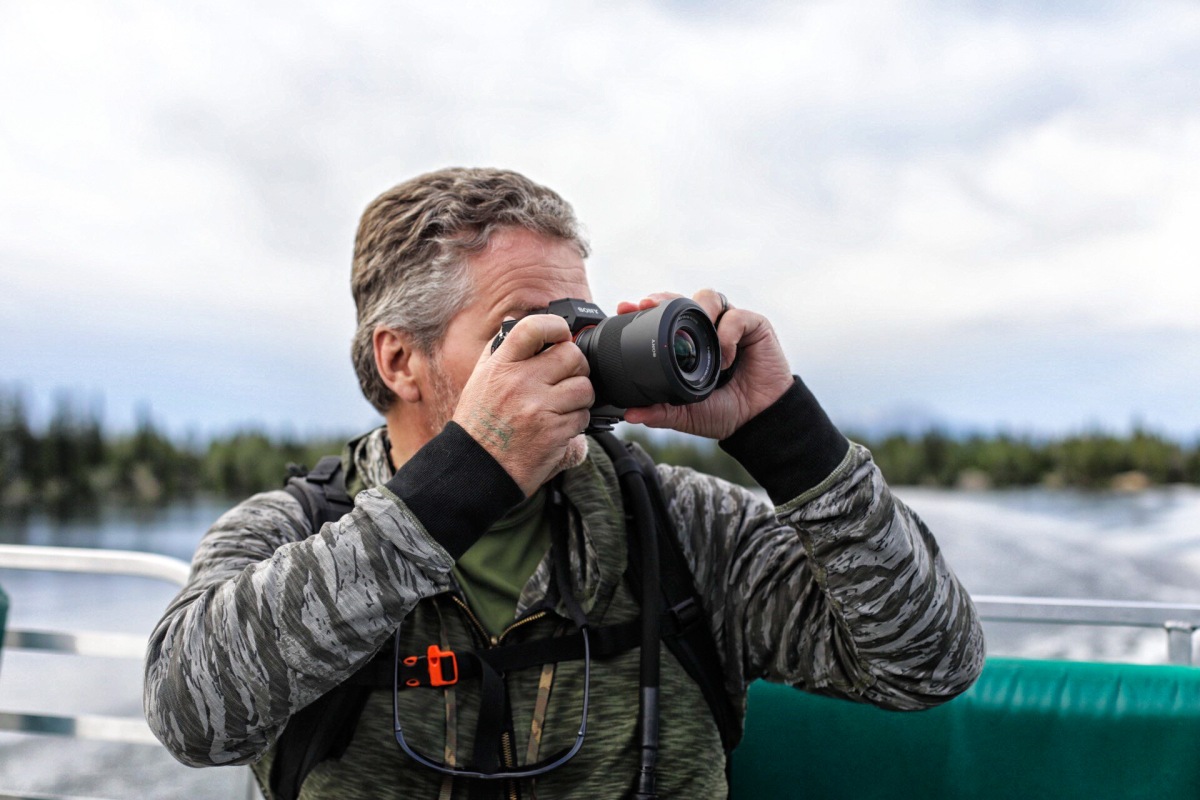
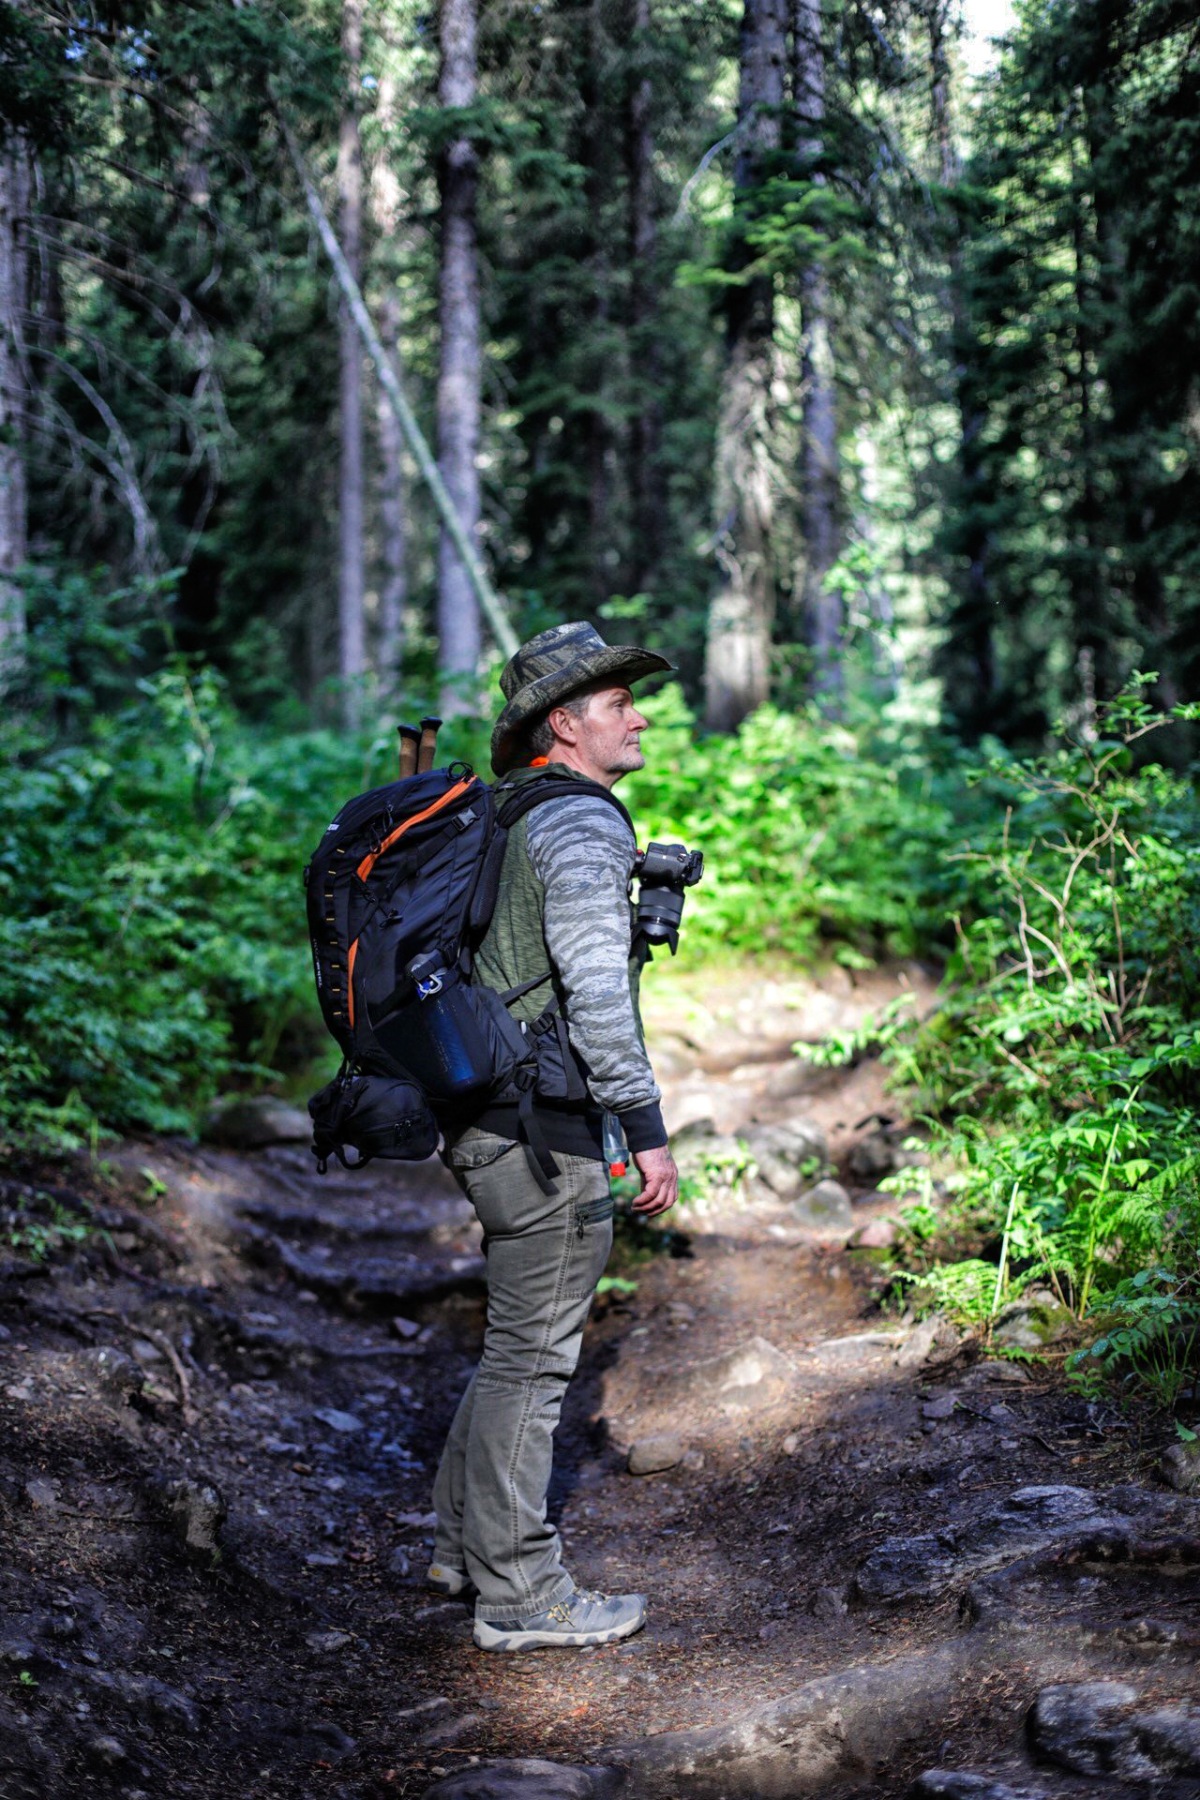
For gear I carried my trekking poles and wore my 45-liter Teton Sports backpack with food, extra clothing and emergency gear as well as a tripod for my camera. The camera I carry clipped to my shoulder strap.

On this hike I chose not to include my water bladder but took two 24oz bottles of a water/electrolyte mix and a 24oz Life Straw bottle prefilled with purified water. I also brought a Sawyer mini-filtration system. I didn’t want the added weight of my 3.5-liter water bladder and knew there were plenty of water sources along the way.

AlaskaBasinTrailHike3
Photo by: Marc Bowen

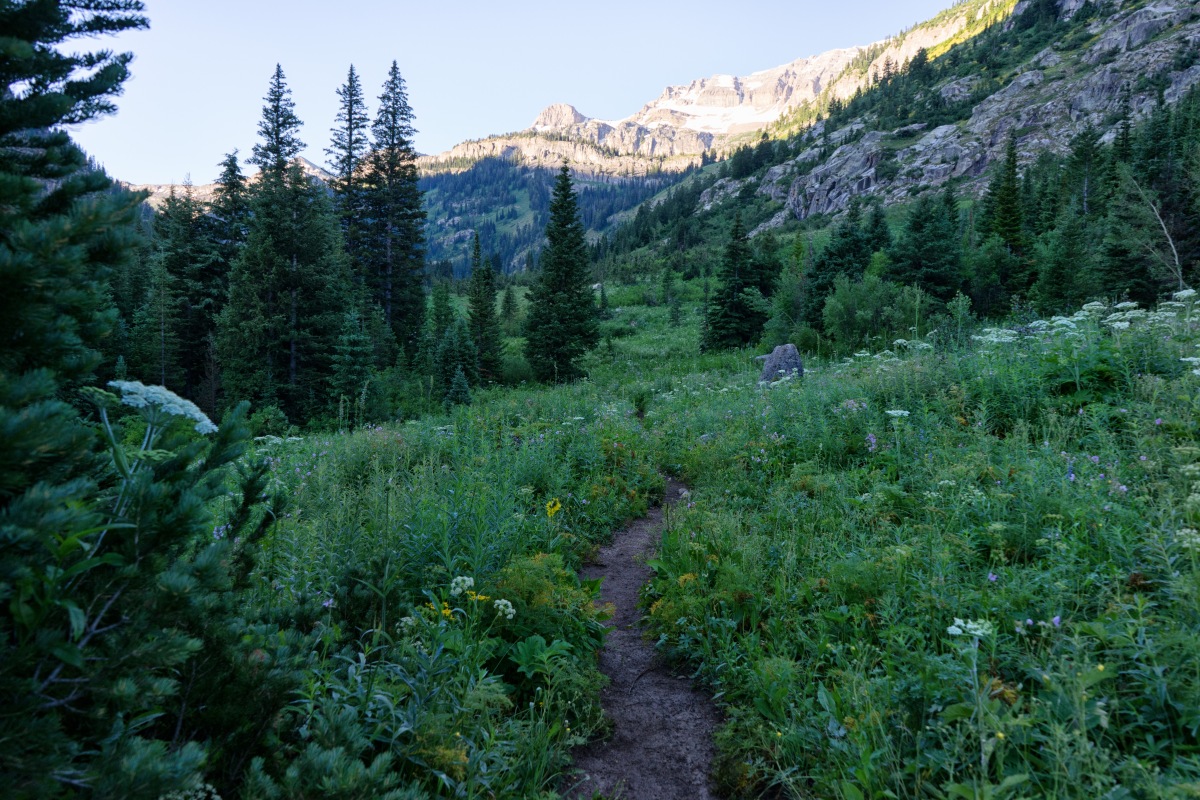
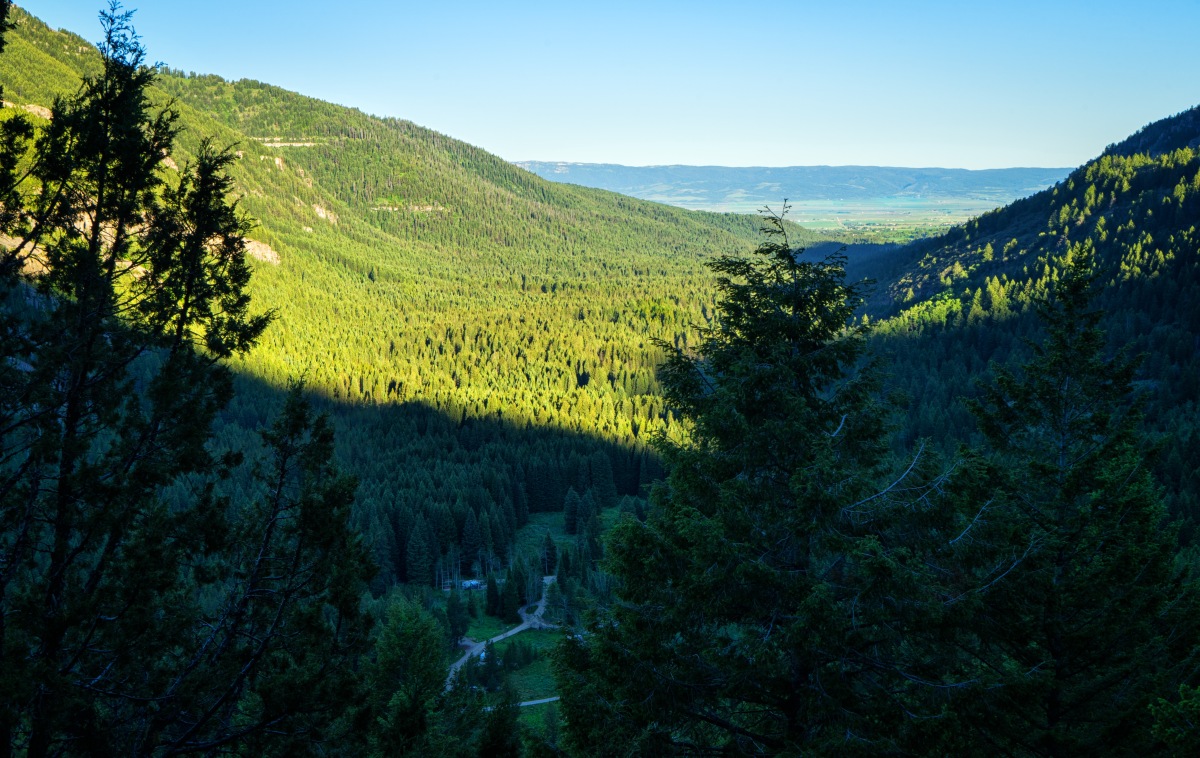
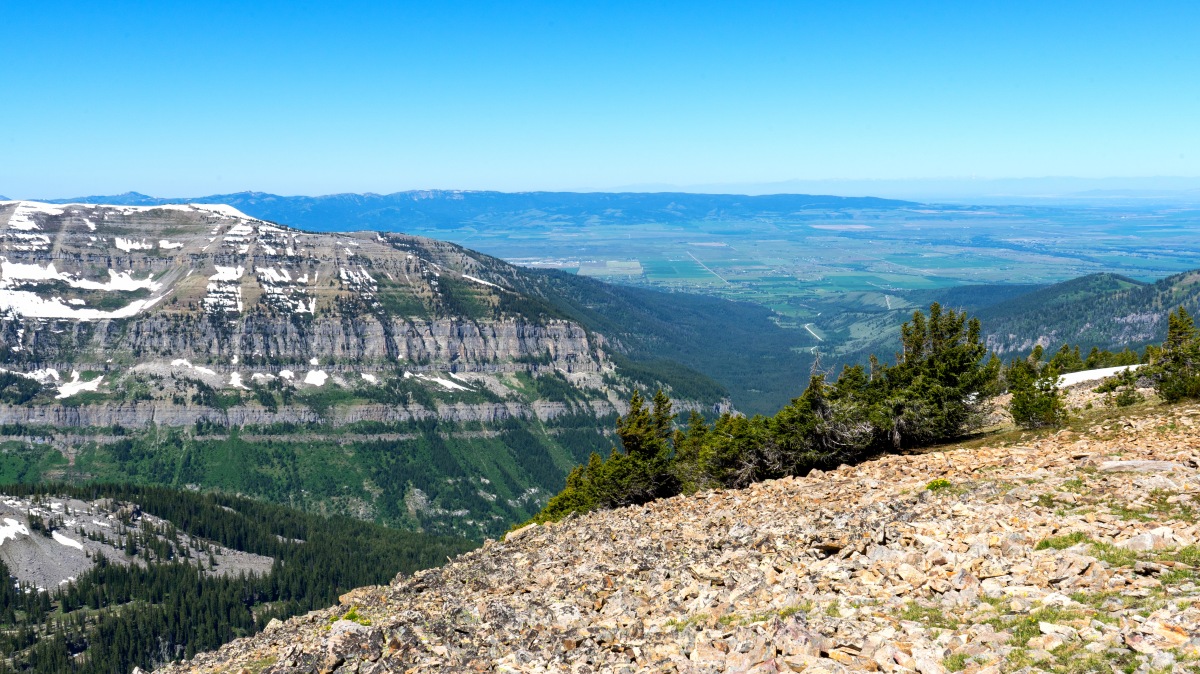
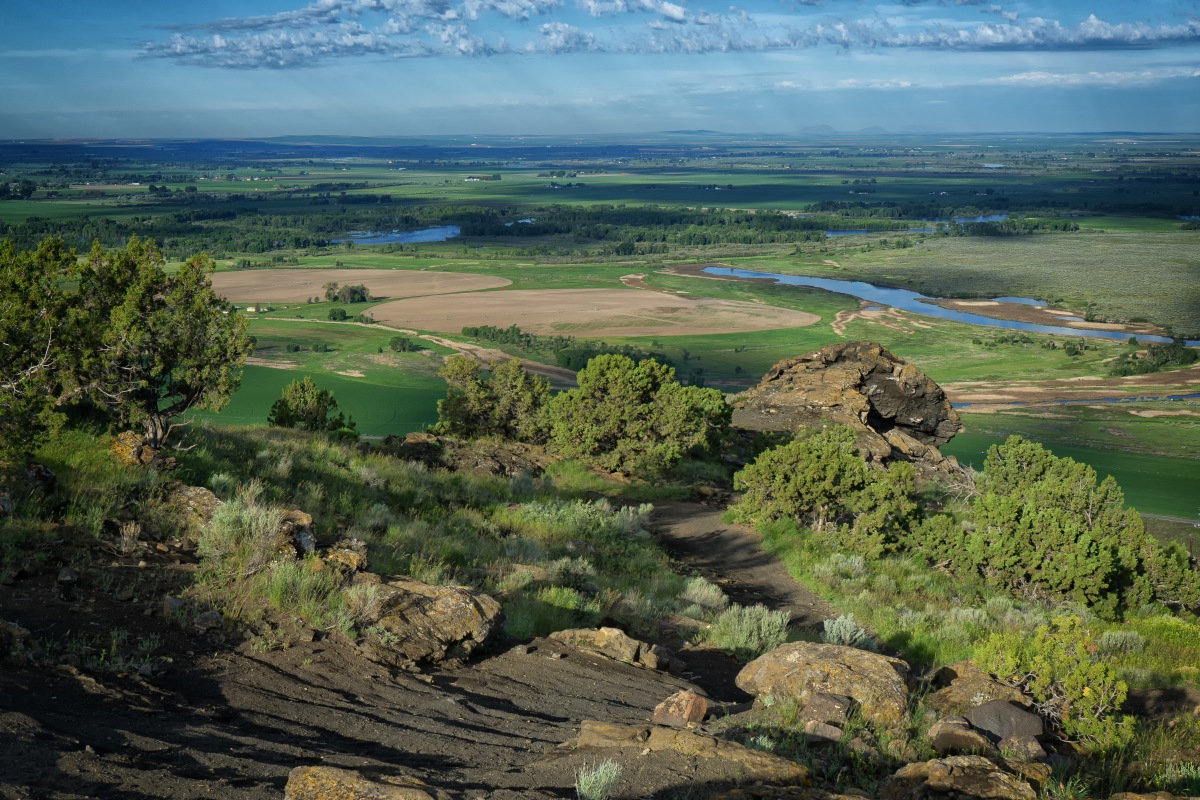
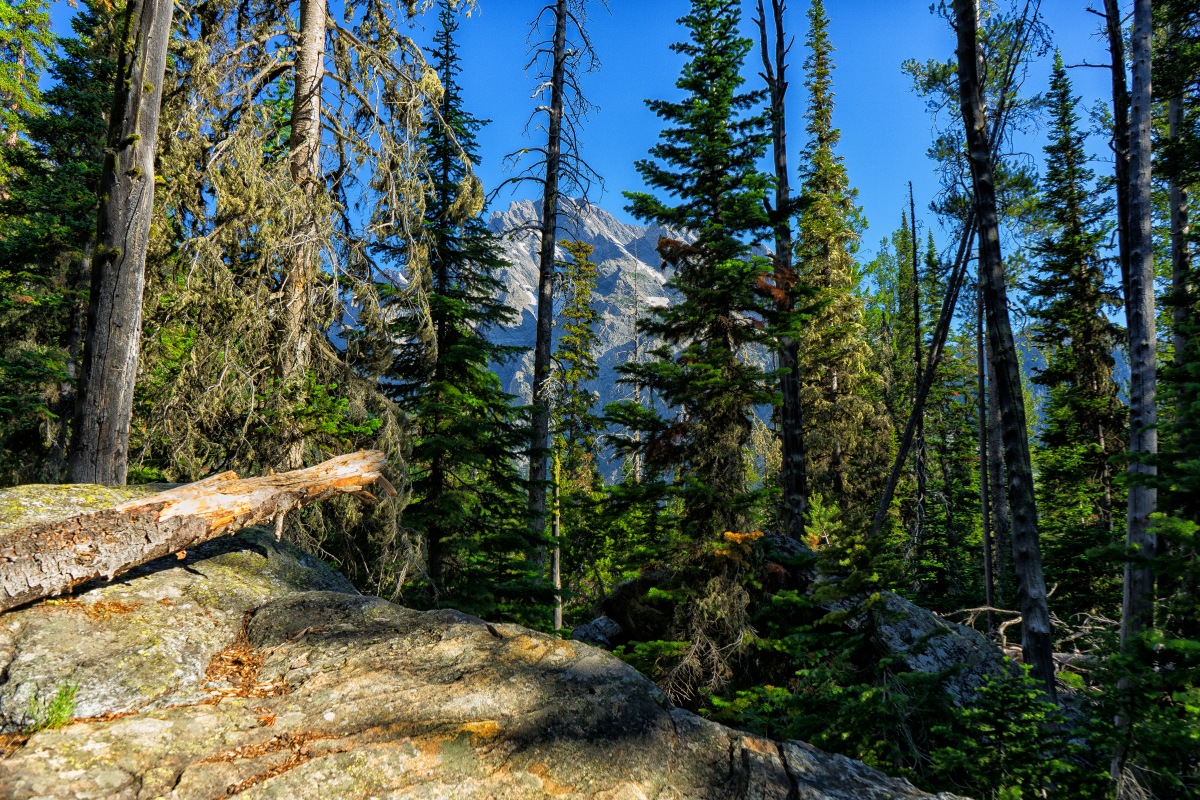
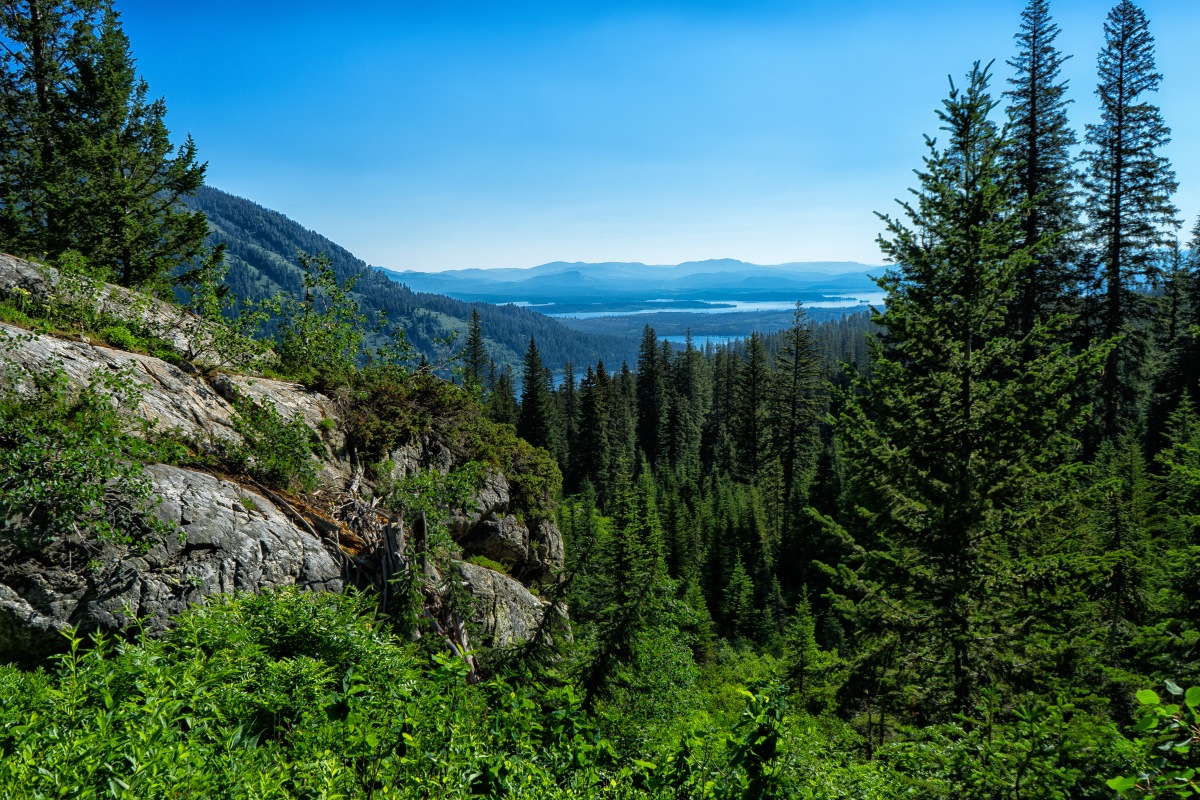
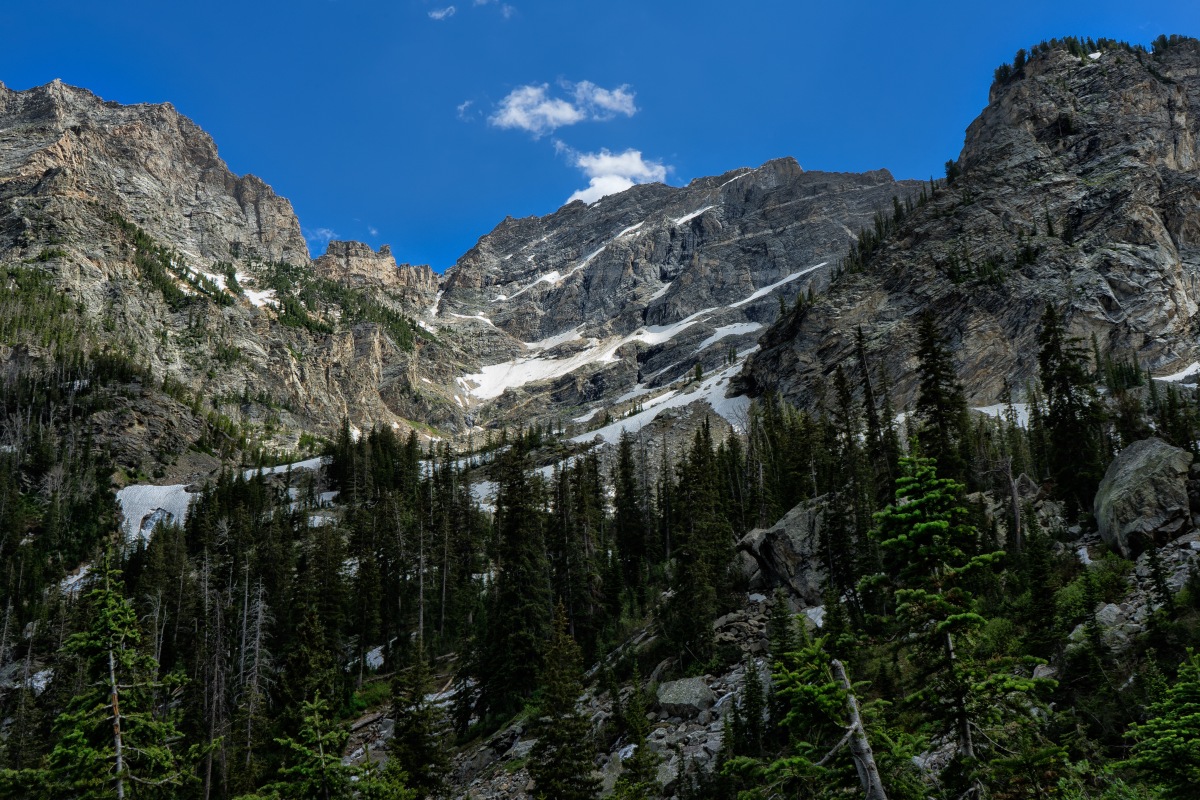
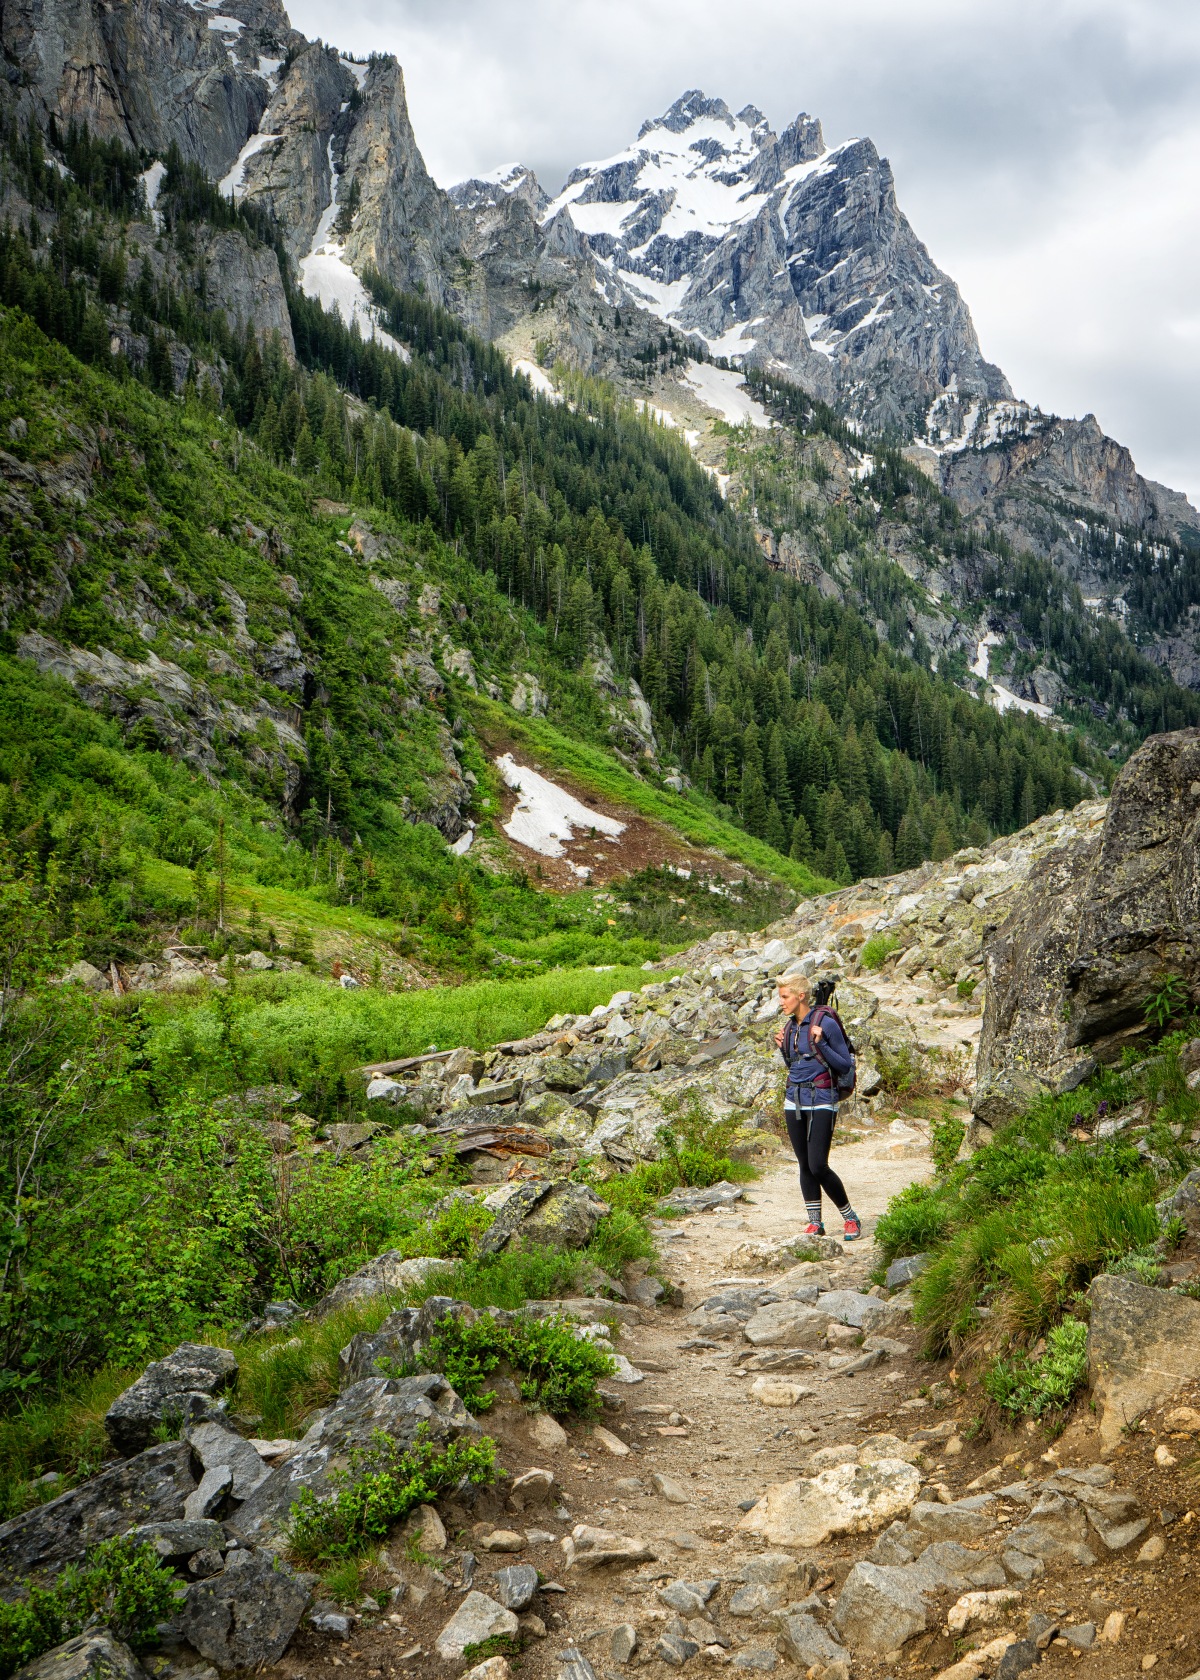
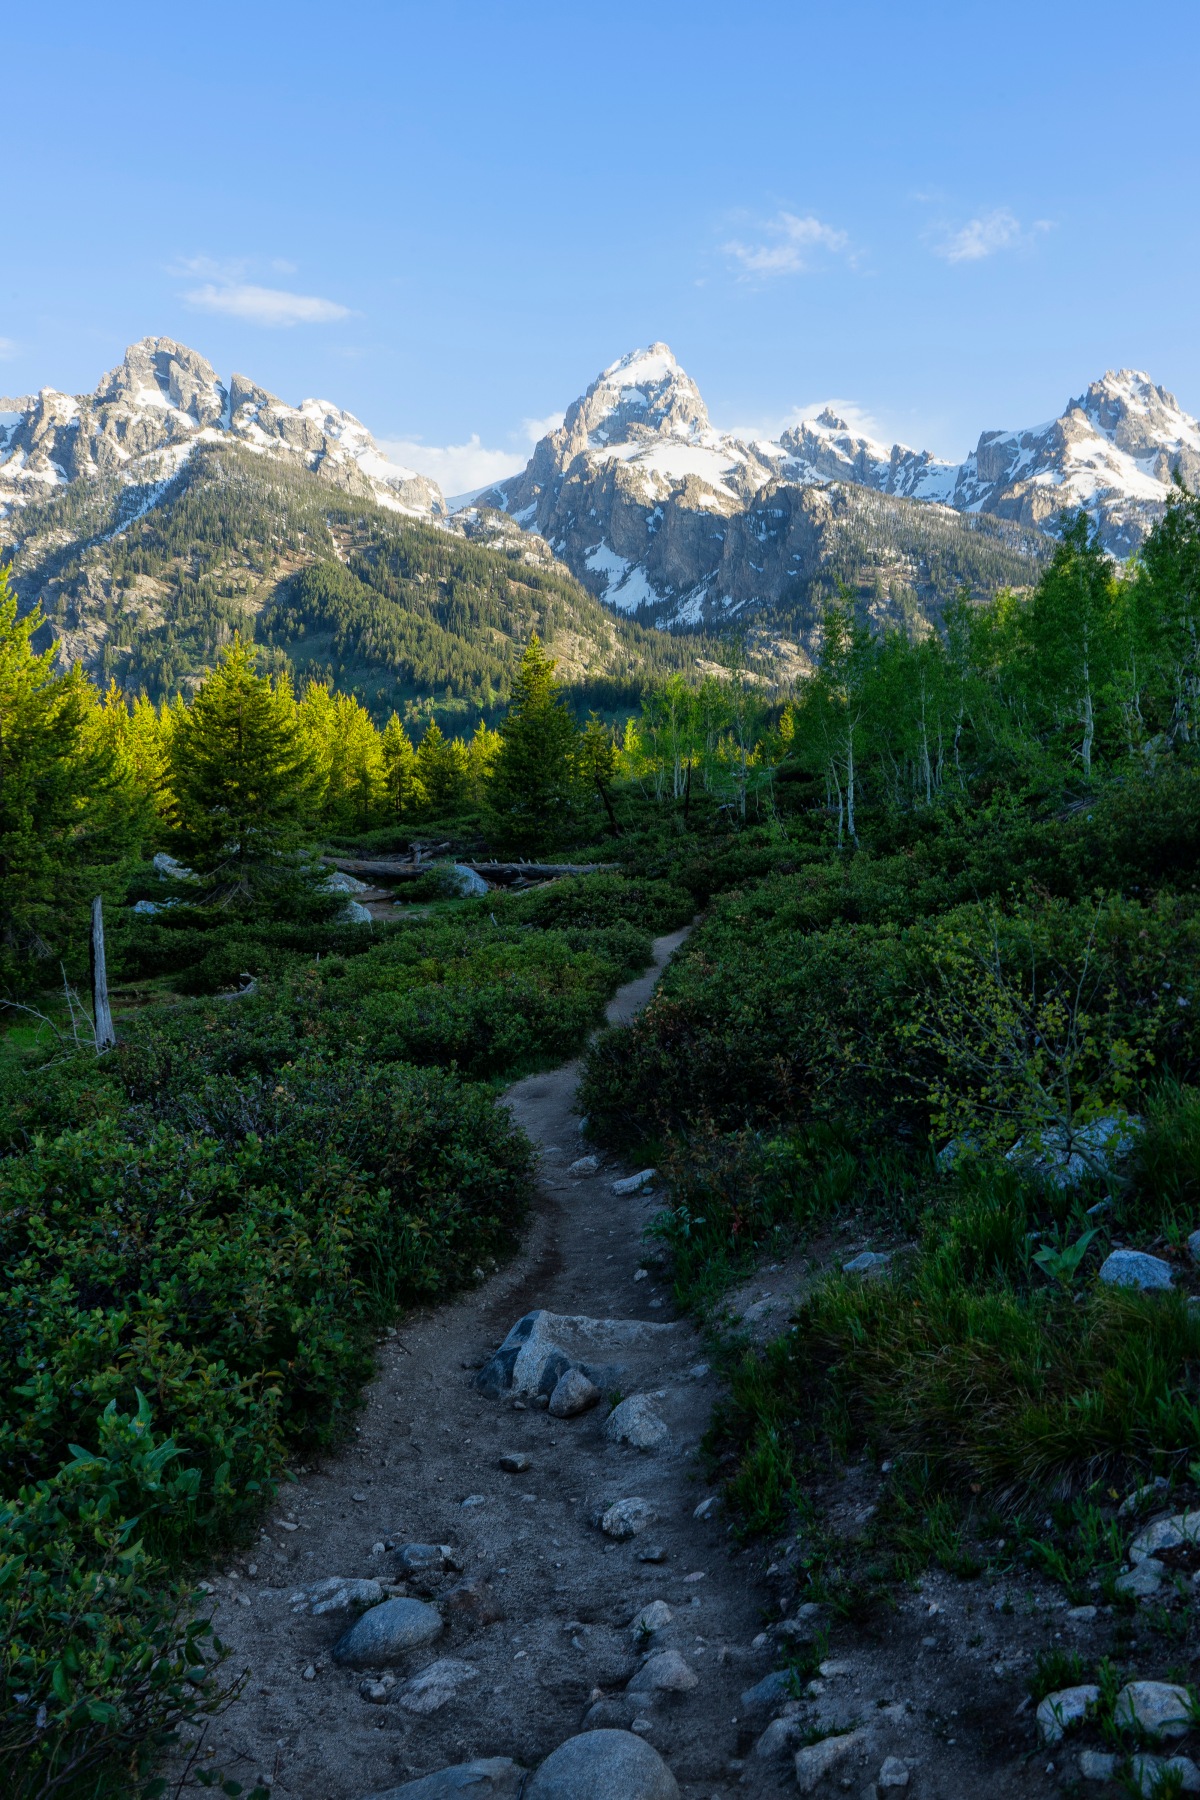
After about a mile and a half the canyon started to open up and I could see the Teton Shelf, a point of rock called The Wedge, Mt. Meek and Mt. Jedediah Smith.

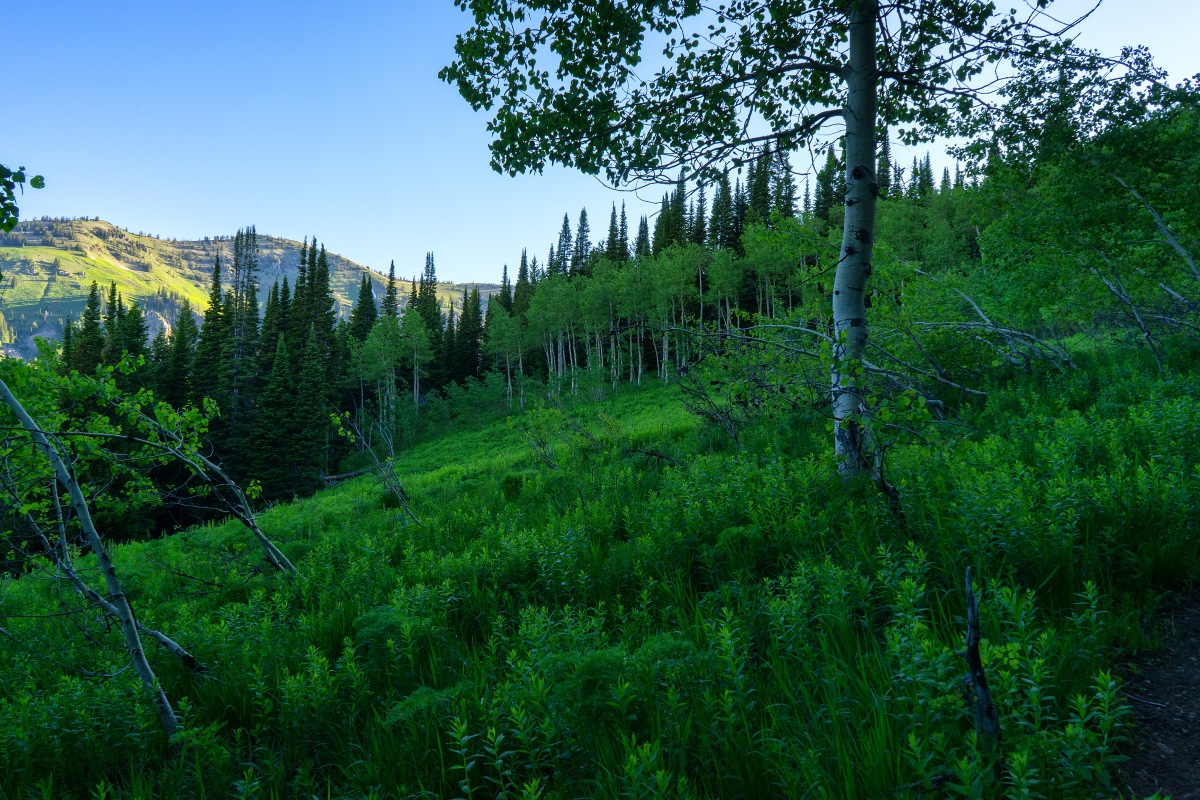
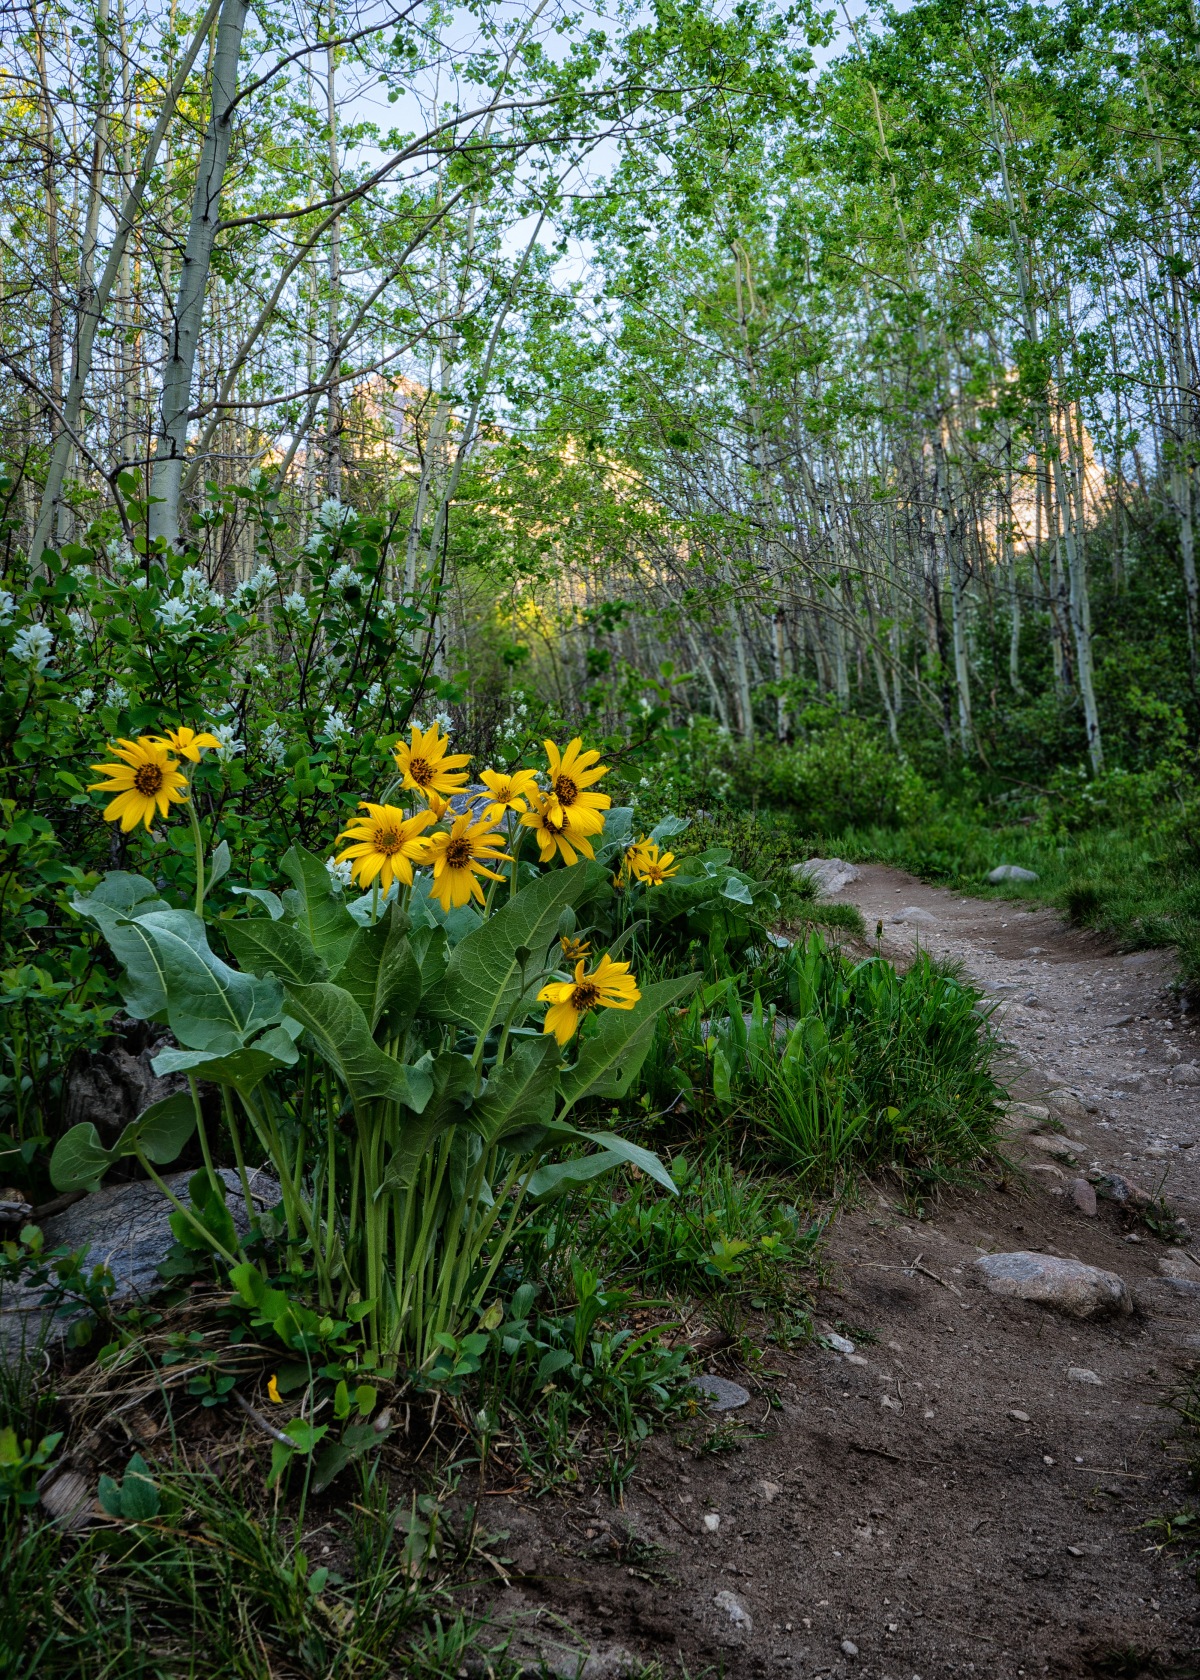
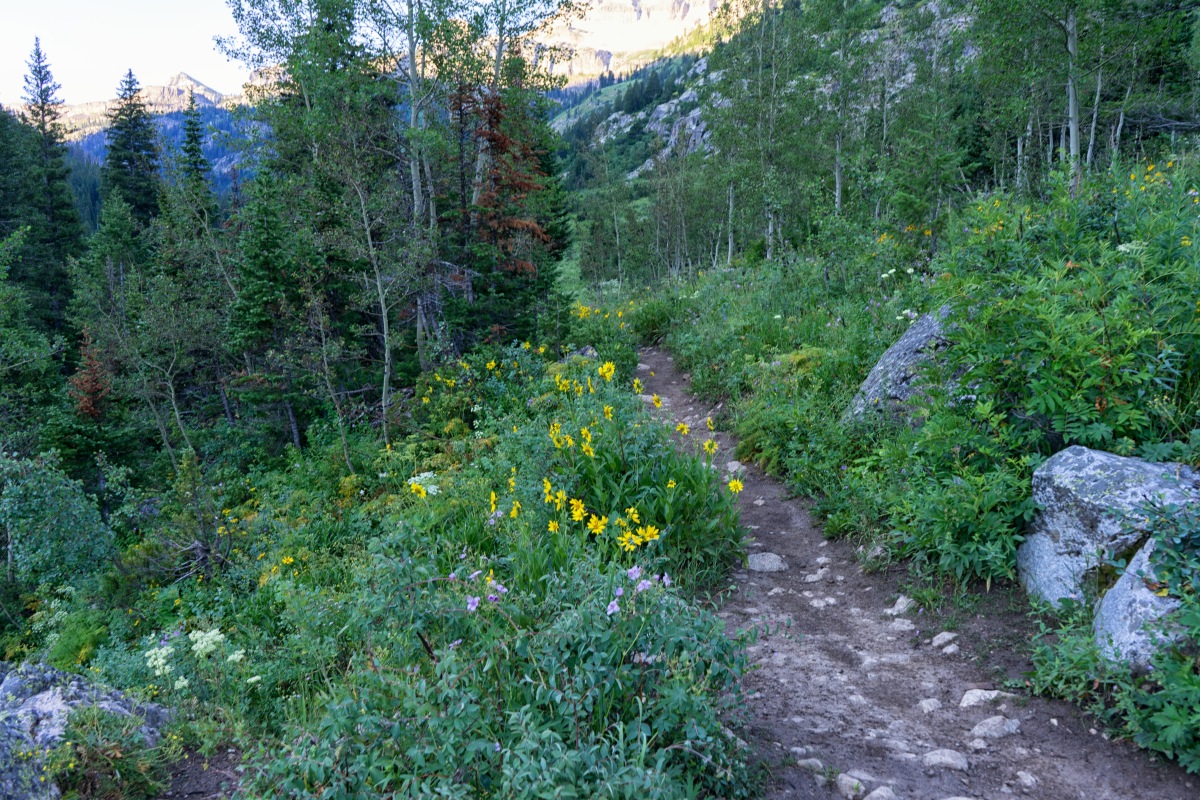
When I came up this trail three weeks ago everything was green with many plants growing and some flowers just starting to bloom. Plants then were 6-12 inches high.

AlaskaBasinTrailHike4
Photo by: Marc Bowen – Wildflowers 3-5 feet tall!

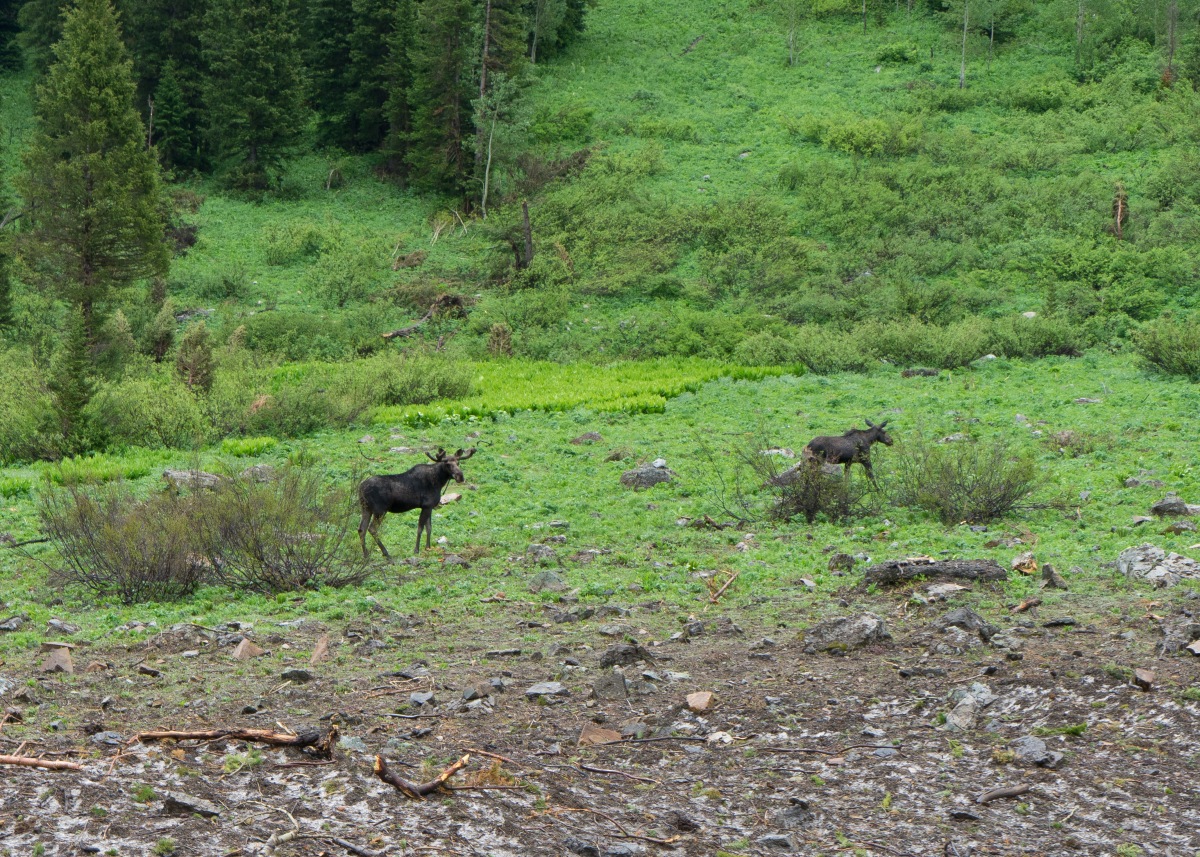
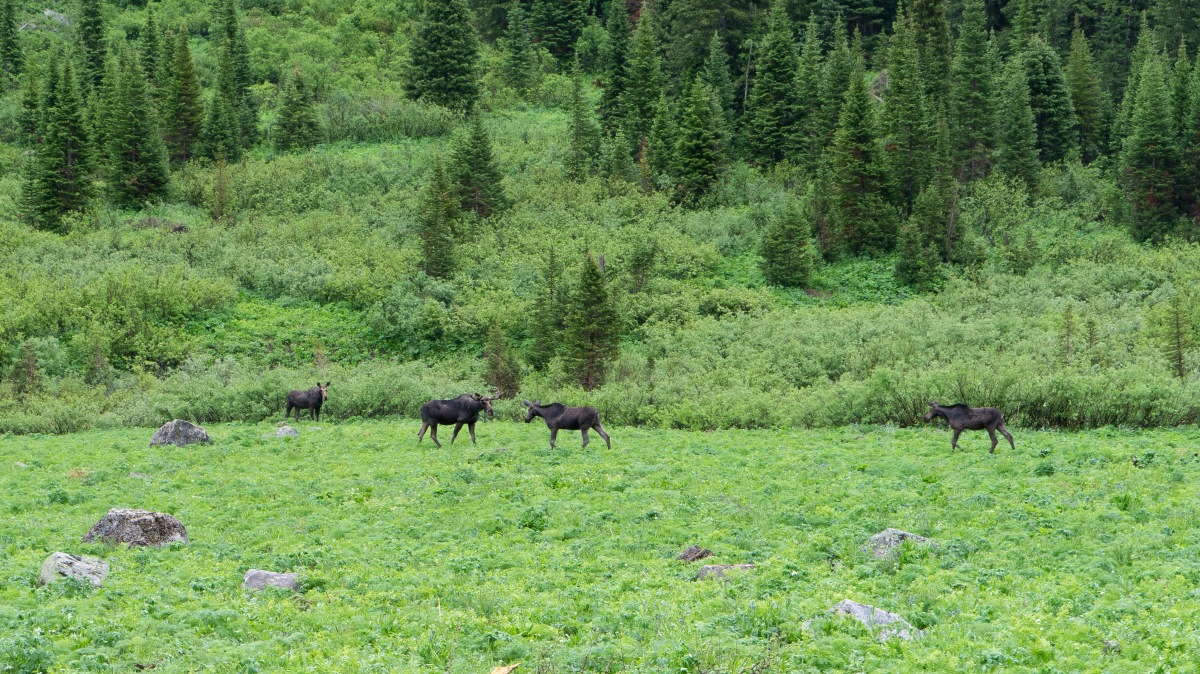
In three weeks time those plants were now 3-5 FEET high, blooming and the trail was practically overgrown with the plants. It would be difficult to get off trail and walk through them although I’m sure it wouldn’t slow down a moose or a bear hidden amongst the flowers.

AlaskaBasinTrailHike5
Photo by: Marc Bowen

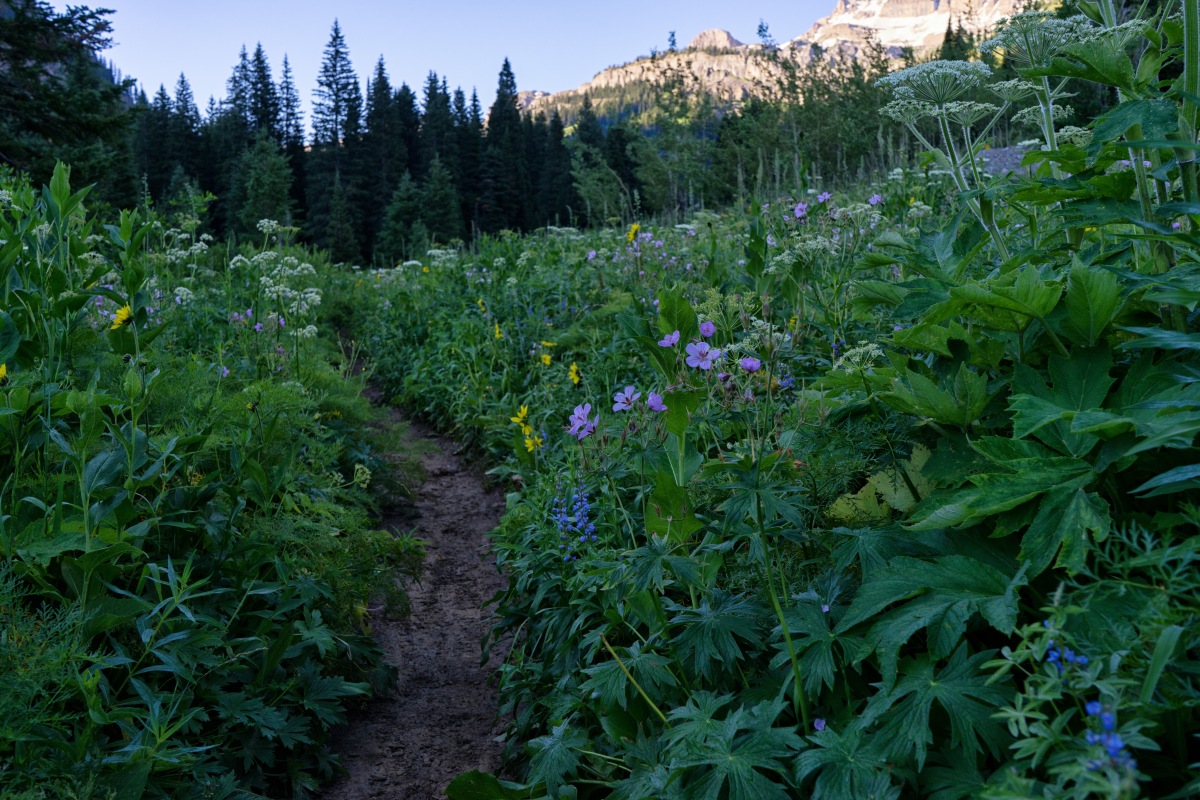
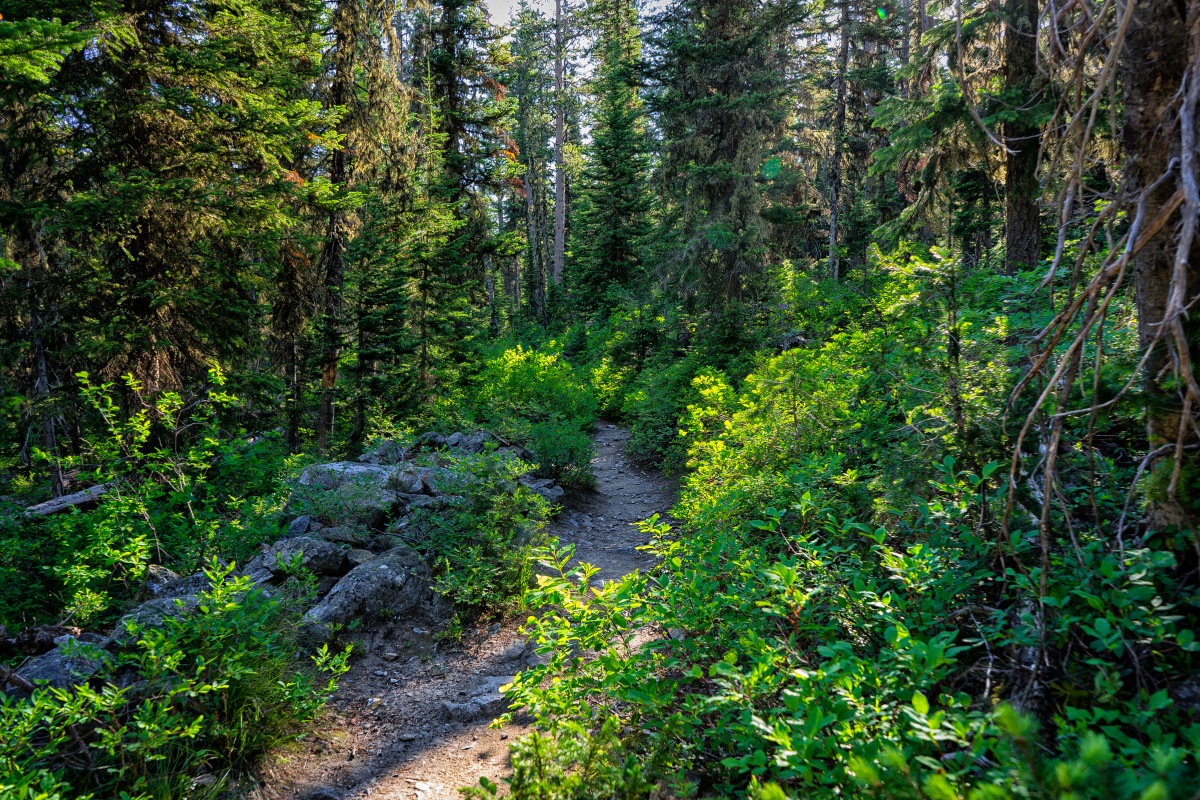
The first three miles of this hike is a mild grade and an absolutely beautiful stroll up the canyon. I was able to keep a pretty good pace when I wasn’t stopping to take pictures.

I’m liking my new GPS app (GAIA). I can use it offline. It has been great, providing me with info on my speed (when recording)(approx 2-5 mph) and audibly notifying me of my distance traveled every mile (it took me awhile to figure out what the tiny voice was coming from my pocket). Also it gives me my current altitude, altitude gain and loss and average pace. I can set waypoints and label them with different icons and titles.

Anyway it was great to have until the app quit working about 13-14 miles into the hike. My phone was going to die so I plugged into my portable charger and put the phone back in my pocket. I checked the app a little later and couldn’t find it. It was no longer on my phone. Got bumped and the app deleted while in my pocket maybe? Once deleted there is no way to get it back without service. Bummer because if caught out on the trail after dark the app would help me immensely.

TrailFork
Photo by: Marc Bowen – Trailhead  for Teton-Shelf Trail and Devils Stairs

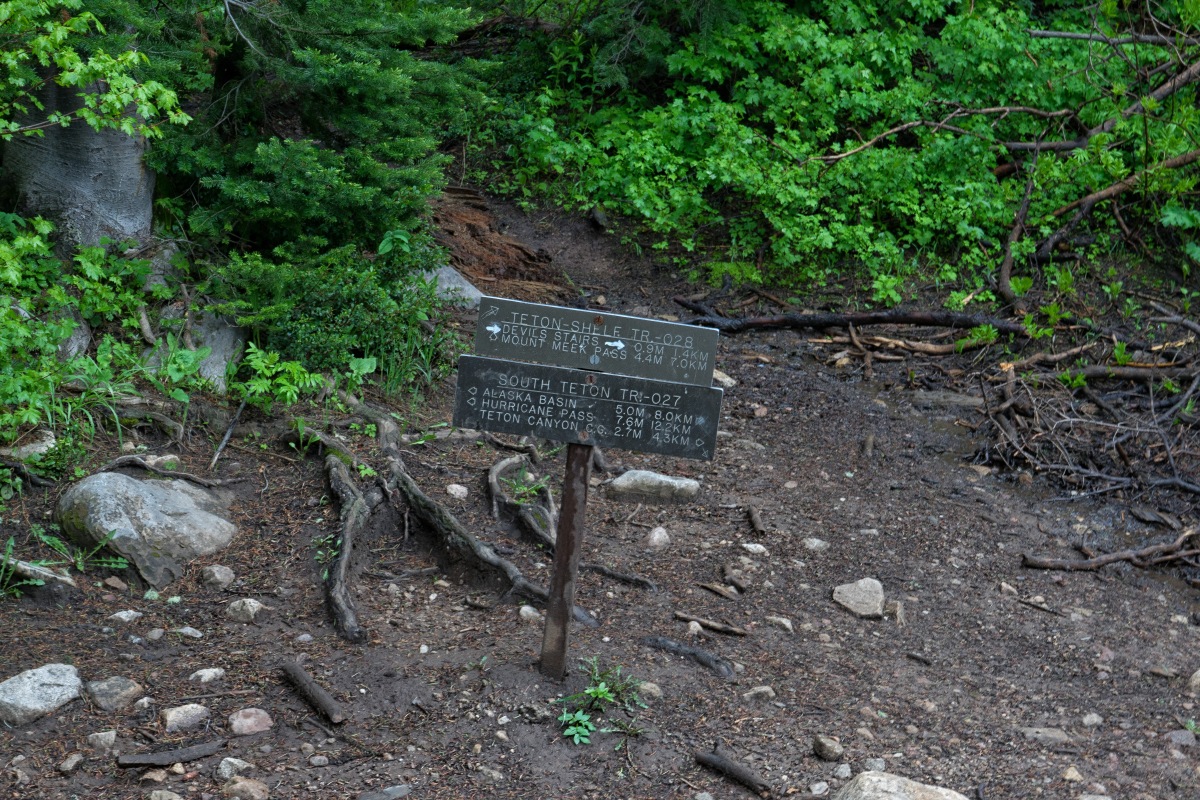
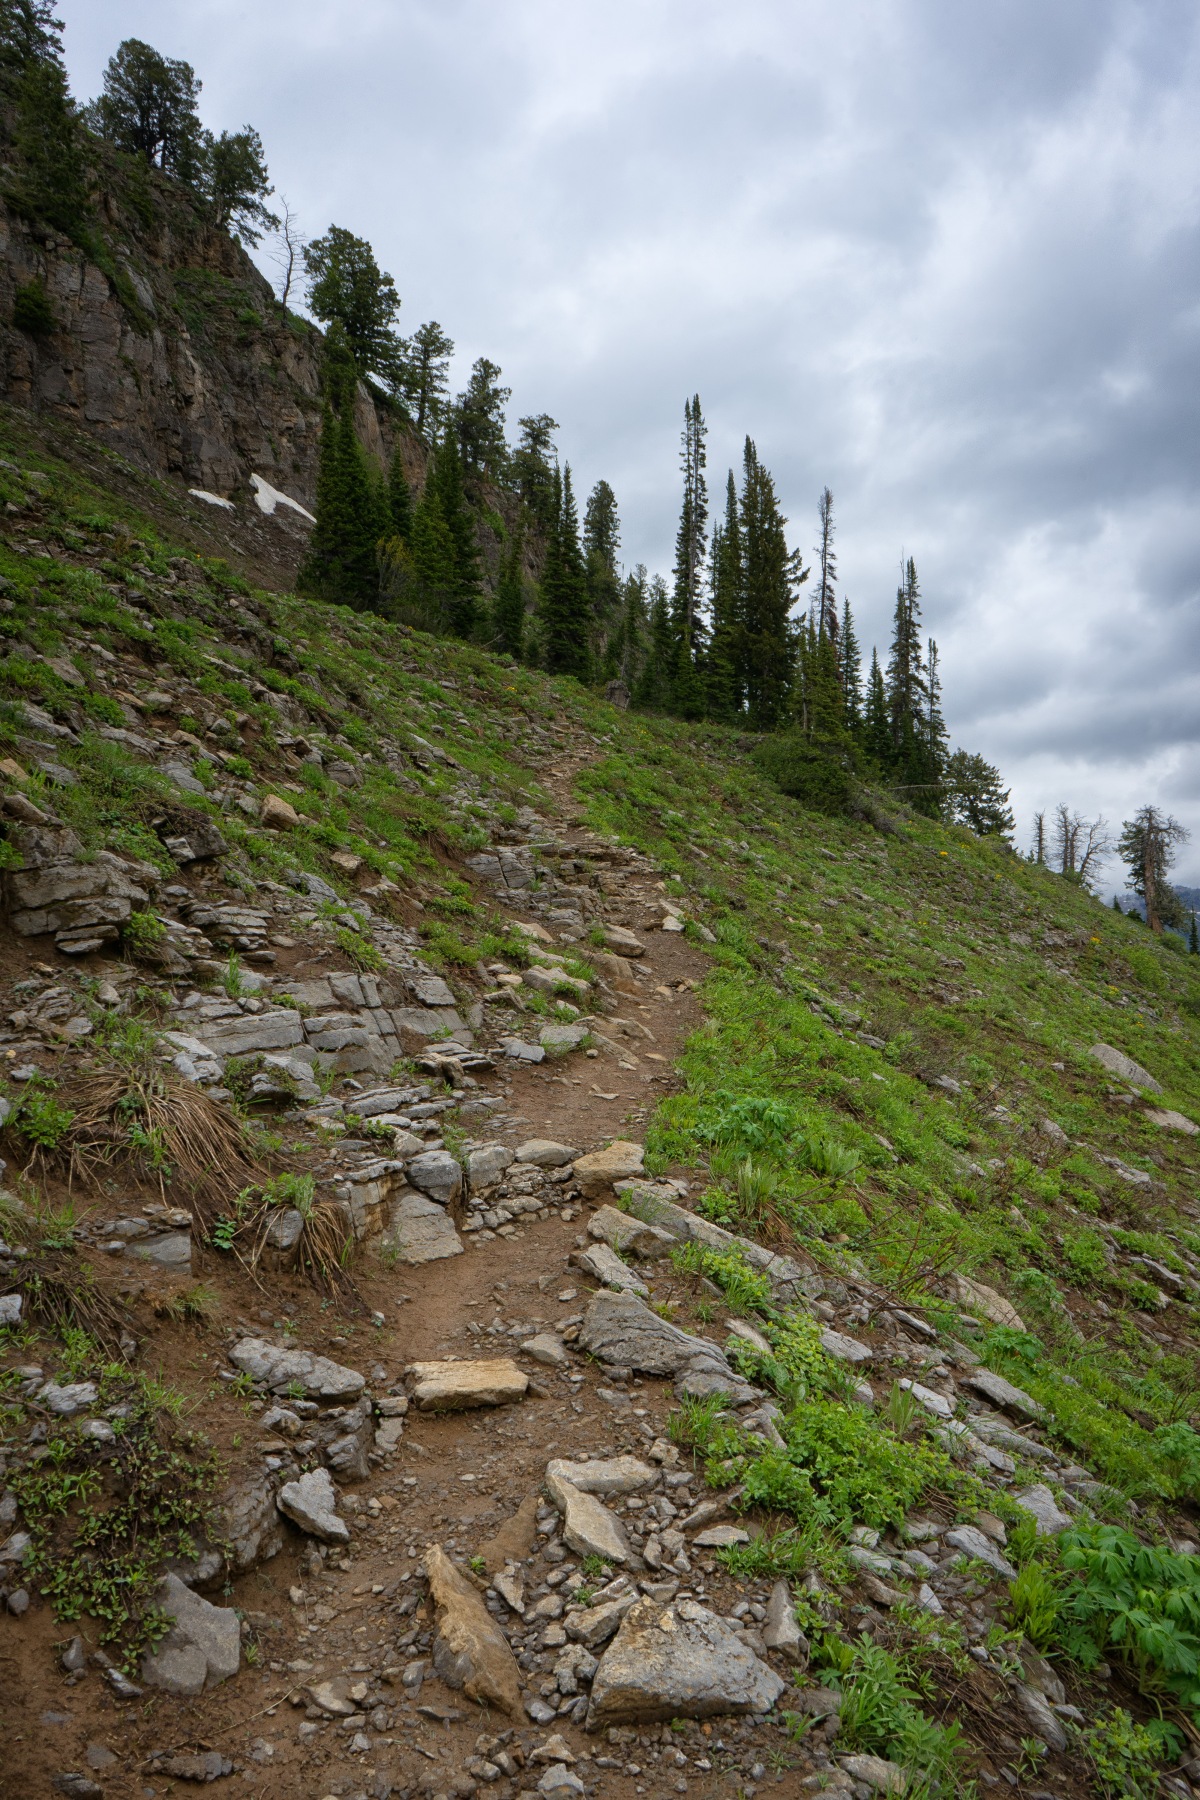
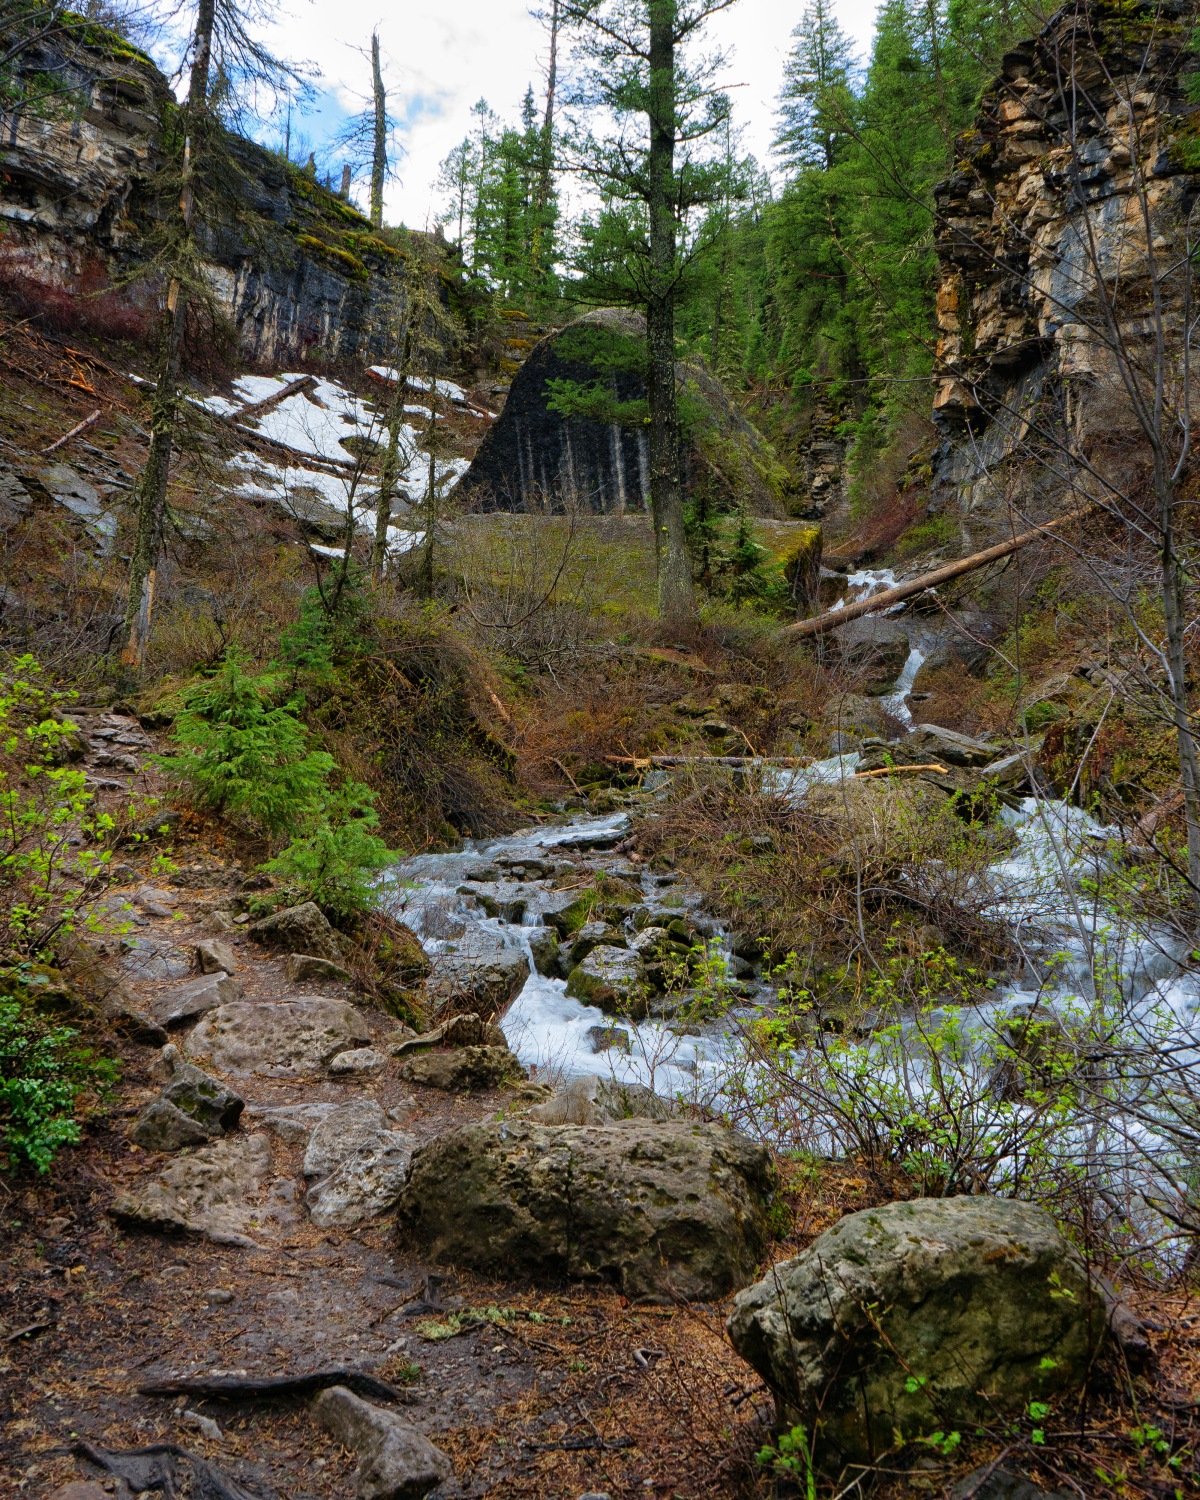
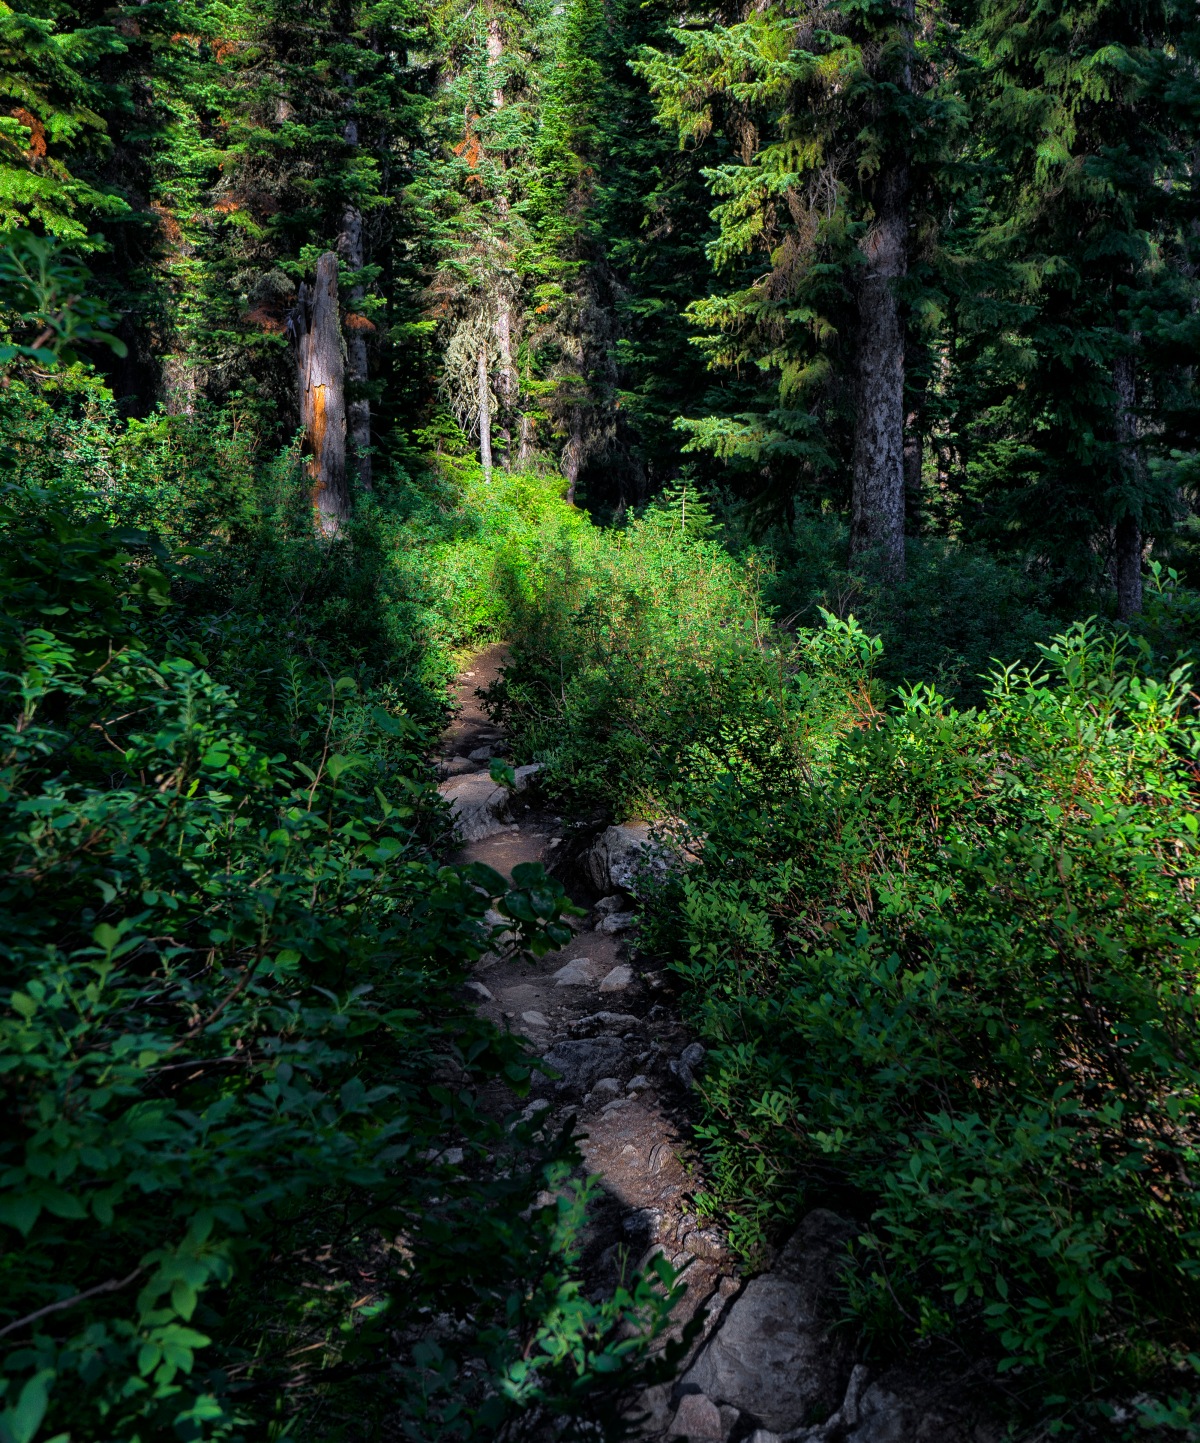
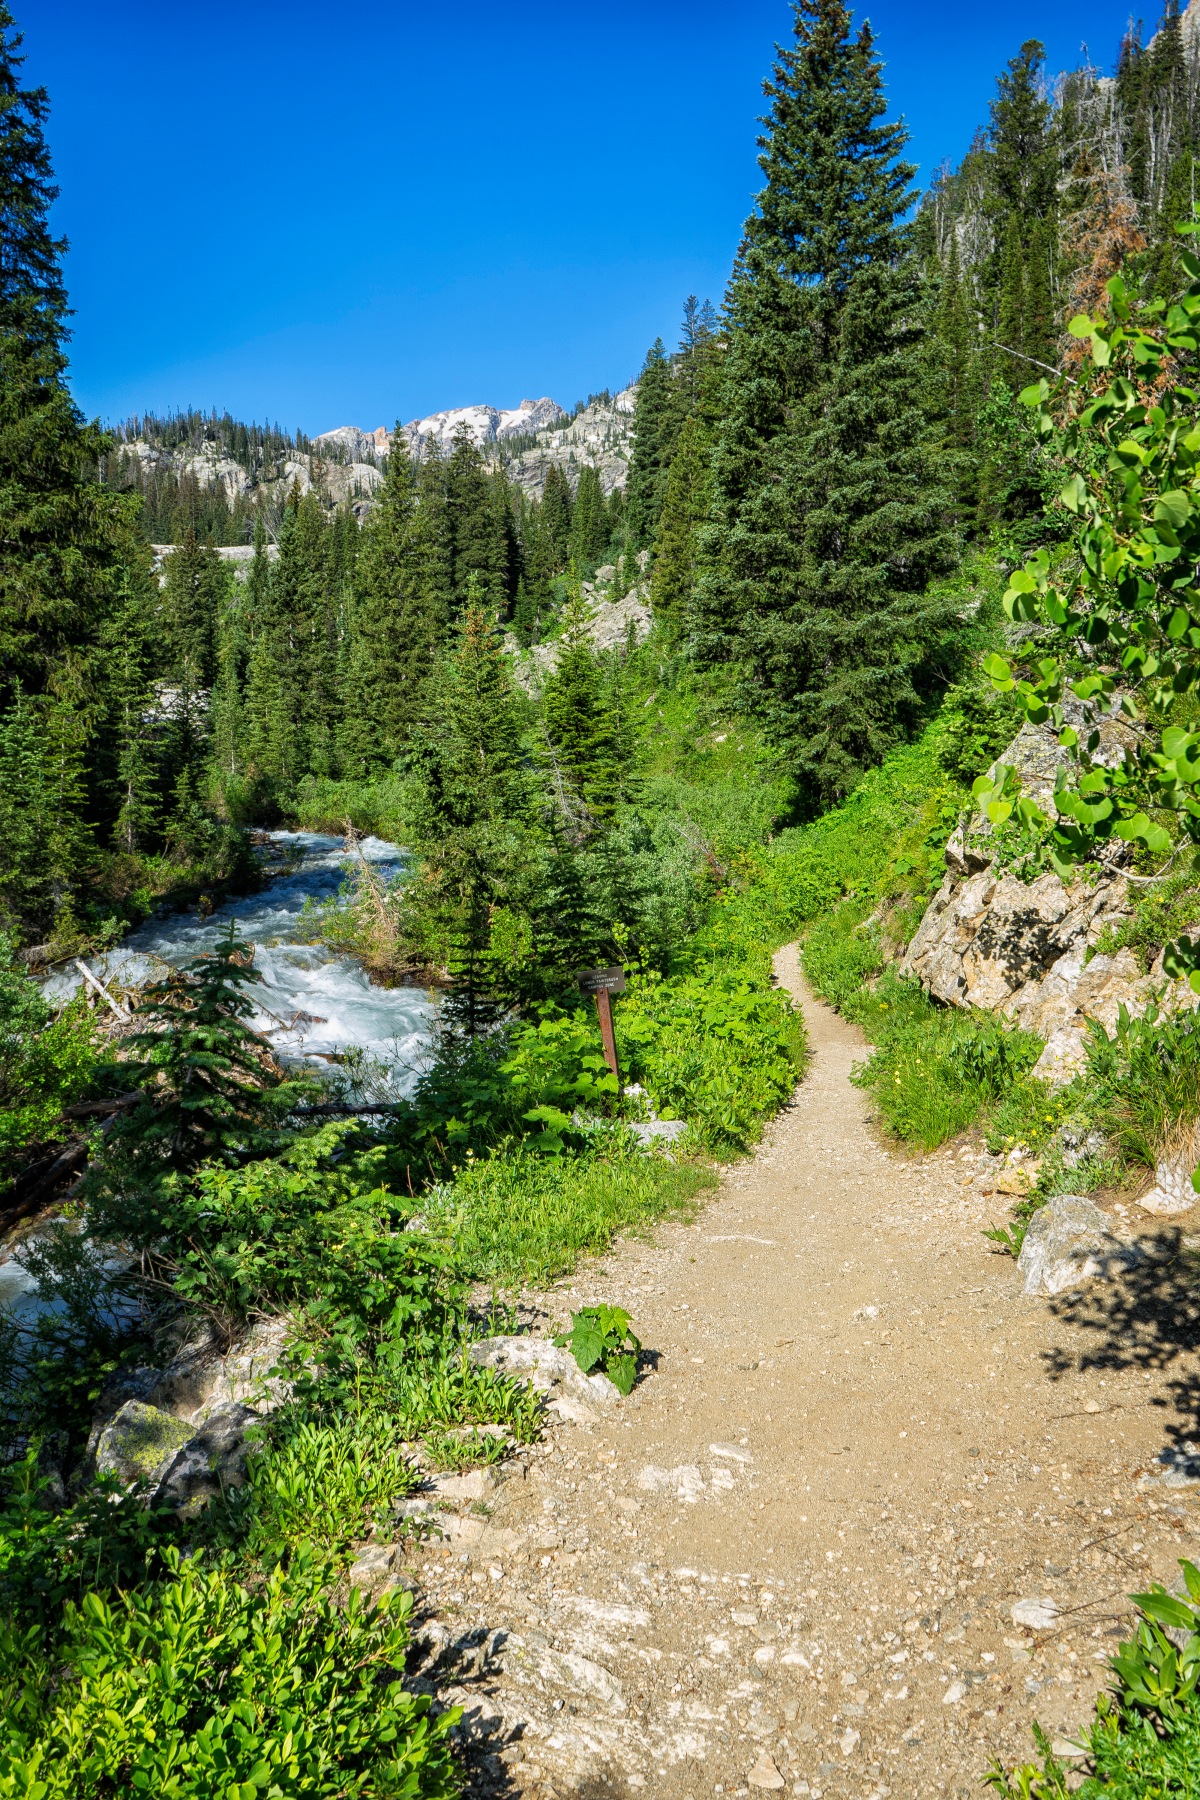
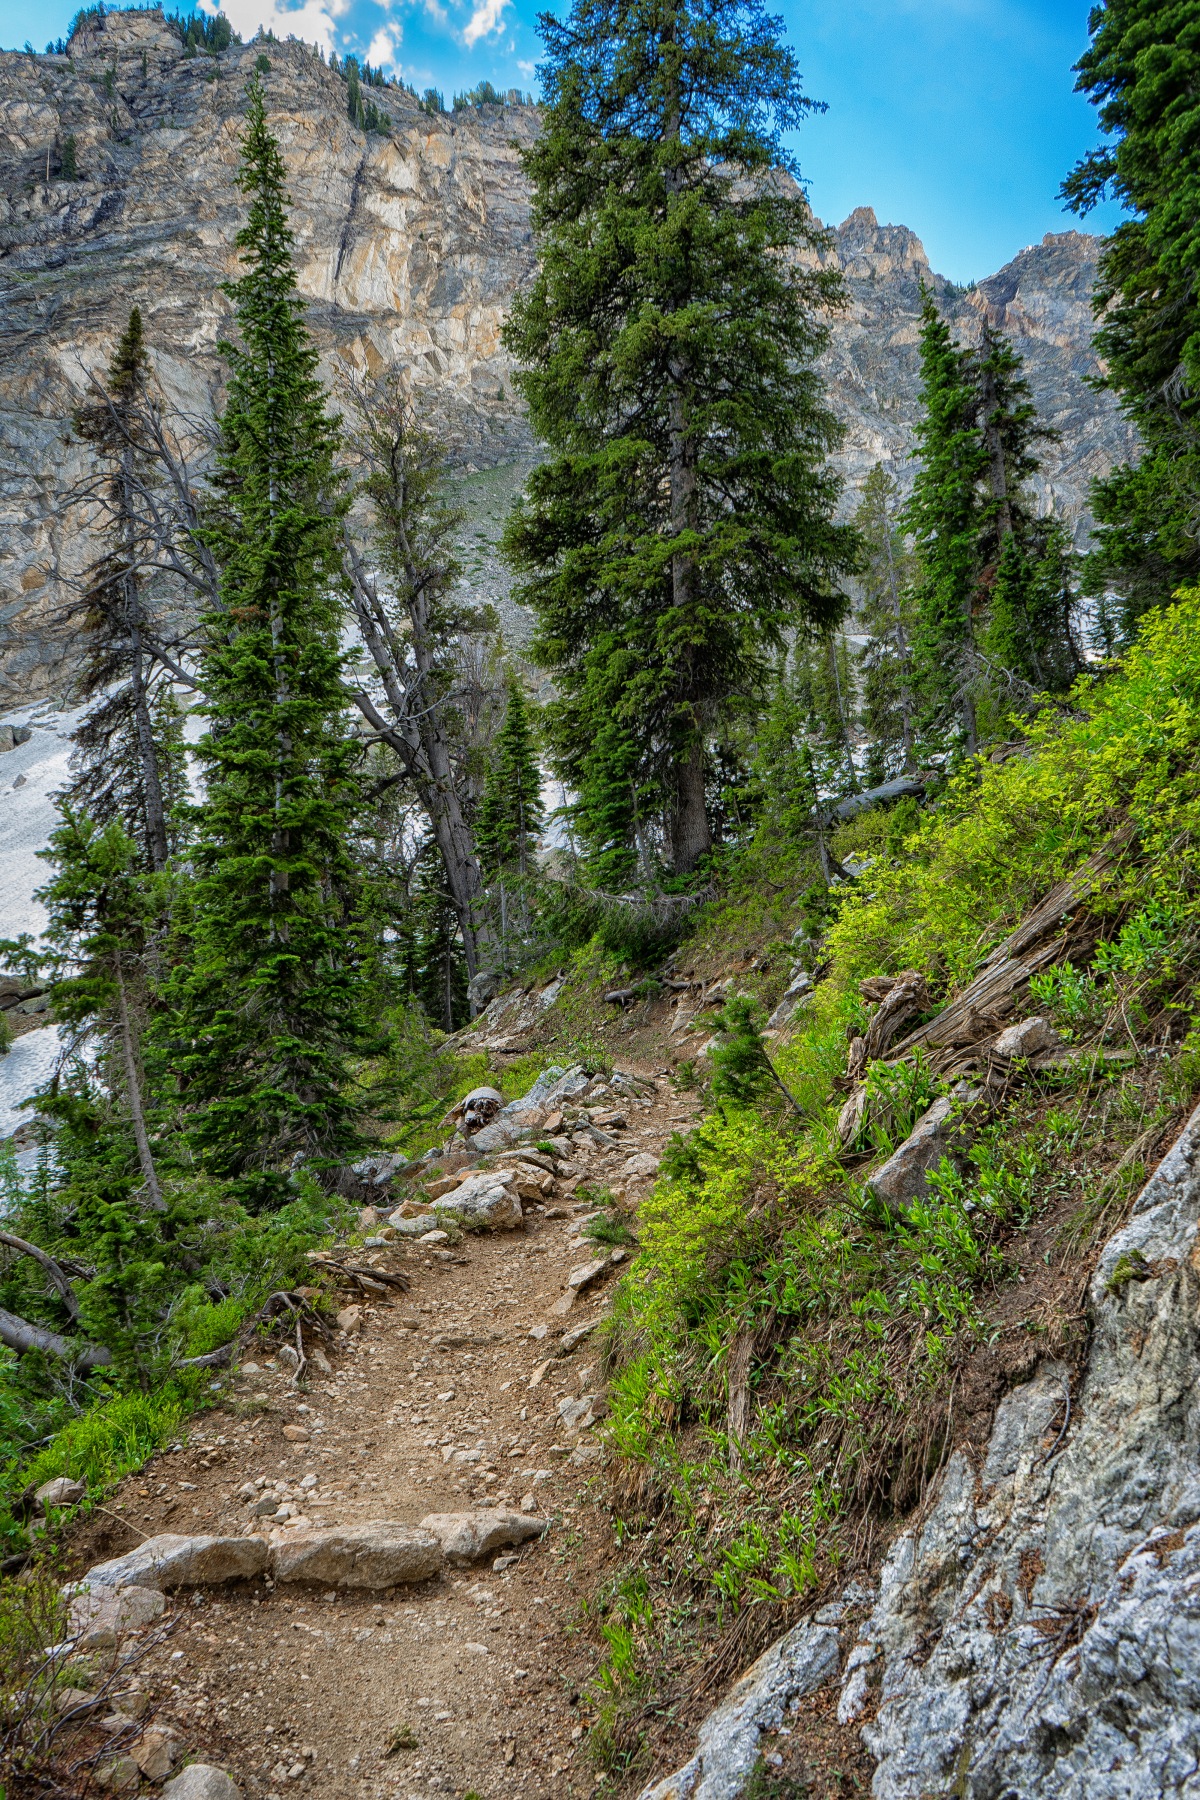
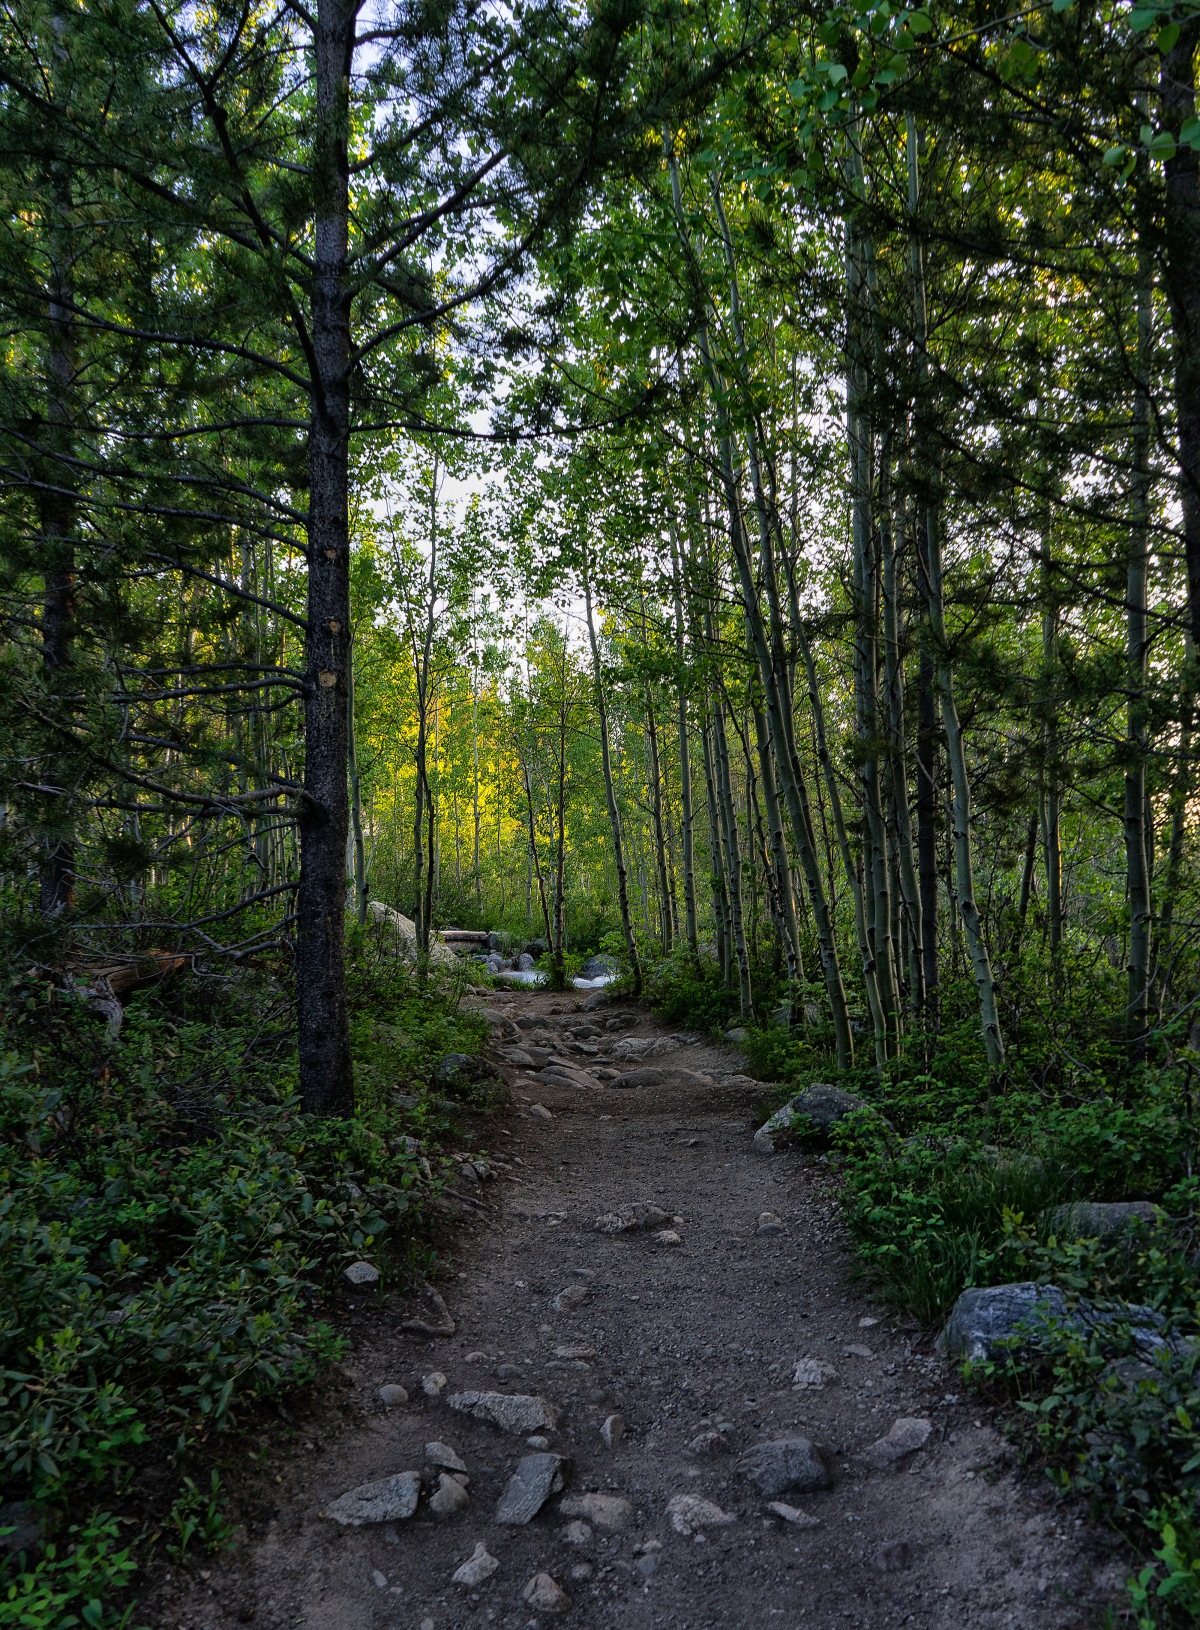
I saw lots of people on the trail during the first three miles. Some I saw turn onto the Devils Stairs /Teton-Shelf Trail at the first fork (above photo). I stayed on the main trail which follows Teton Creek most of the way up the canyon. The trail got a little steeper from here as it headed up through thick brush and dense forest.

TetonCreek
Photo by: Marc Bowen

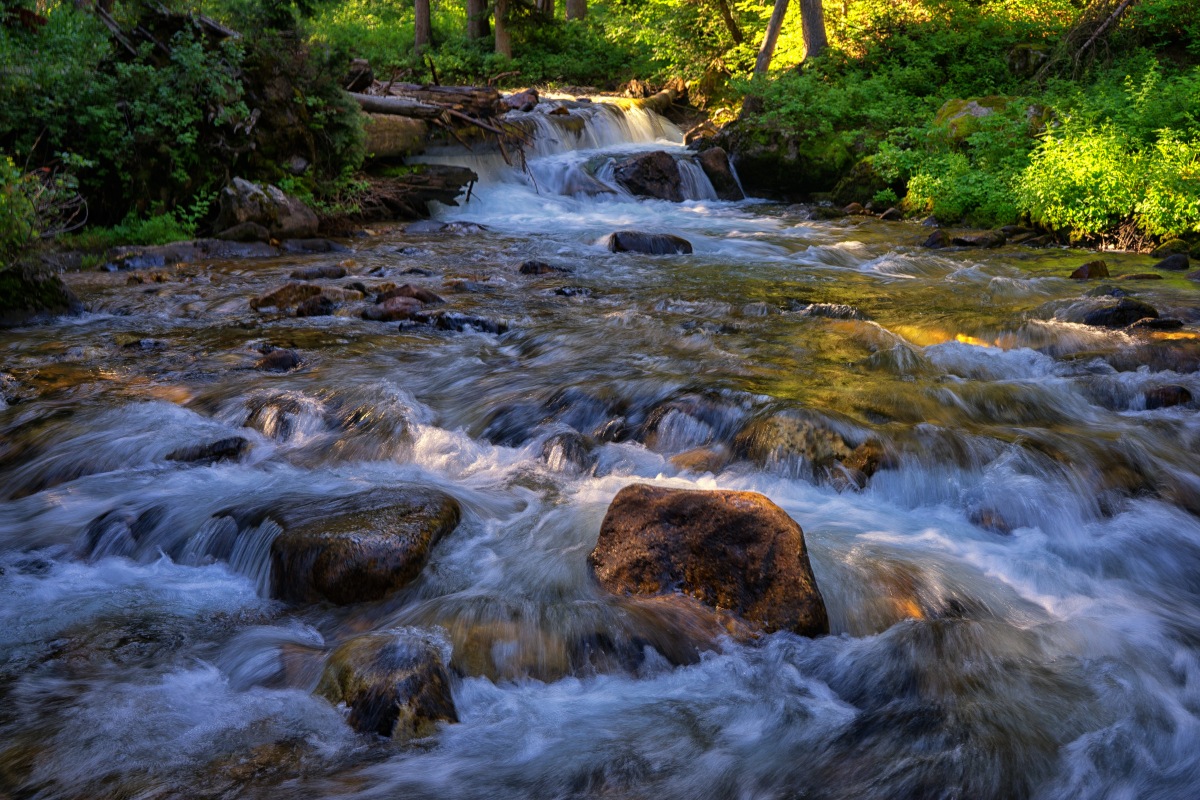
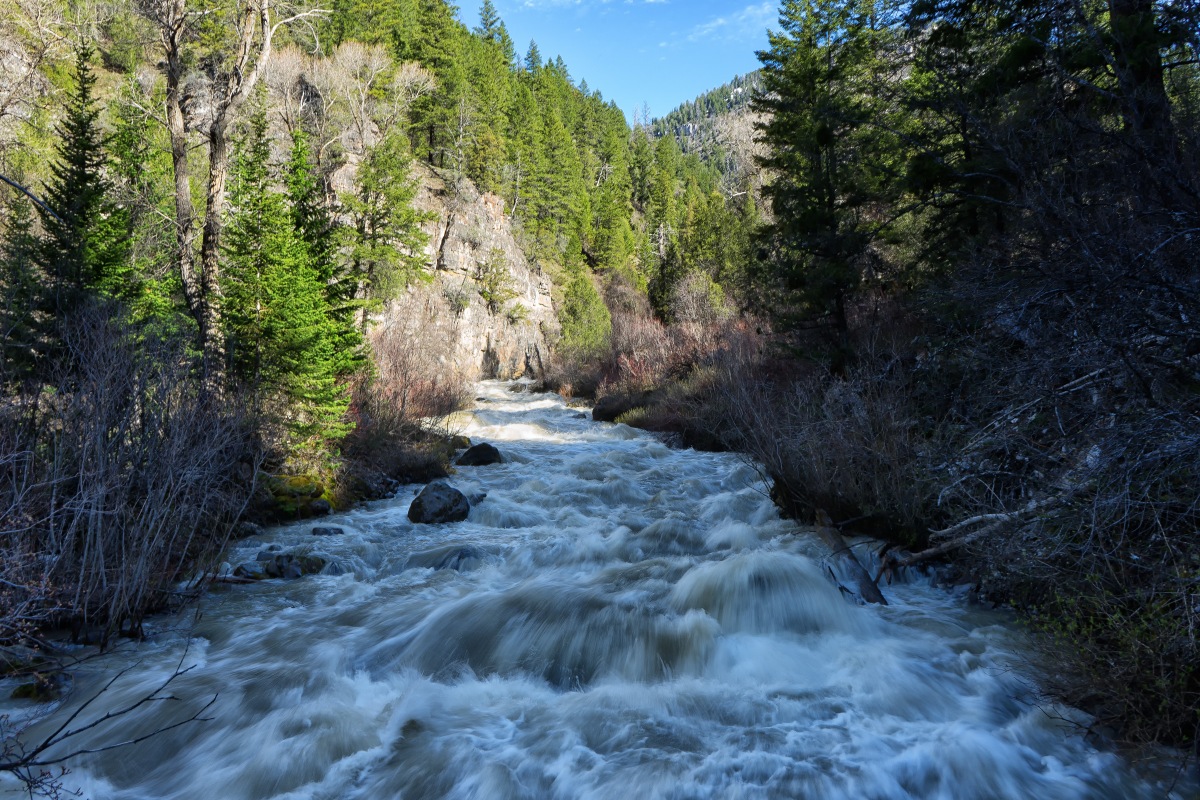
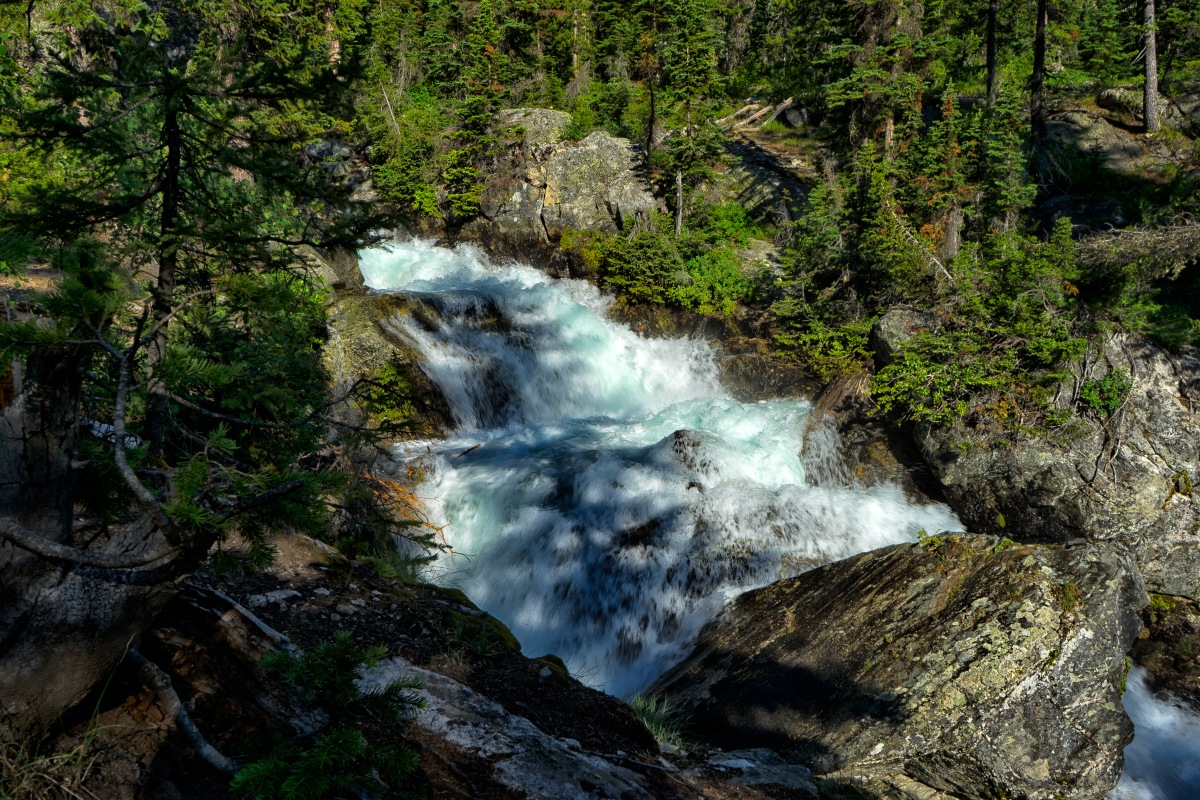
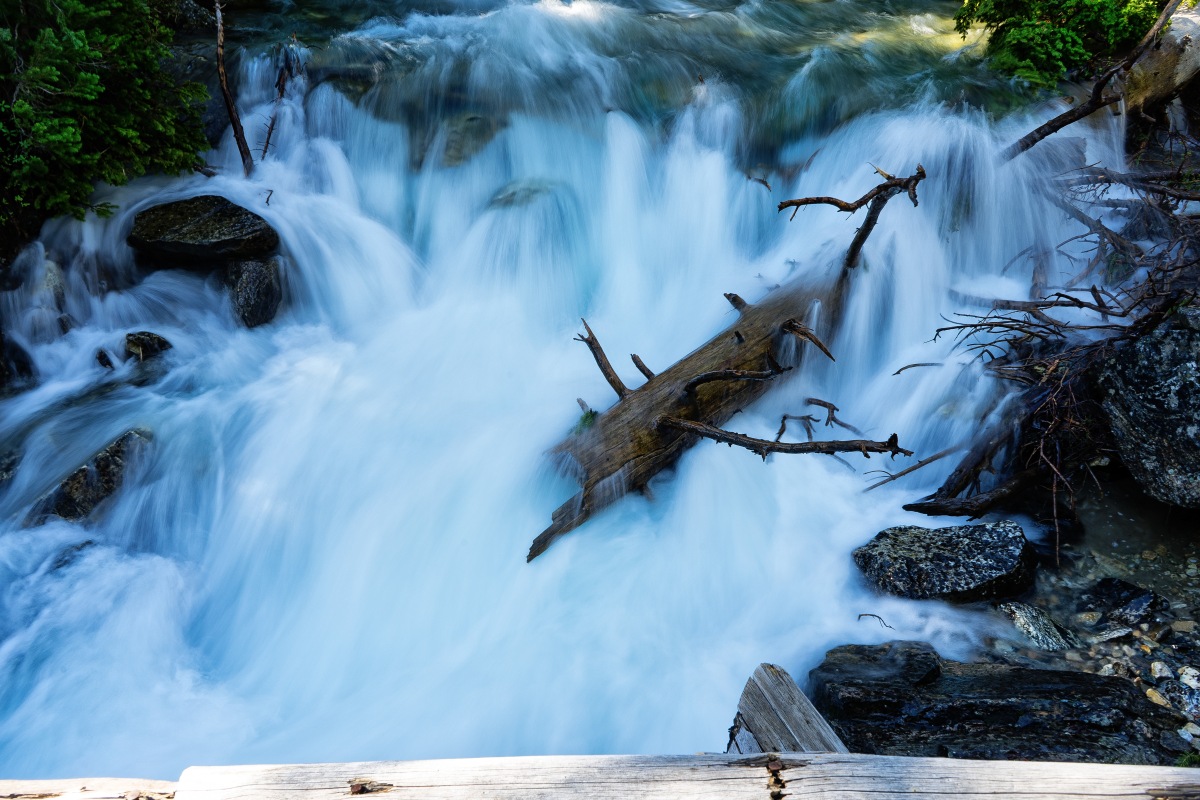
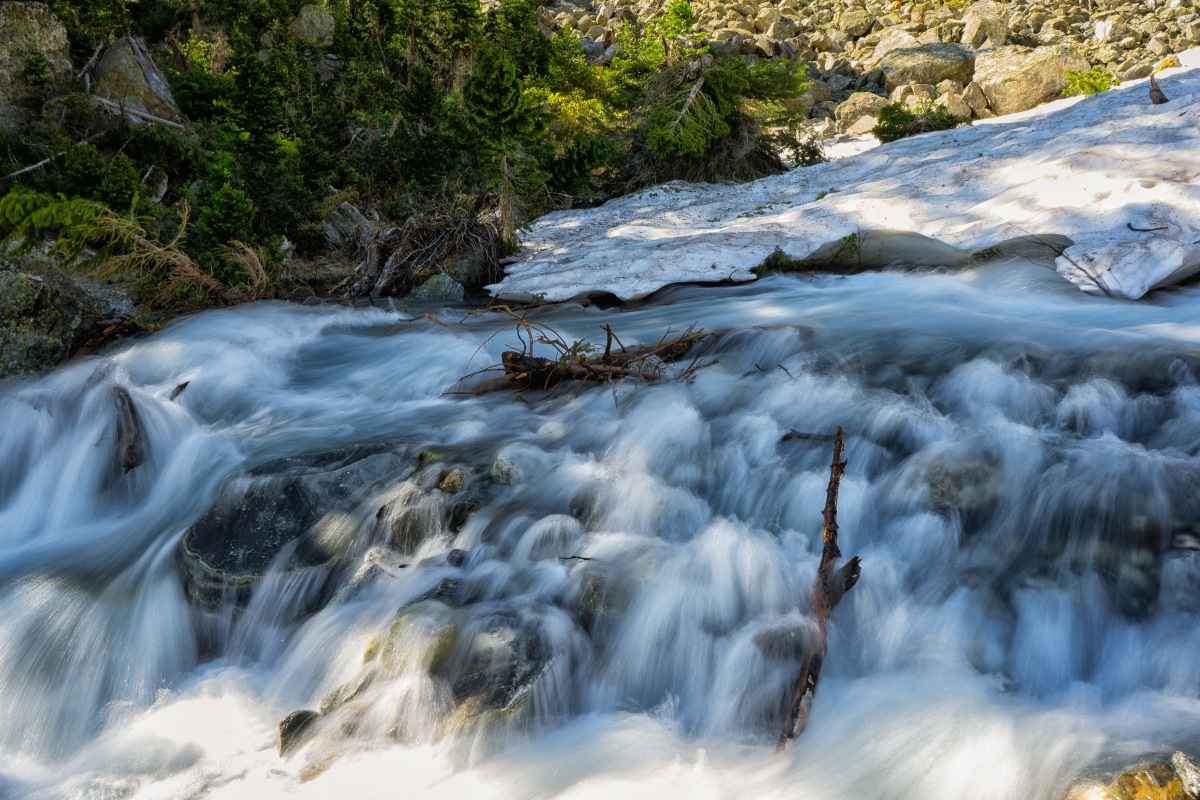
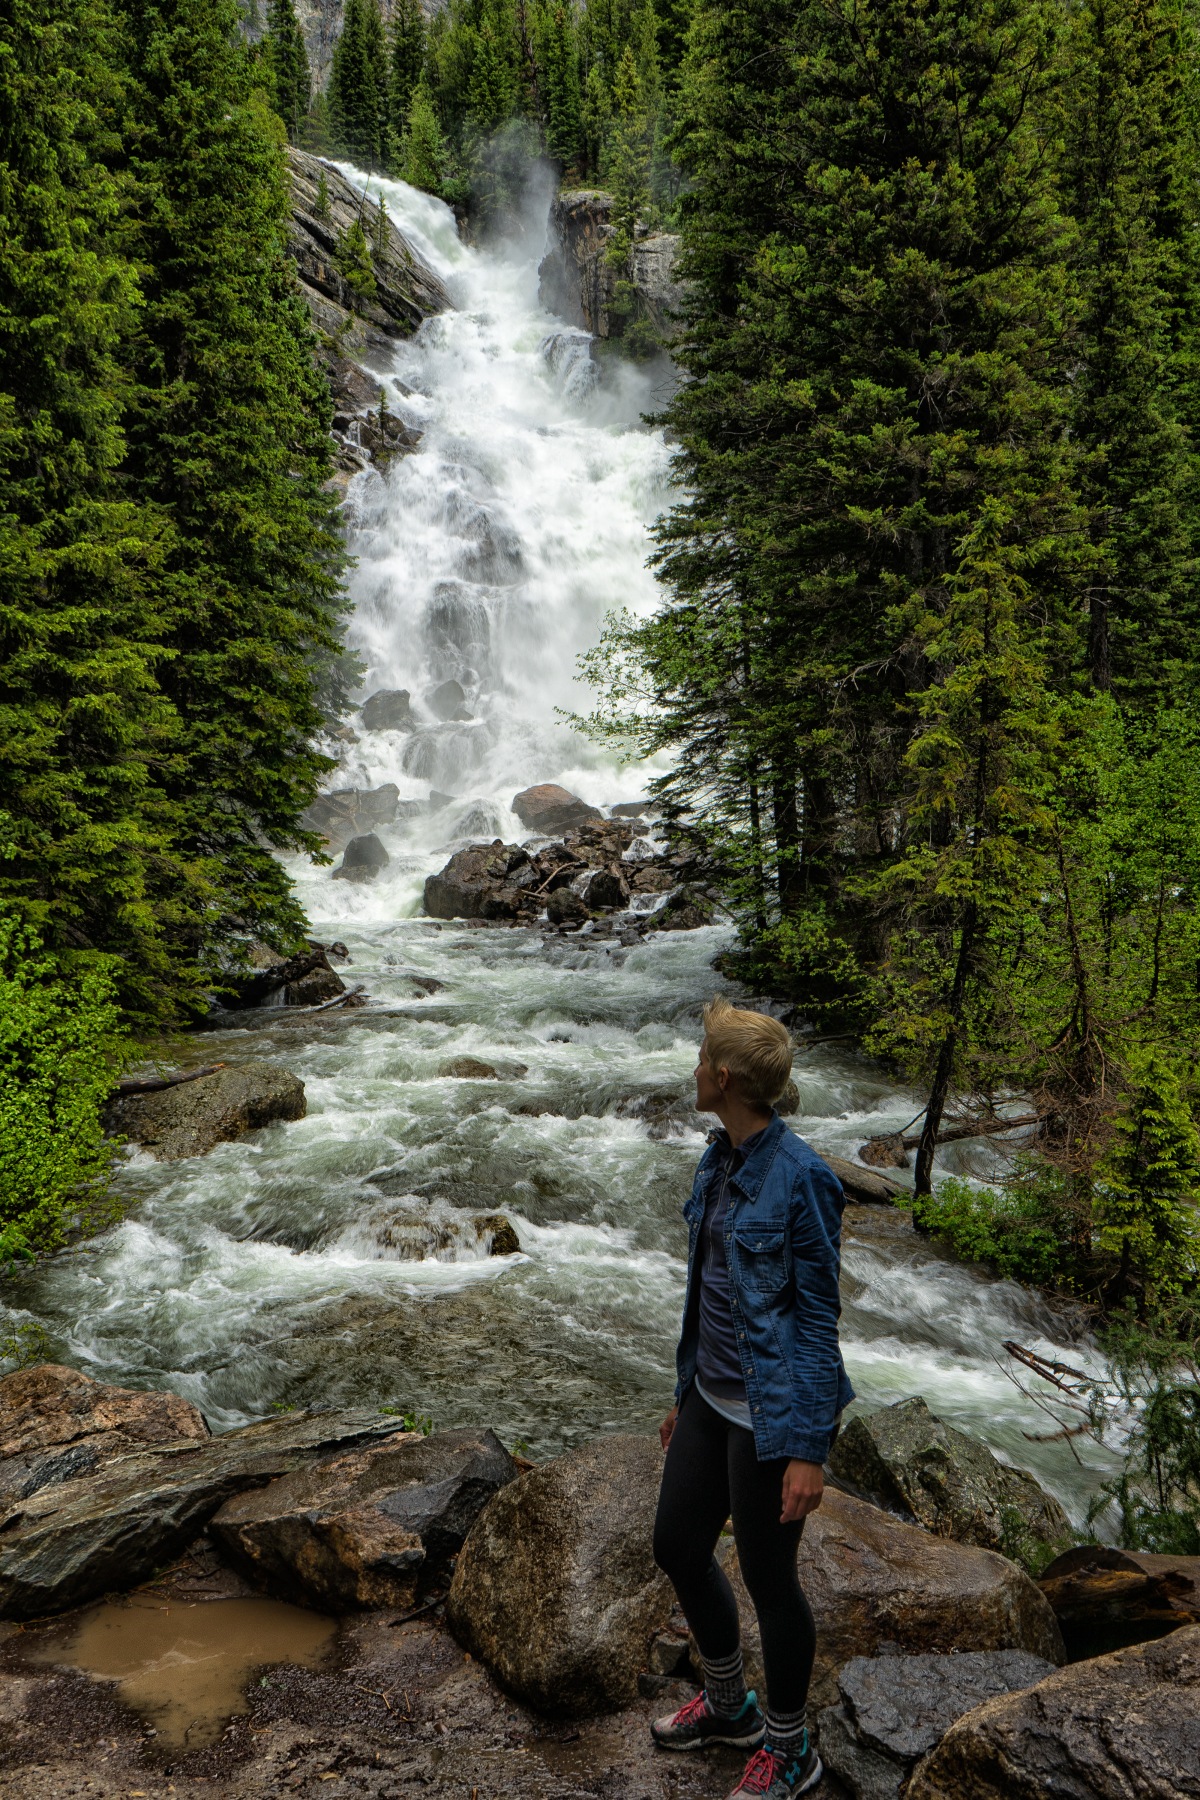
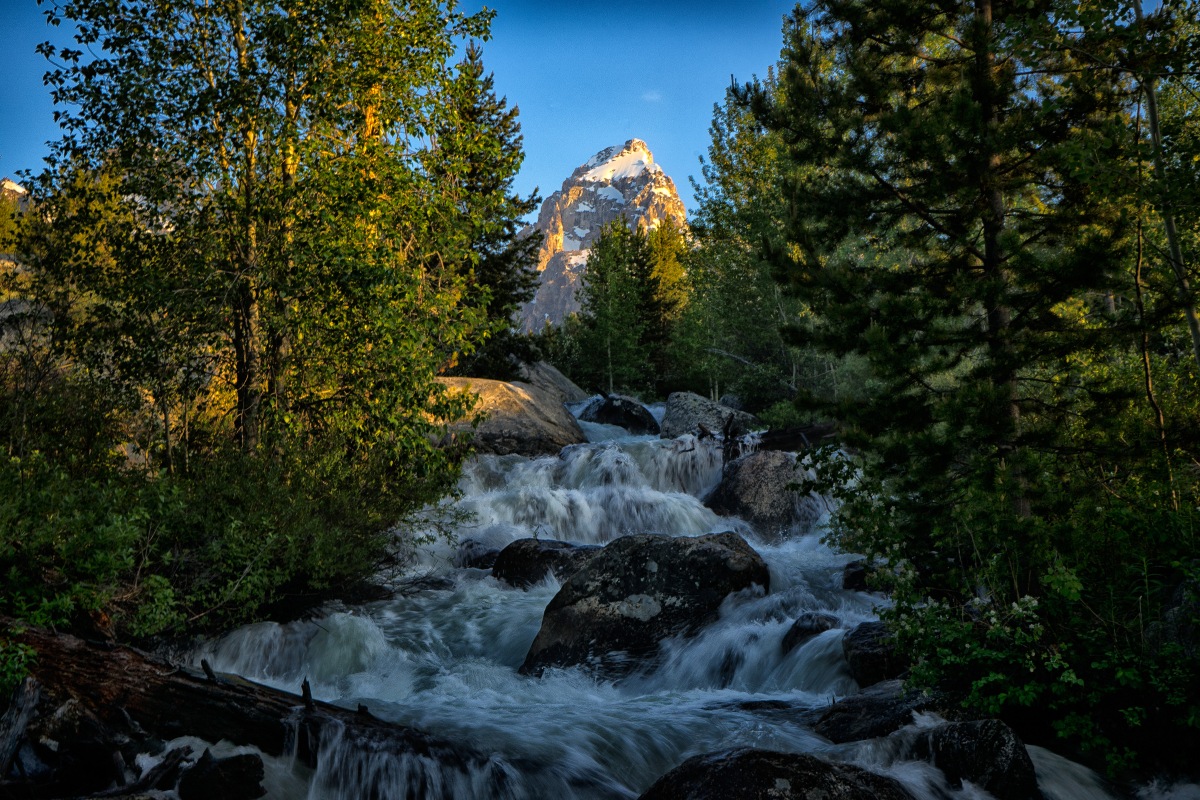
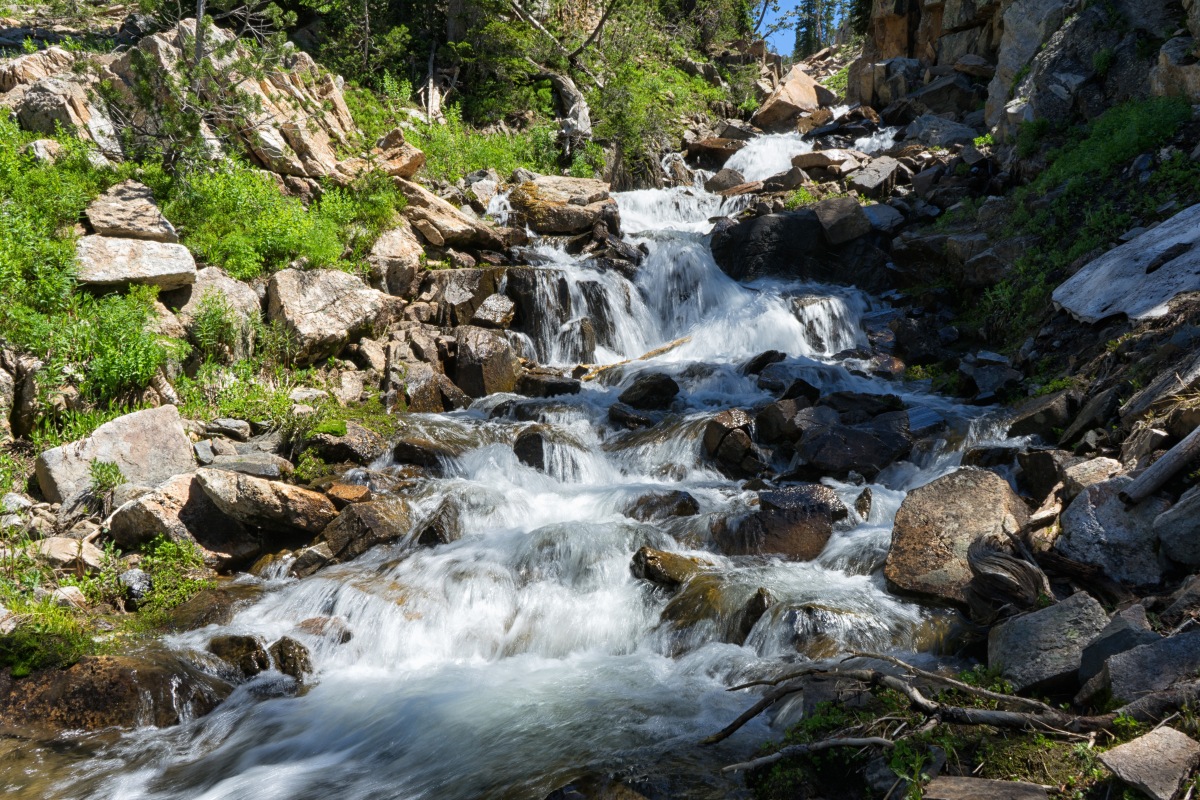
To my left the stream was beautiful with many small waterfalls (above photo). I carefully rock-hopped out into the stream and found a big flat rock to lay belly down on and line up the above shot. The light was beautiful and the water clear and cold.

AlaskaBasinTrailHike11
Photo by: Marc Bowen

As the trail climbed higher there were some clearings and I could occasionally see some open slopes and ridge lines and I watched for wildlife during rest stops. I didn’t see very many hikers along this stretch. Made me wonder if some hikers were taking the other route into the basin.

AlaskaBasinTrailHike12
Photo by: Marc Bowen

The trail just about always follows the water course up the canyon and the forest and brush were again pretty lush and thick.

AlaskaBasinTrailHike6
Photo by: Marc Bowen

All through this area the trail crosses many small tributaries made by melting snow from the higher elevations but so far nothing deep and wide enough that I couldn’t stay dry crossing.

AlaskaBasinTrailHike13
Photo by: Marc Bowen – Buck Mountain in the distance

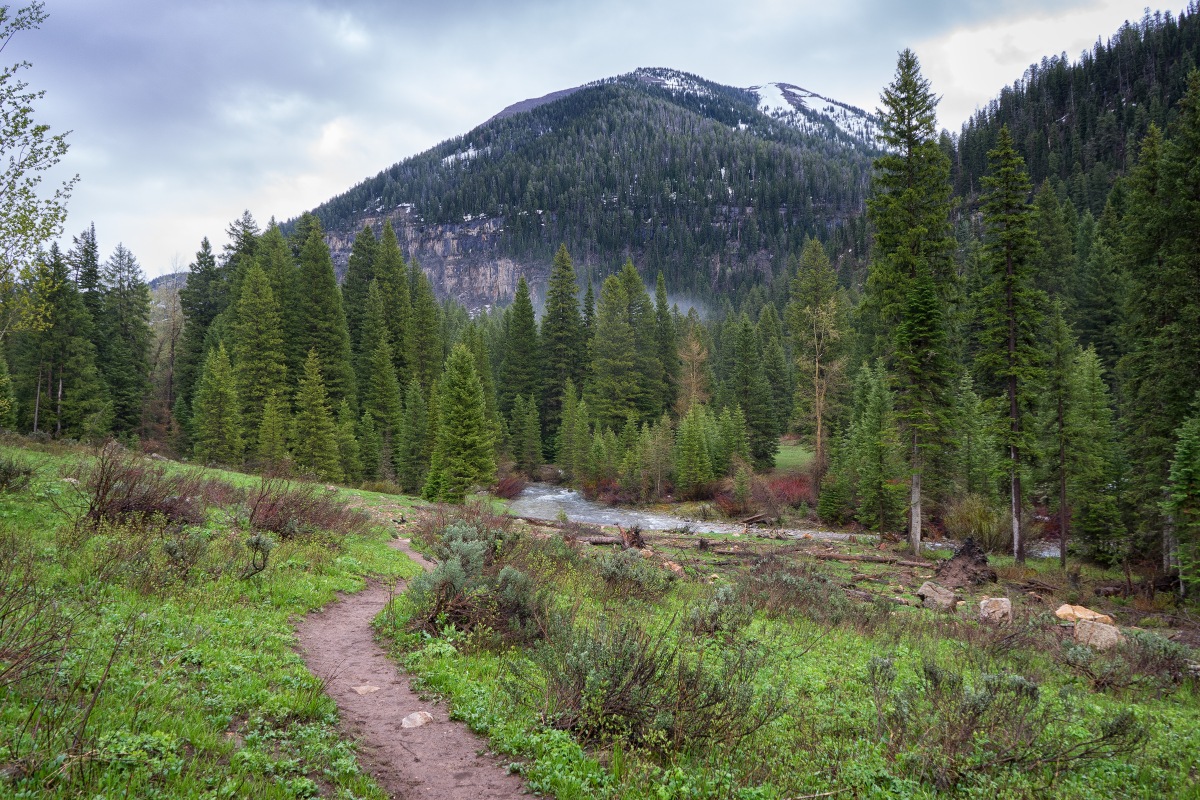
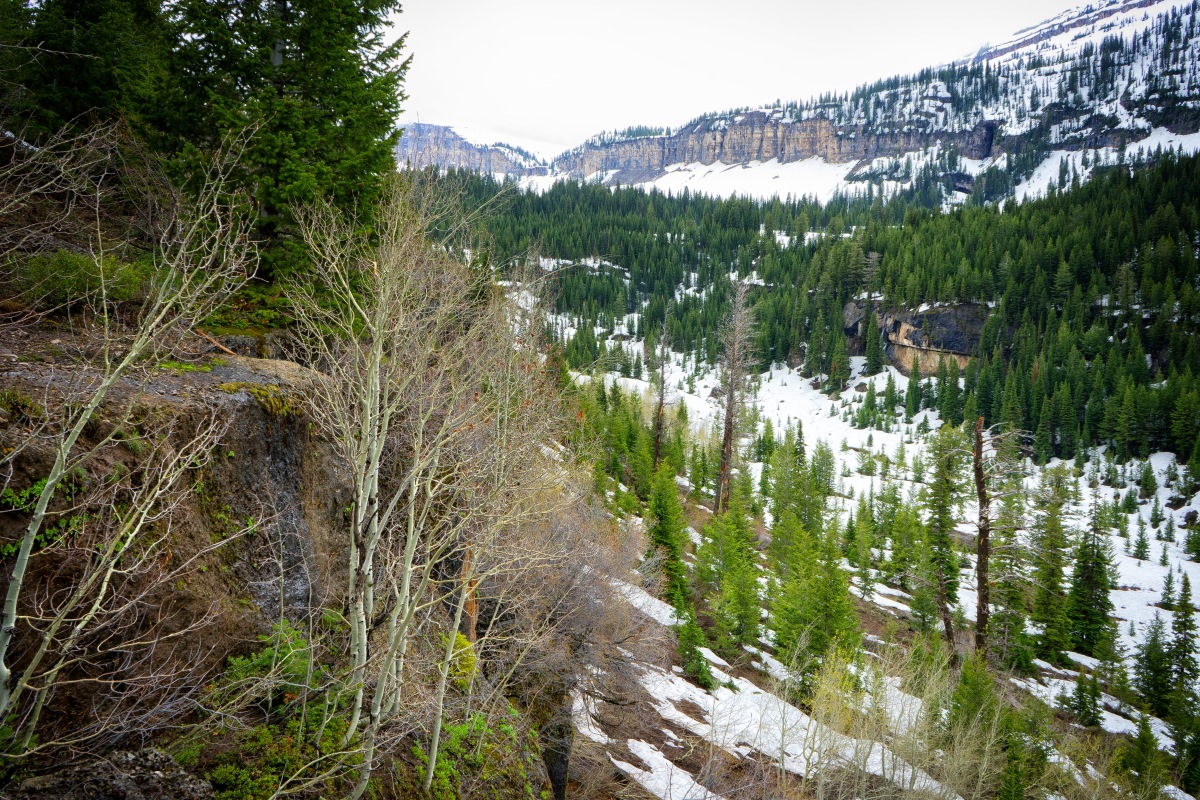
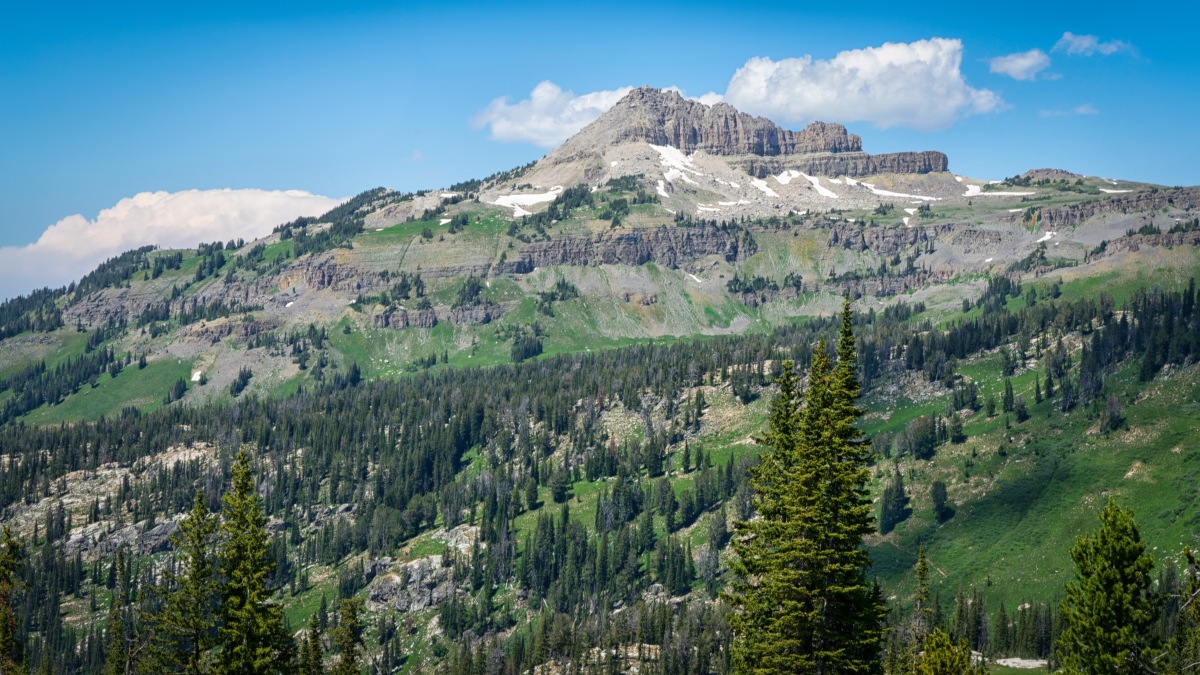
As the trail steepened and entered a few open meadows I could see Buck Mountain to the east.

AlaskaBasinTrailHike7
Photo by: Marc Bowen – Battle Mountain

I could also see Battle Mountain (elev. 10,610) to the North.

AlaskaBasinTrailHike8
Photo by: Marc Bowen

At this point in the hike the trail zigzags up the slope and crosses the main stream of Teton Creek a couple of times so careful rock-hopping was necessary. It was beautiful in this area. Lots of water and multiple small waterfalls.

AlaskaBasinTrailHike9
Photo by: Marc Bowen

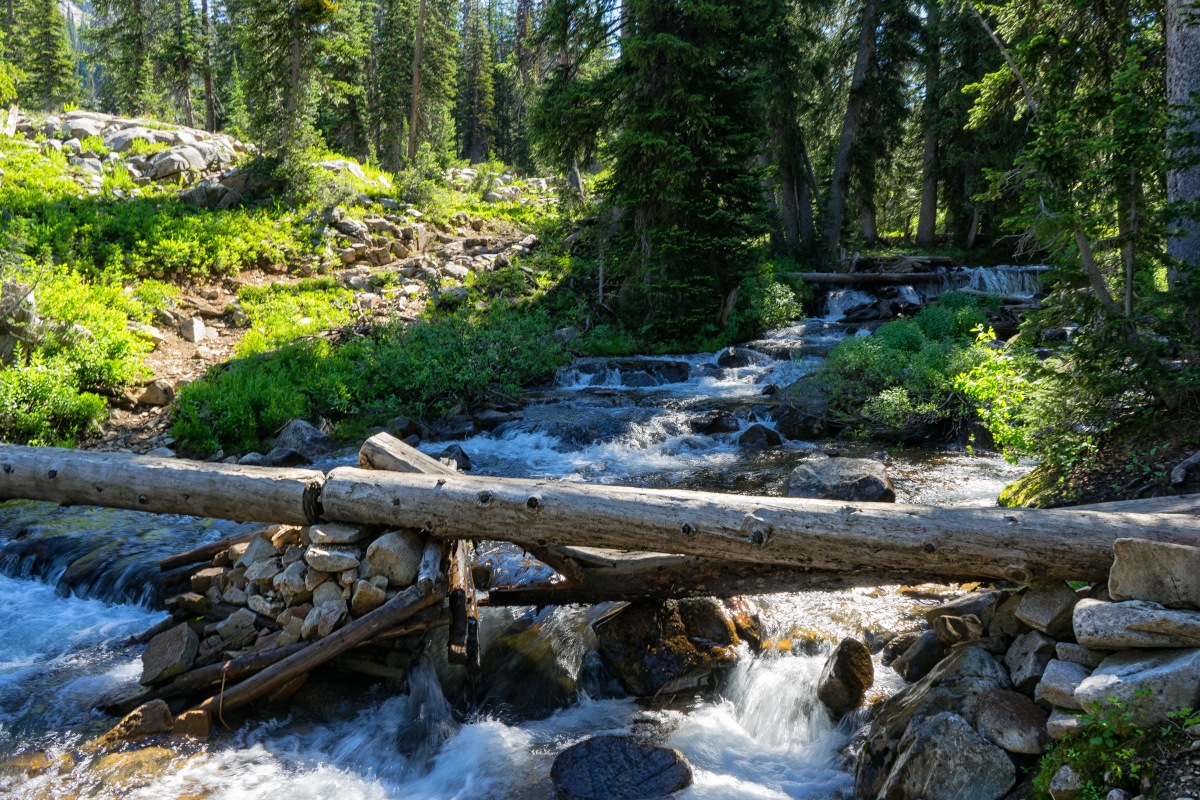
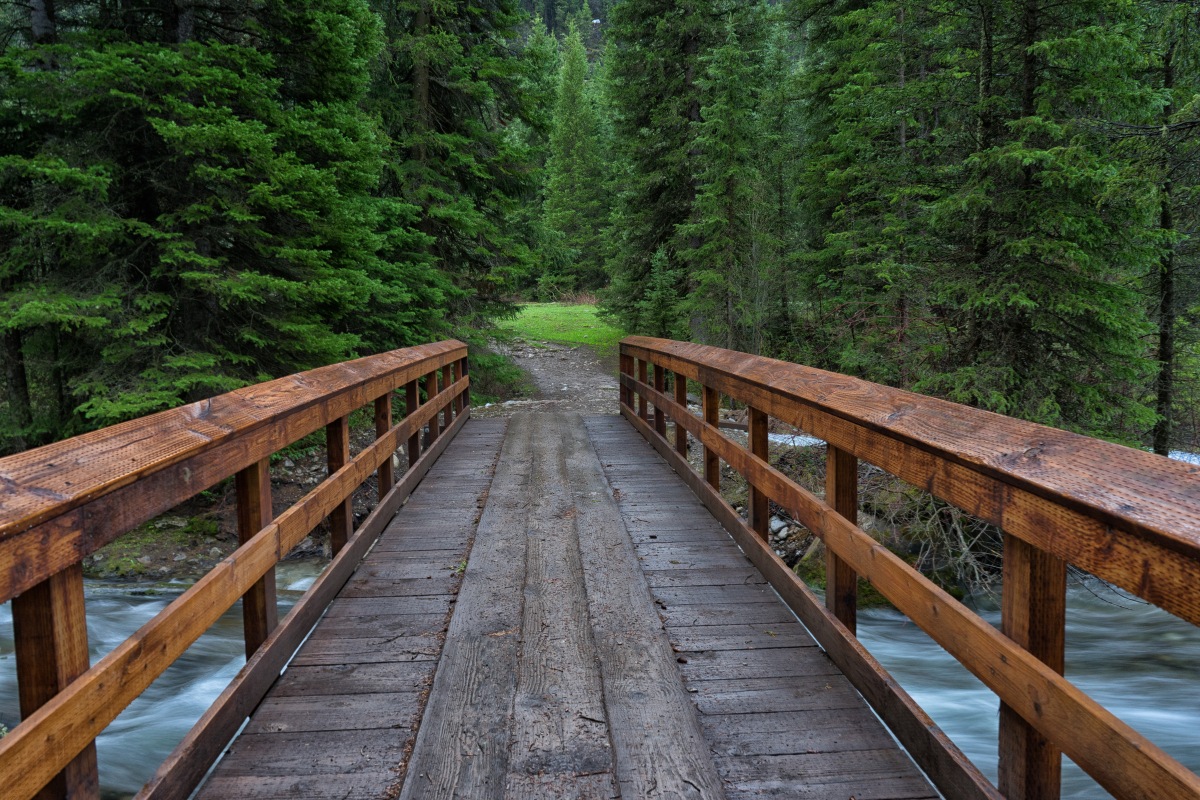
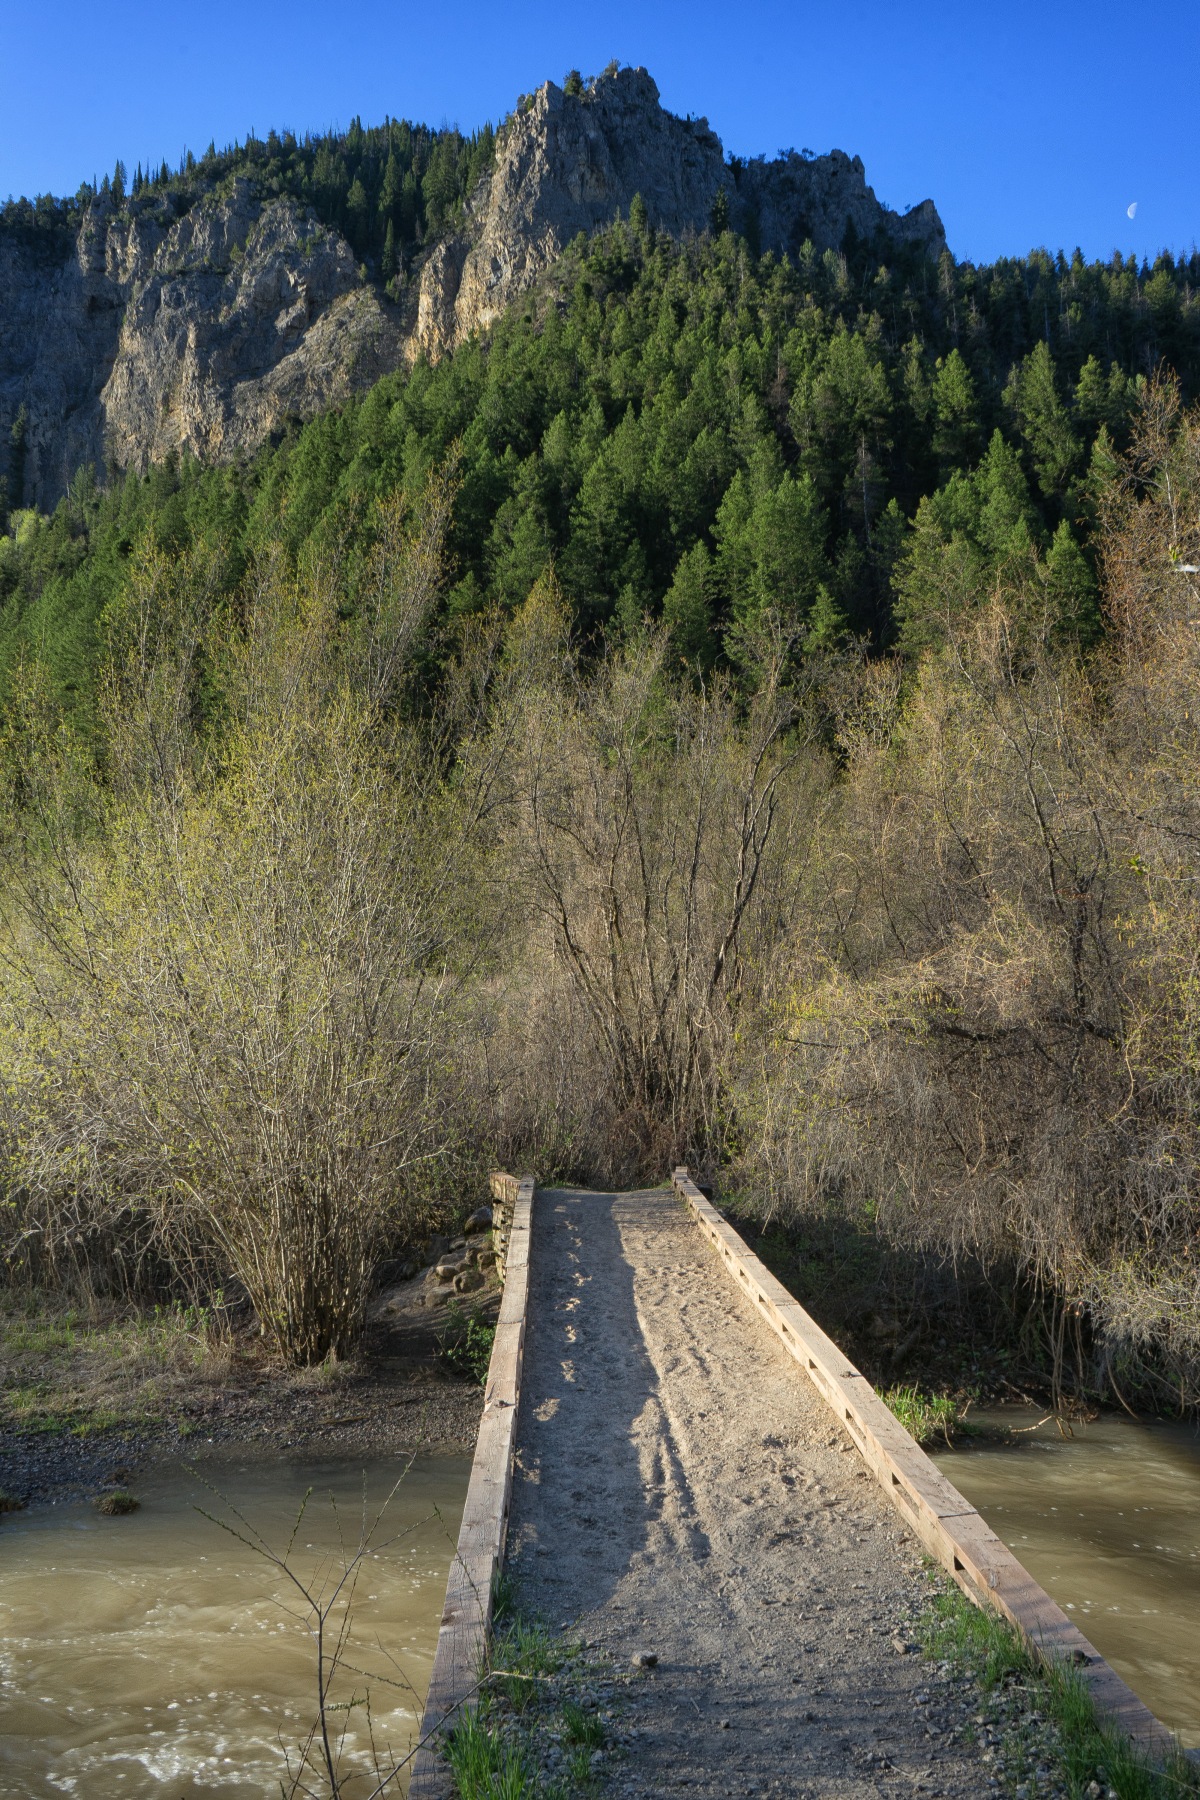
The only thing resembling a bridge during this part of the hike was this one (above photo).

AlaskaBasinTrailHike10
Photo by: Marc Bowen

This area was about five miles in and very lovely with more water-falls, clear ice-cold pools of water and sunlight filtering through the trees.

AlaskaBasinTrailHike14
Photo by: Marc Bowen

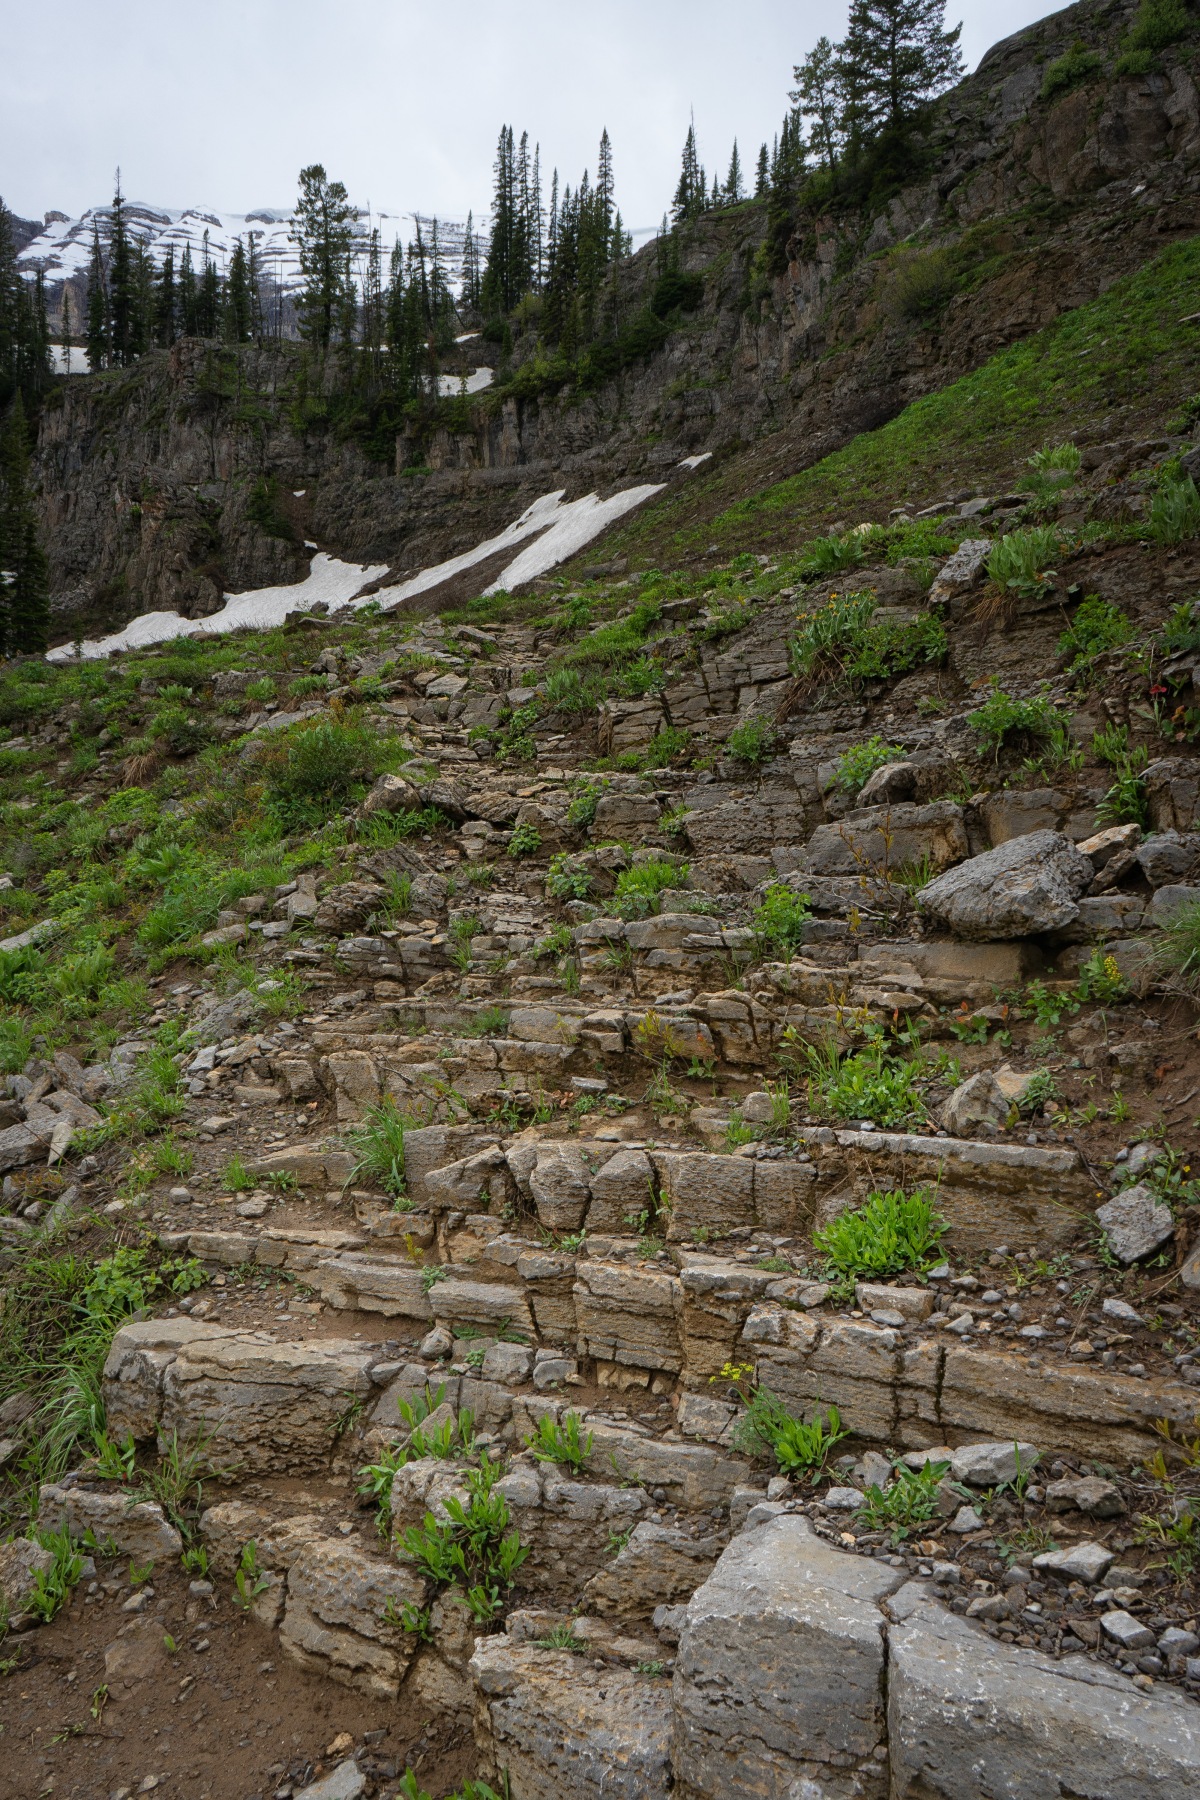
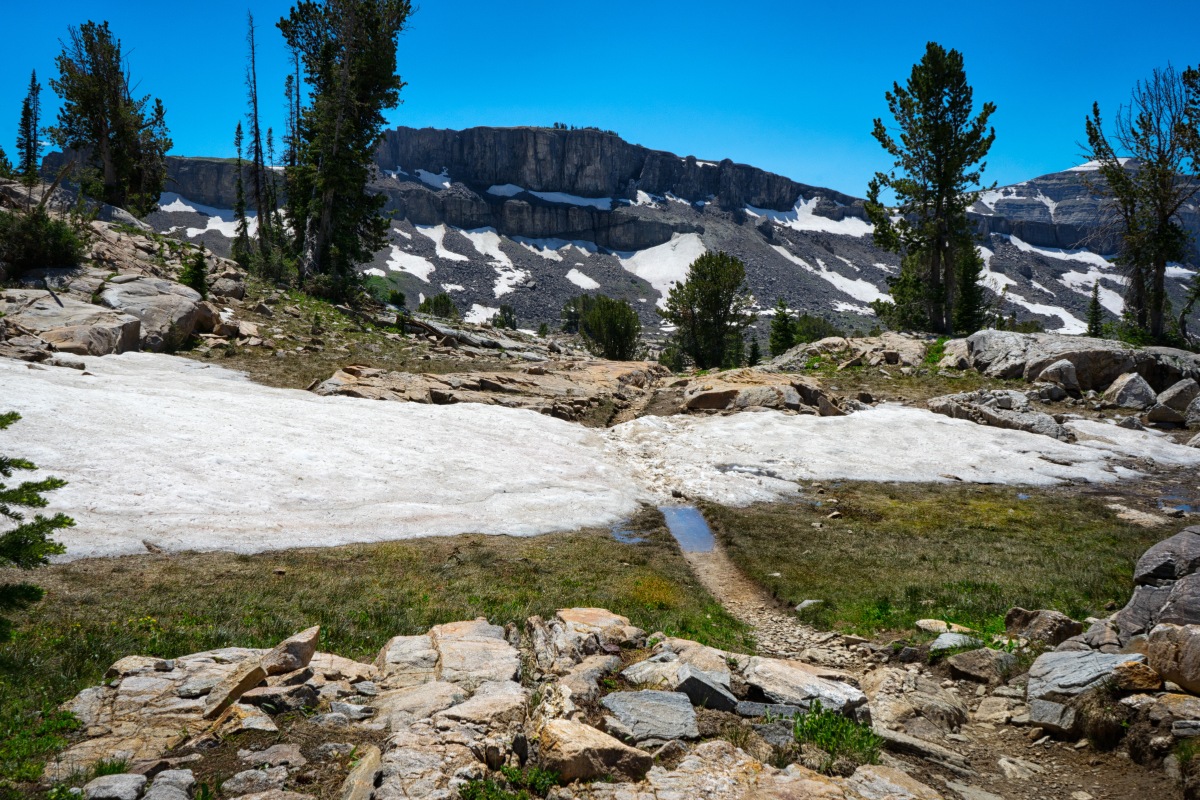
At almost six miles the trail levels out a little and enters a very rocky area.

AlaskaBasinTrailHike15
Photo by: Marc Bowen

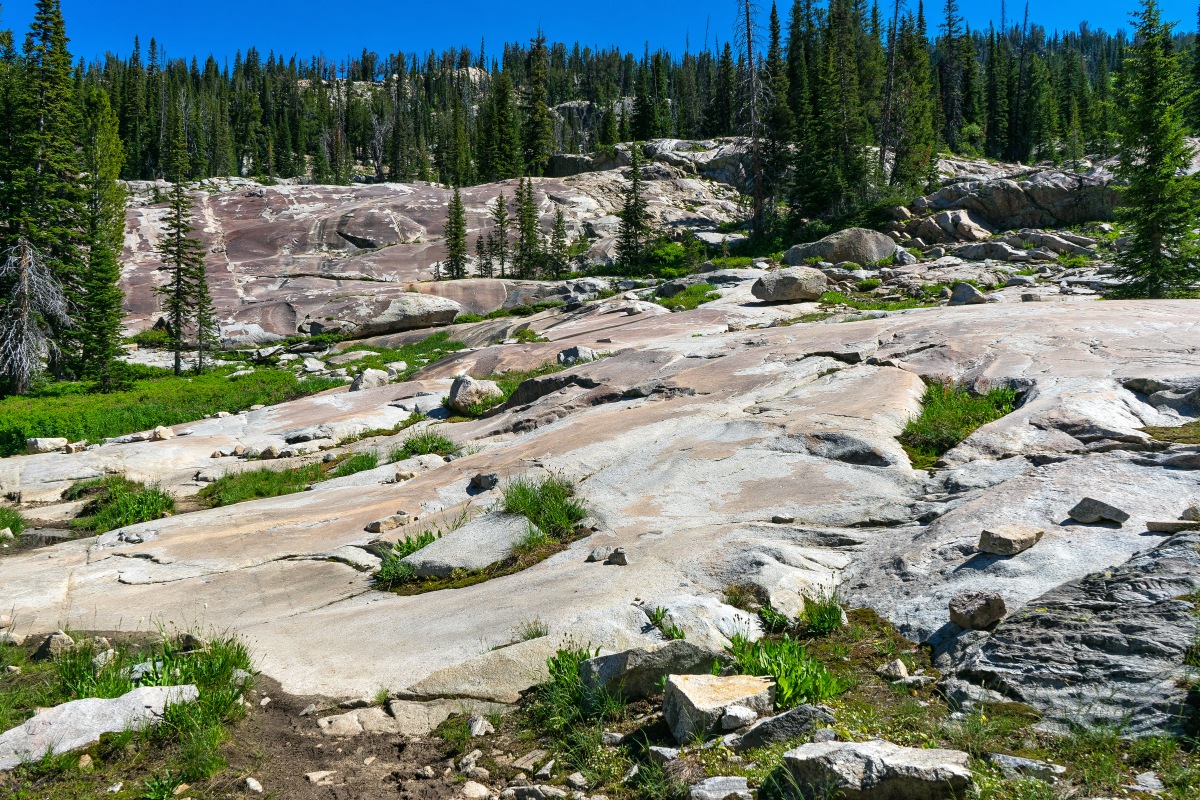
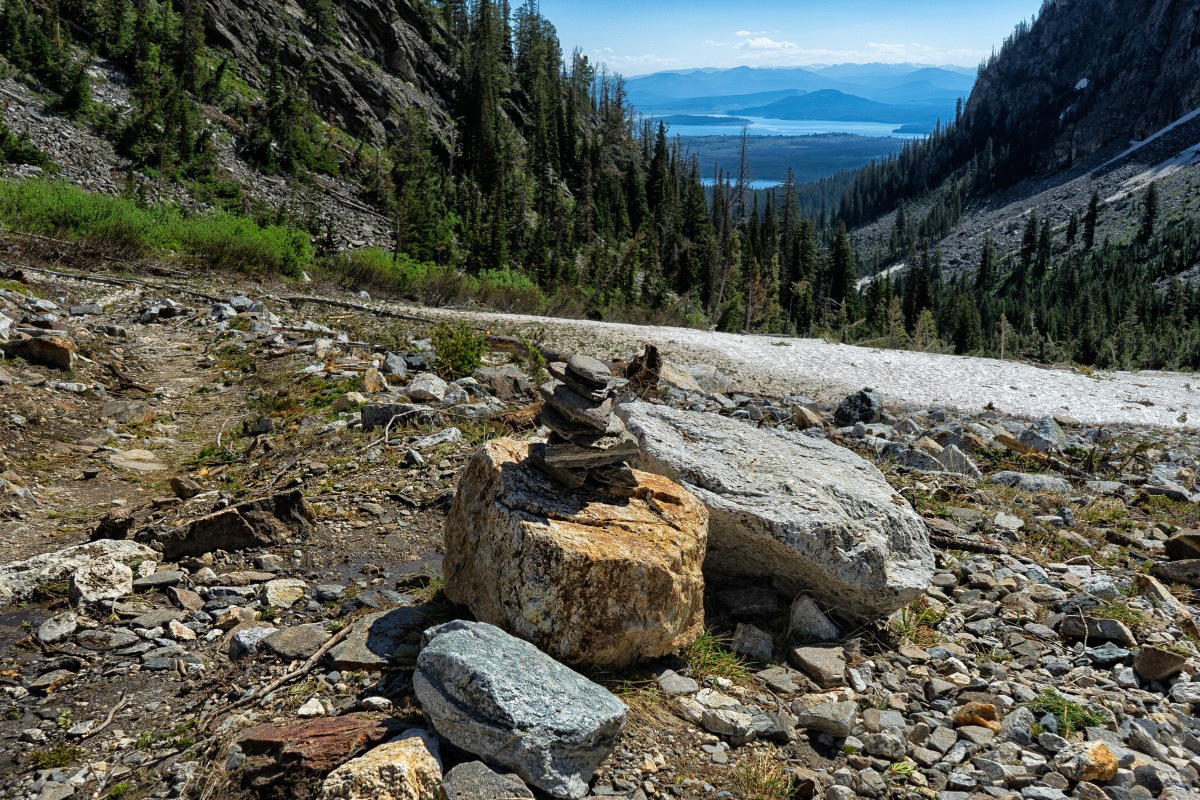
The trail crossed bare rock in some areas and was hard to follow for a short way. It did have some rock cairns and lines of loose rock pointing the way so really wasn’t a problem navigating.

AlaskaBasinTrailHike16
Photo by: Marc Bowen – The Wedge and Teton Shelf

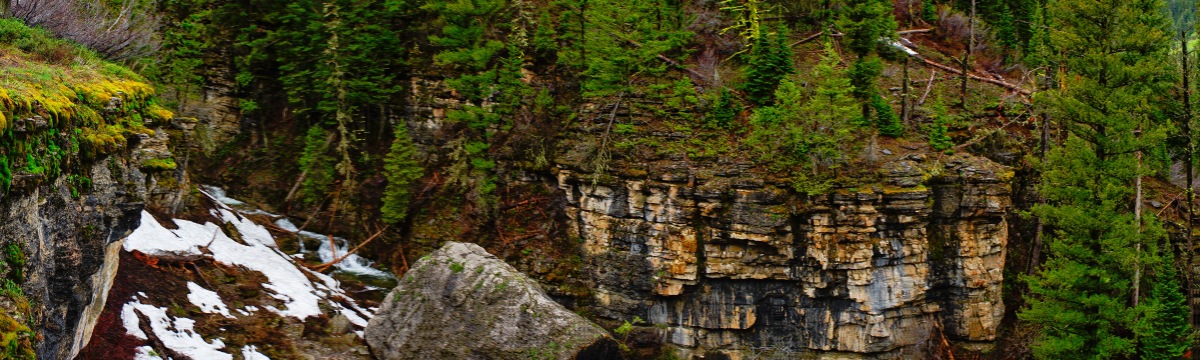
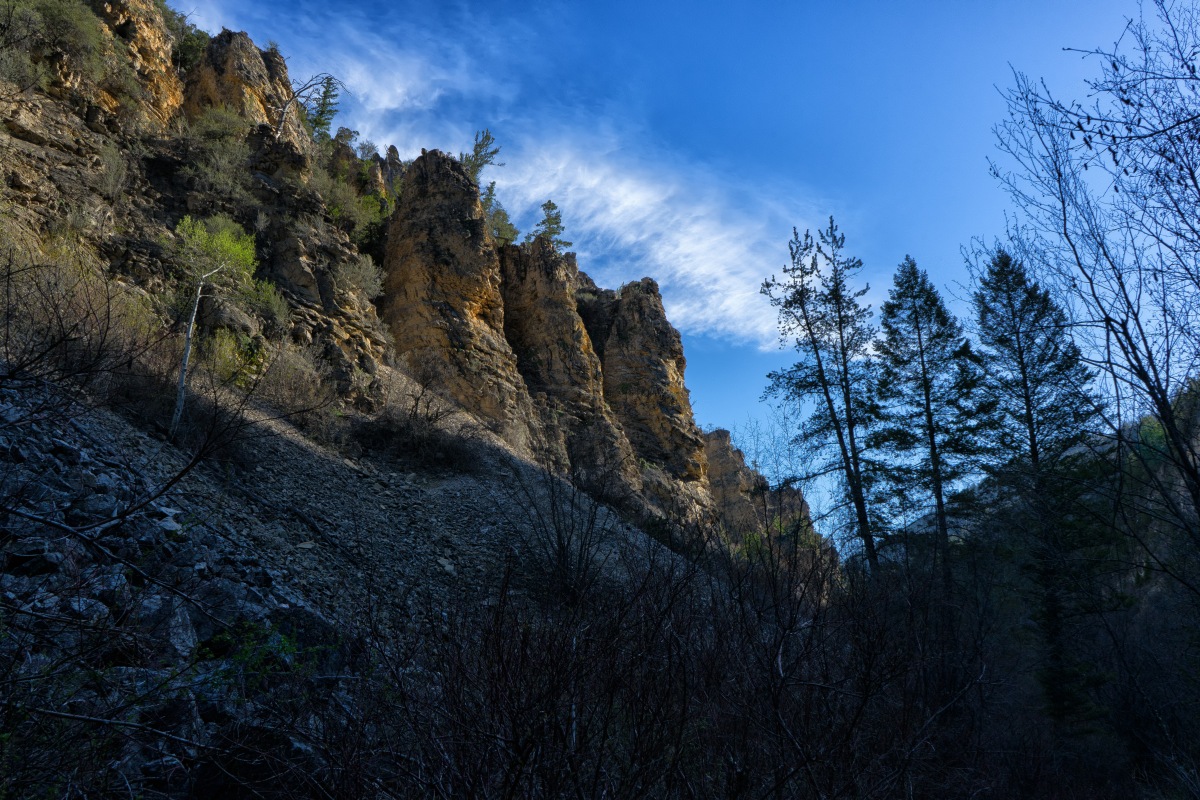
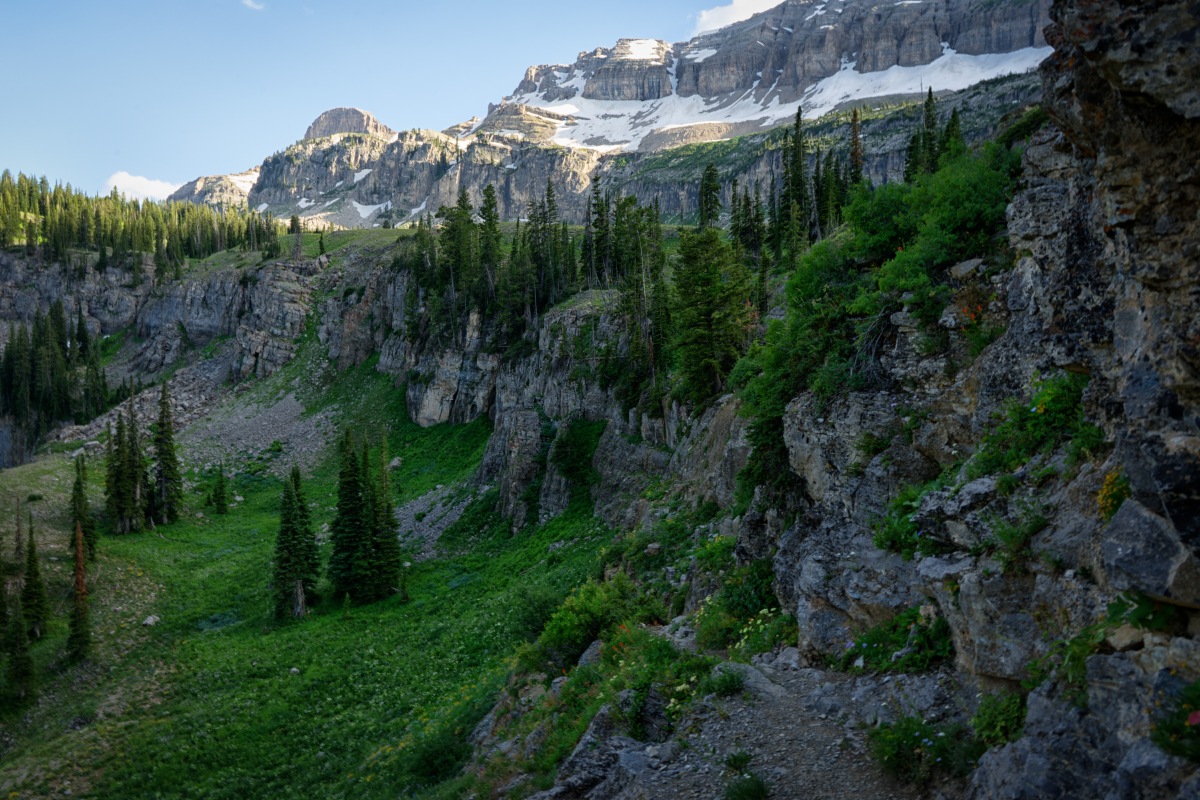
From this part of the trail looking back to my right I had a good view across the canyon of a large rock formation called The Wedge, its shape easy to pick-out from the ridge-line.

AlaskaBasinTrailHike17
Photo by: Marc Bowen

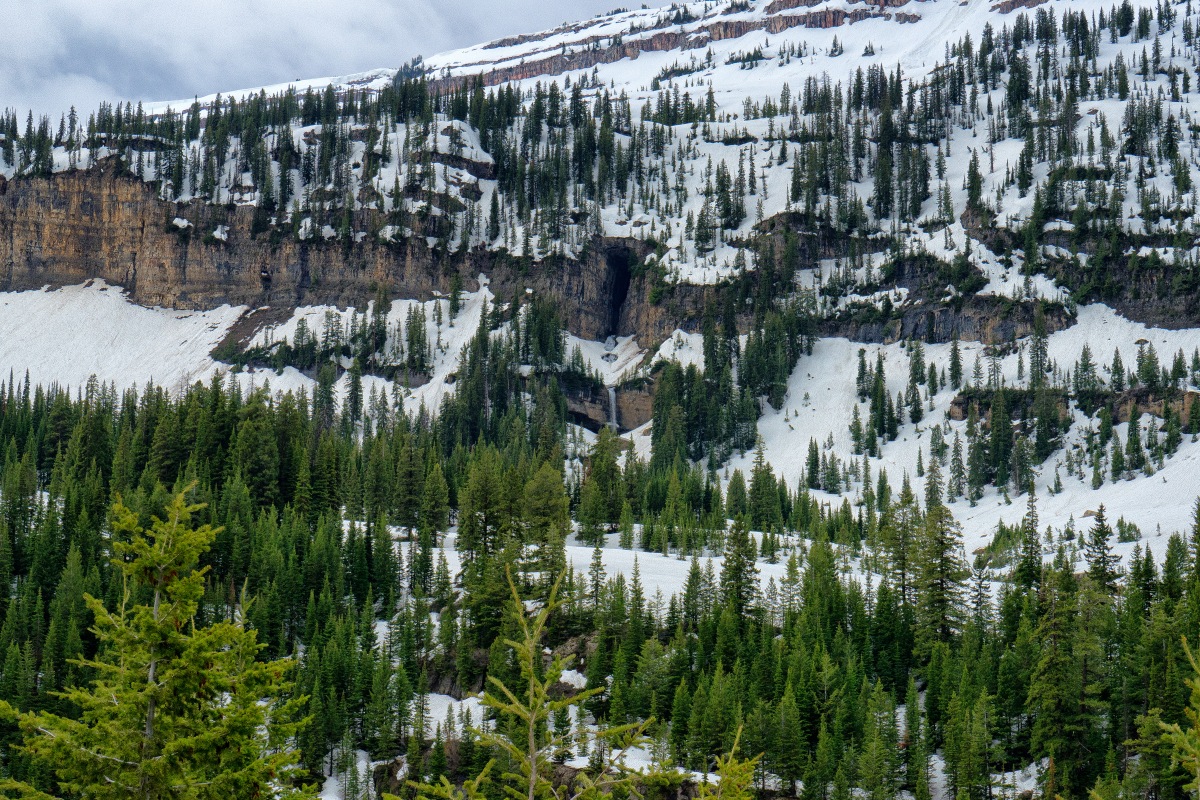
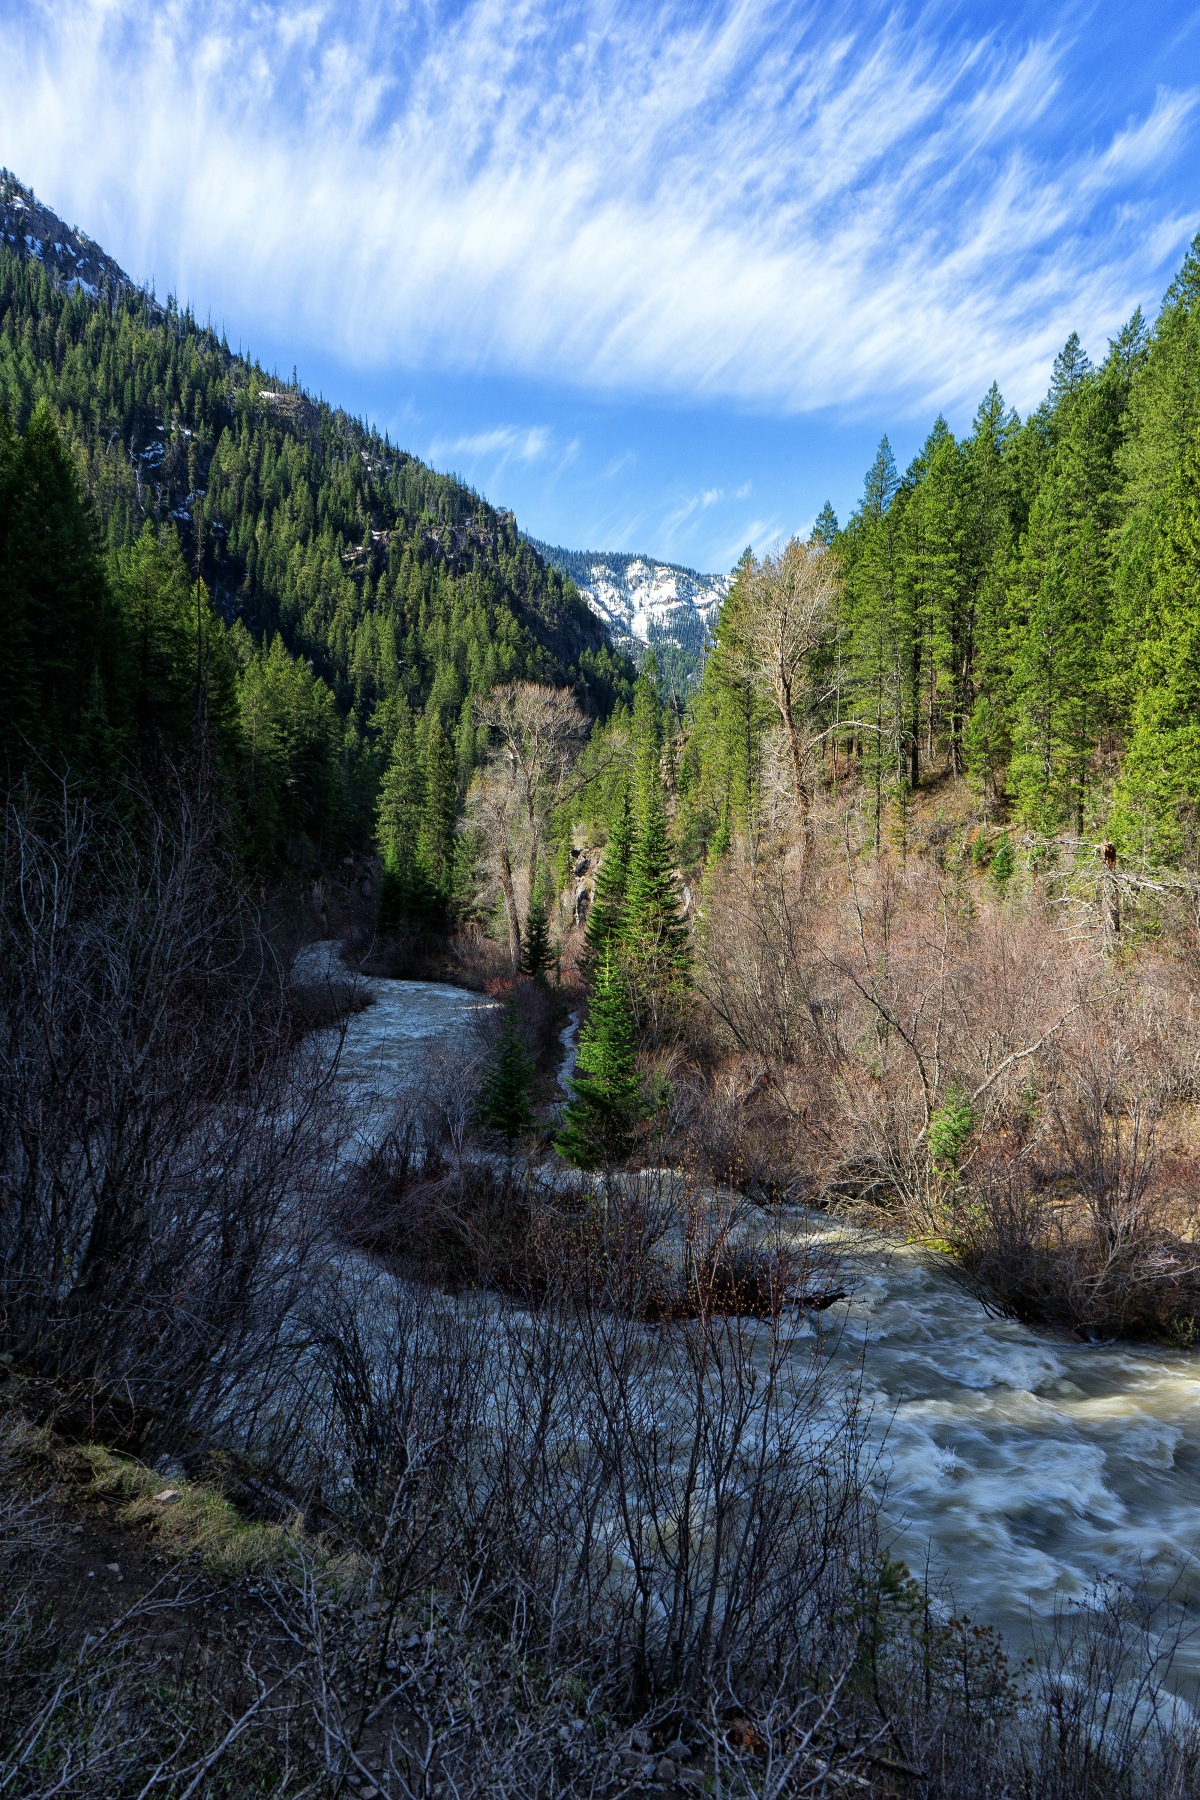
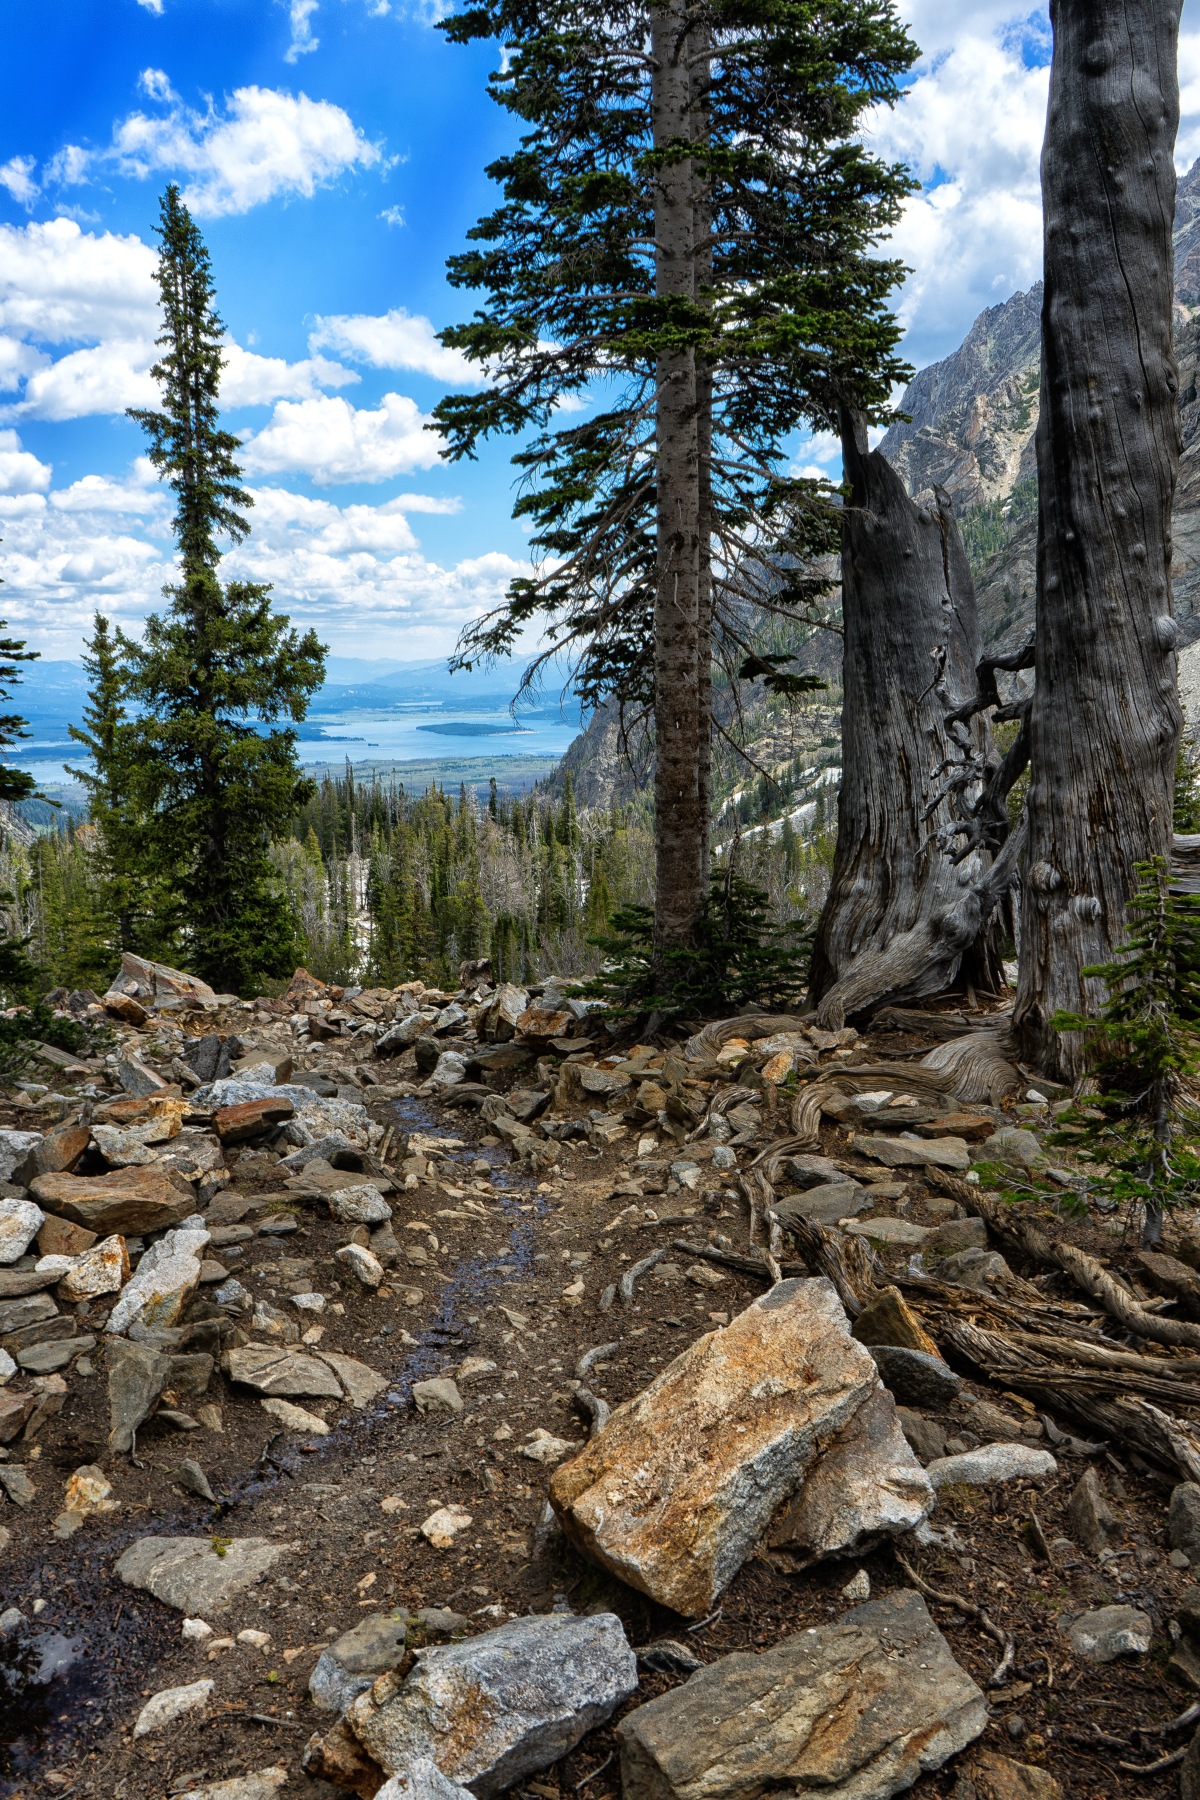
As the trail climbed up the head of Teton Canyon, I stepped off the trail a short distance to enjoy the sight of Teton Creek carving its way down into the canyon from the lakes above.

AlaskaBasinTrailHike18
Photo by: Marc Bowen

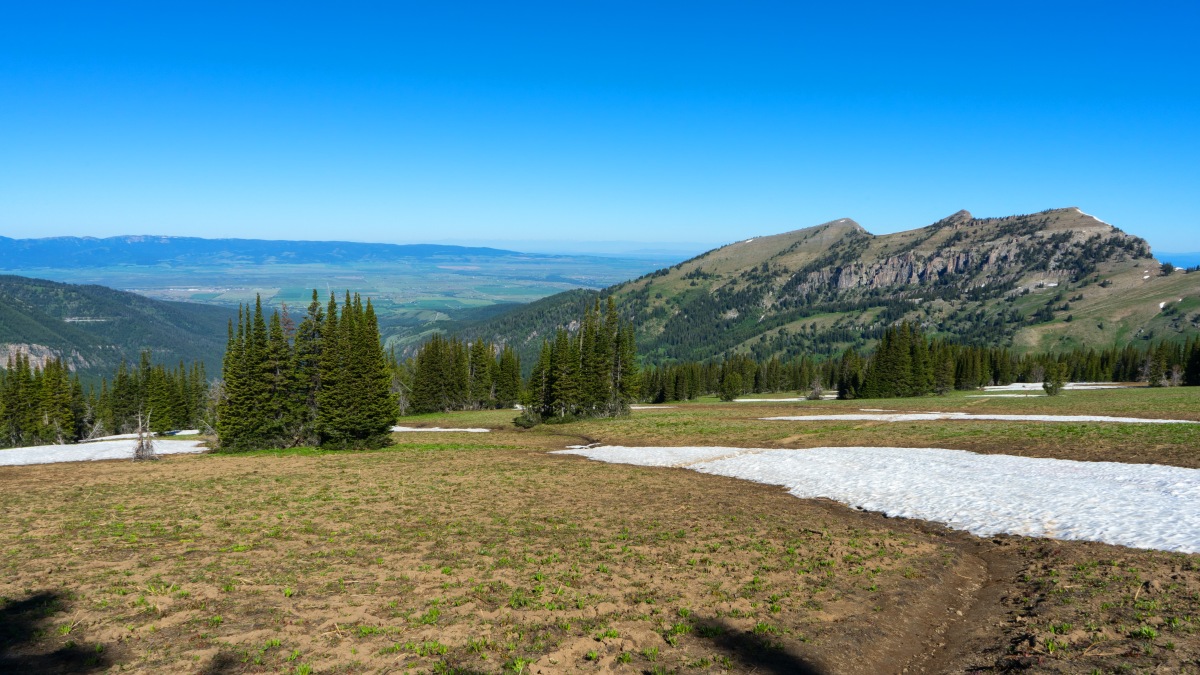
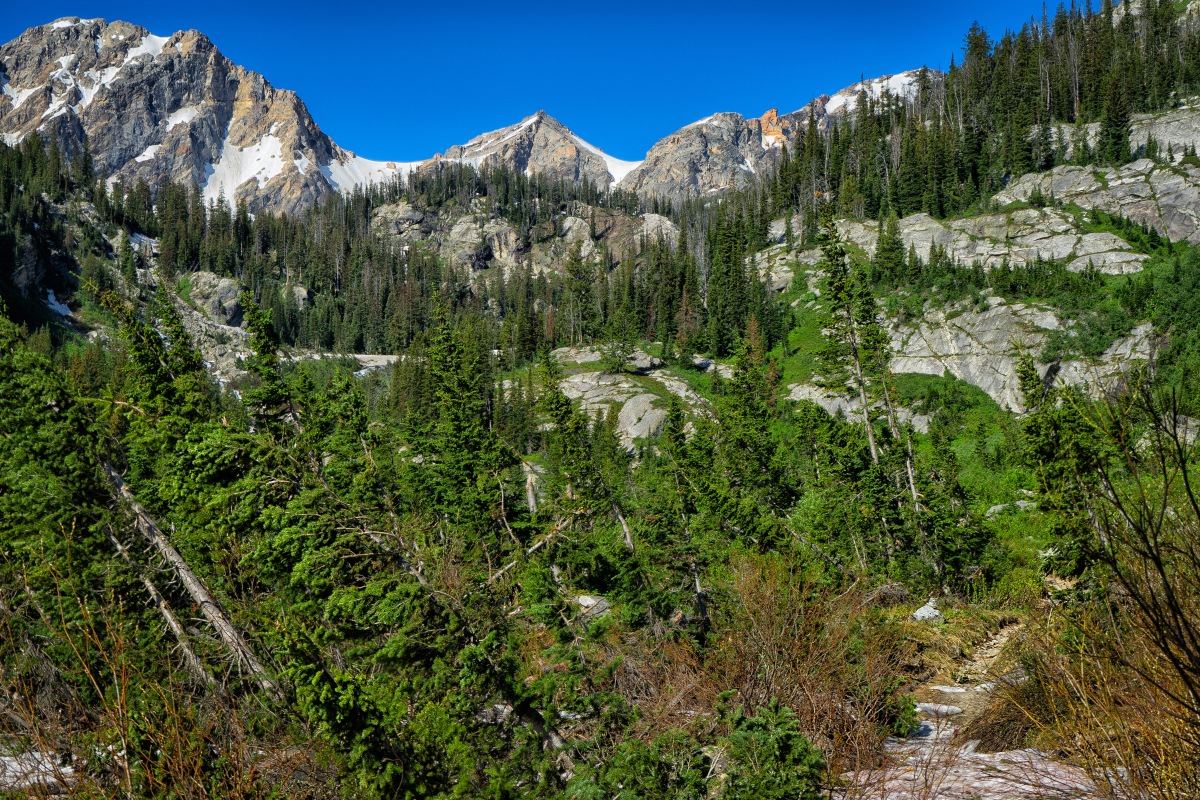
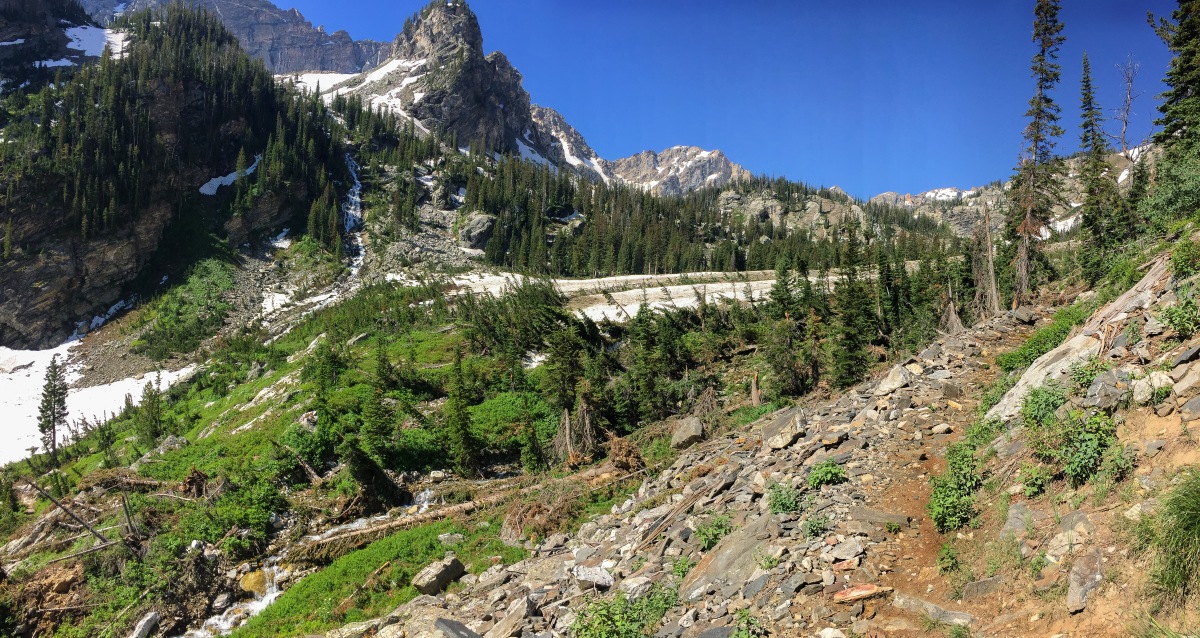
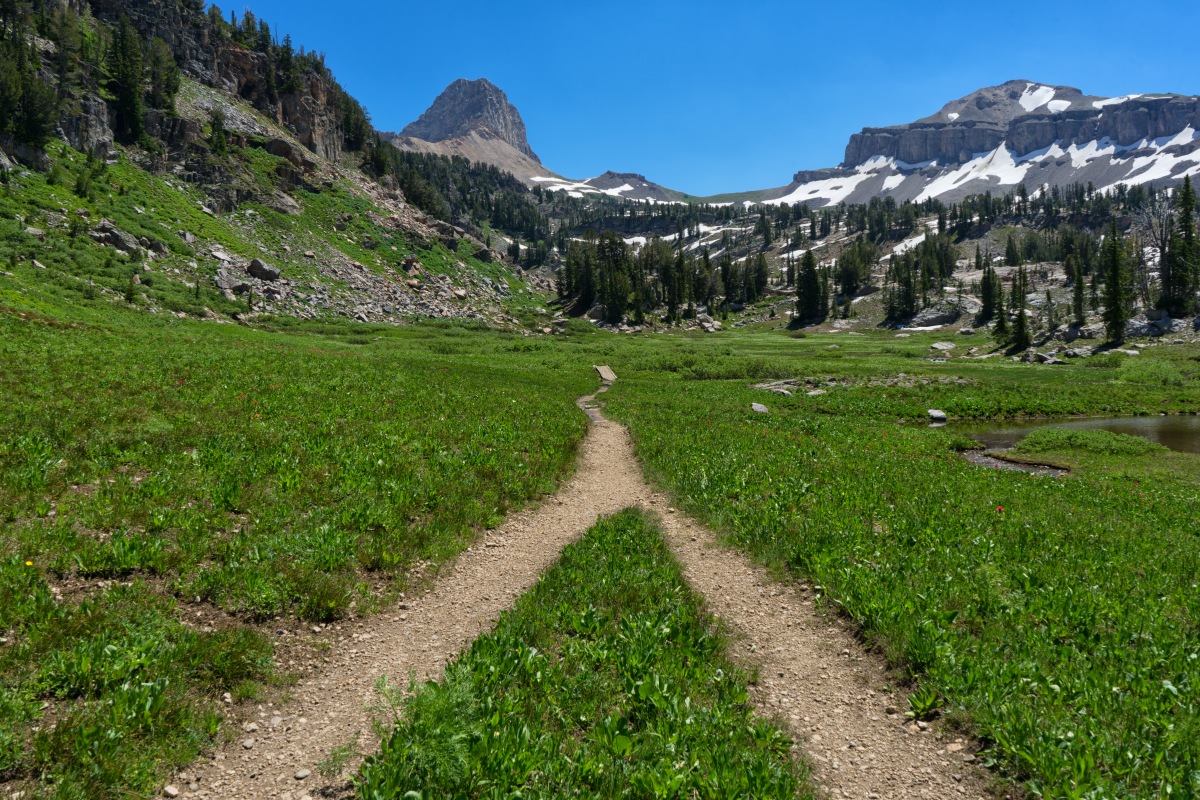
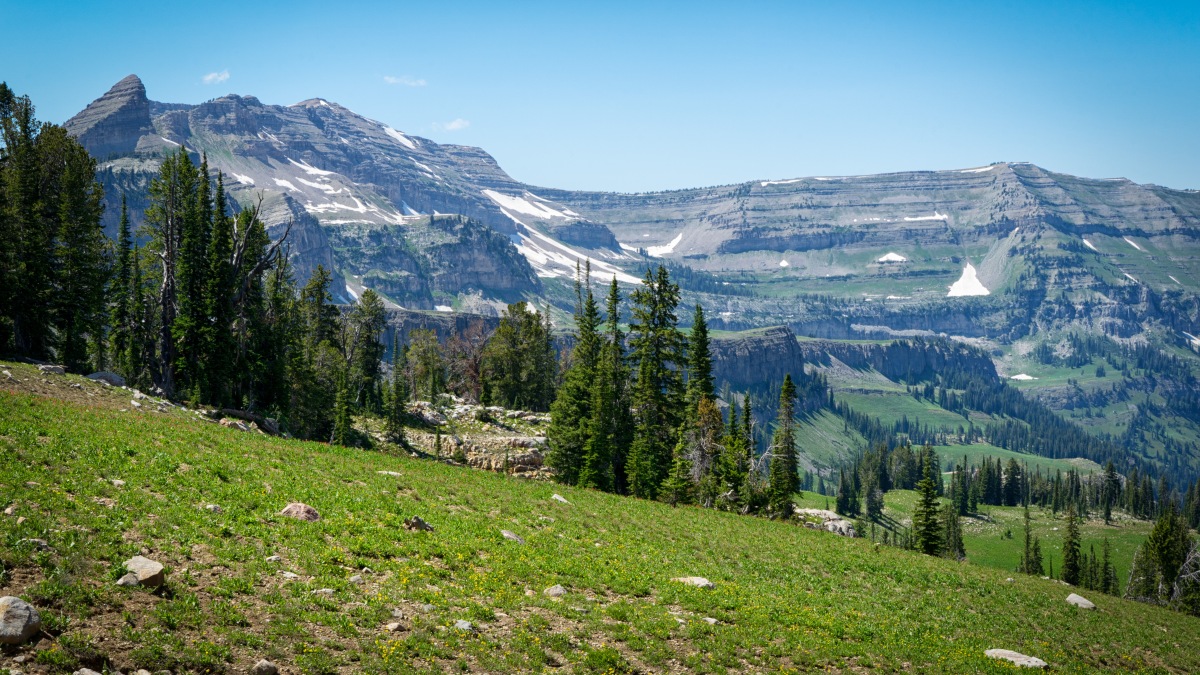
At approximately 6.5 miles the trail enters a long high meadow. I stopped and turned to look back down the trail and captured the above image. There are some amazing views from here of Mt. Meek, The Wedge and Teton-Shelf.

AlaskaBasinTrailHike19
Photo by: Marc Bowen

At this point the trail got pretty steep again and I was getting tired. I thought shoot If I’m getting this tired maybe I should turn around so I have enough energy to get back. Not like I was going to spend the night at one of the lakes. I wondered how my son would like this trail. This will be his first long hike this year and if I’m struggling he will too and I don’t want him to struggle so much he doesn’t enjoy the journey. Then I thought I’ve put this much effort into getting this far I’m not going back until I’ve seen what I came to see so I kept going, resting when I needed too.

The altitude here was about 9000 feet. I was feeling the altitude and my lungs were starting to burn as I tried to catch my breath. I had practiced this past week a high altitude breathing technique which I started to apply at this point and I have to say it did help me get my breathing under control every time I applied it.

AlaskaBasinTrailHike20
Photo by: Marc Bowen

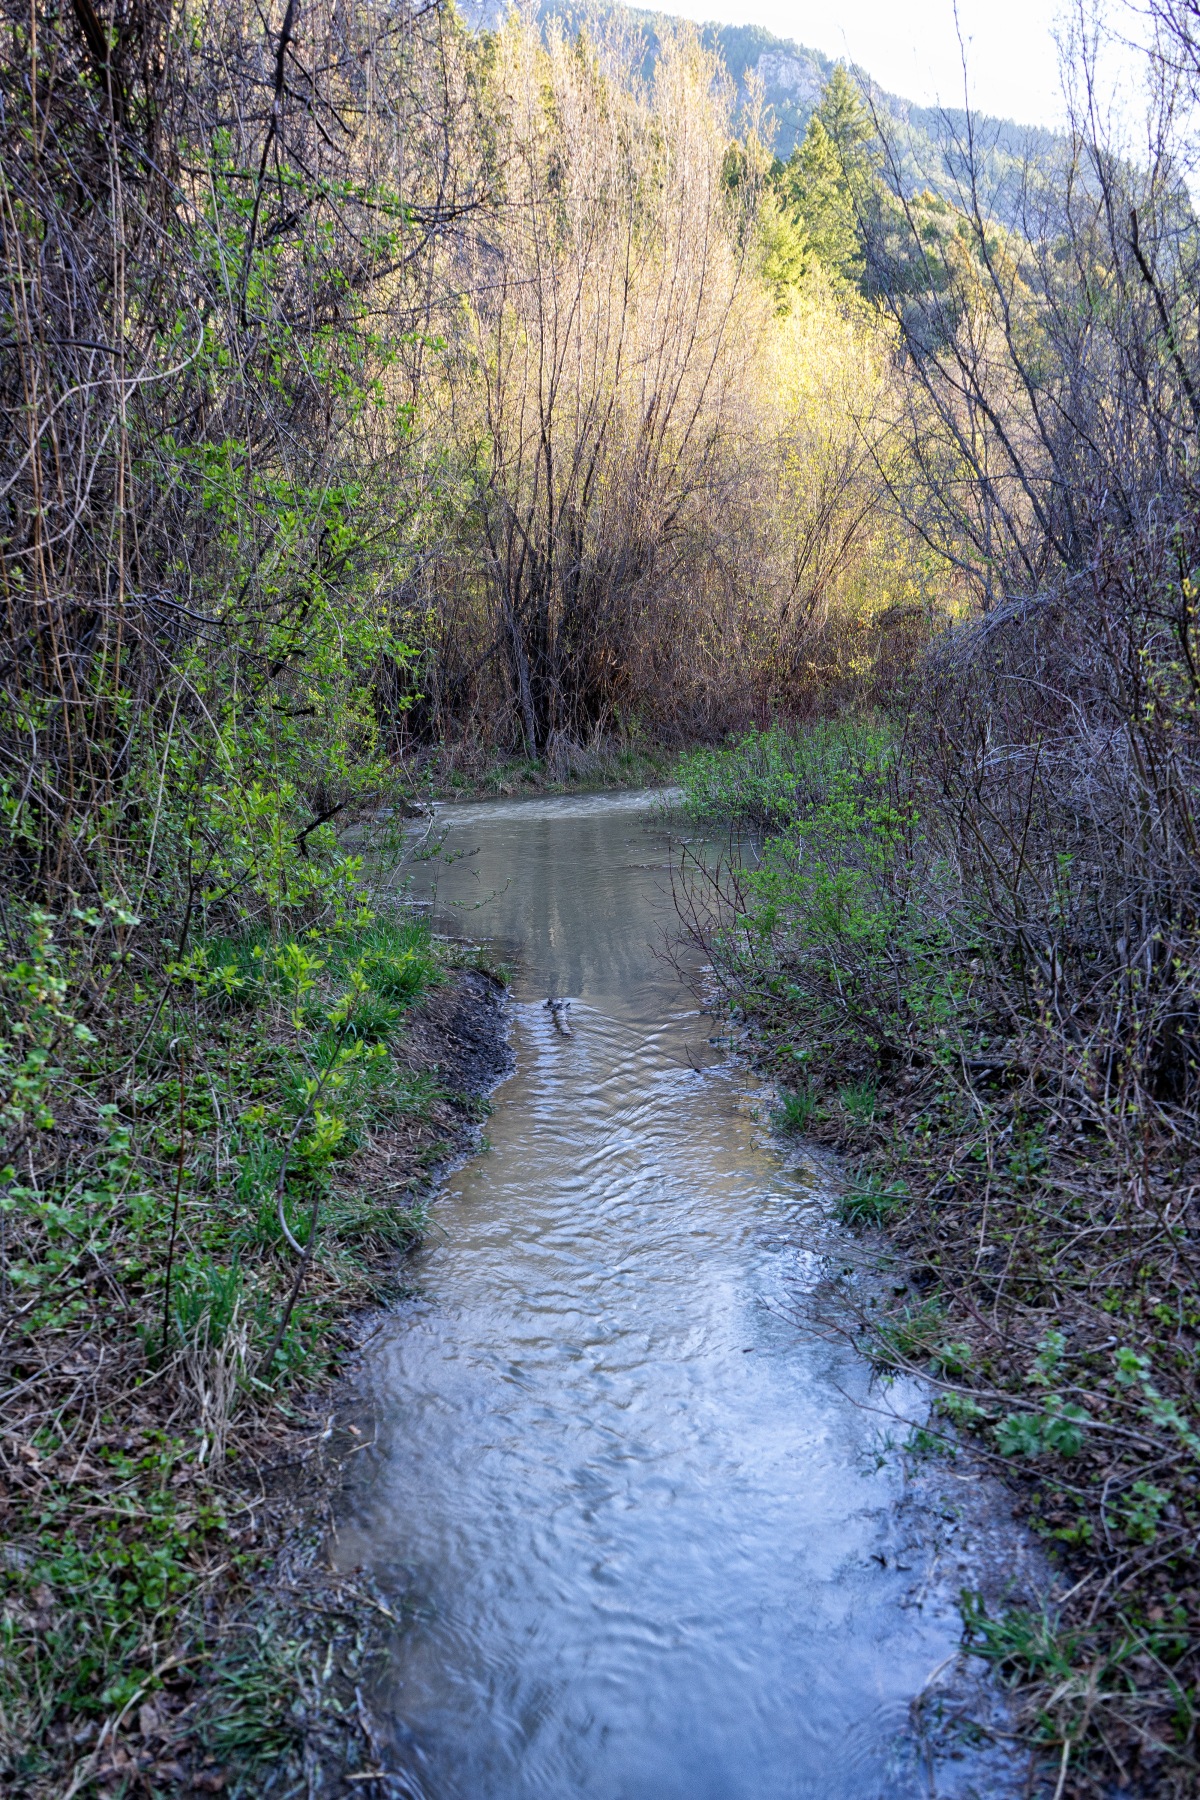
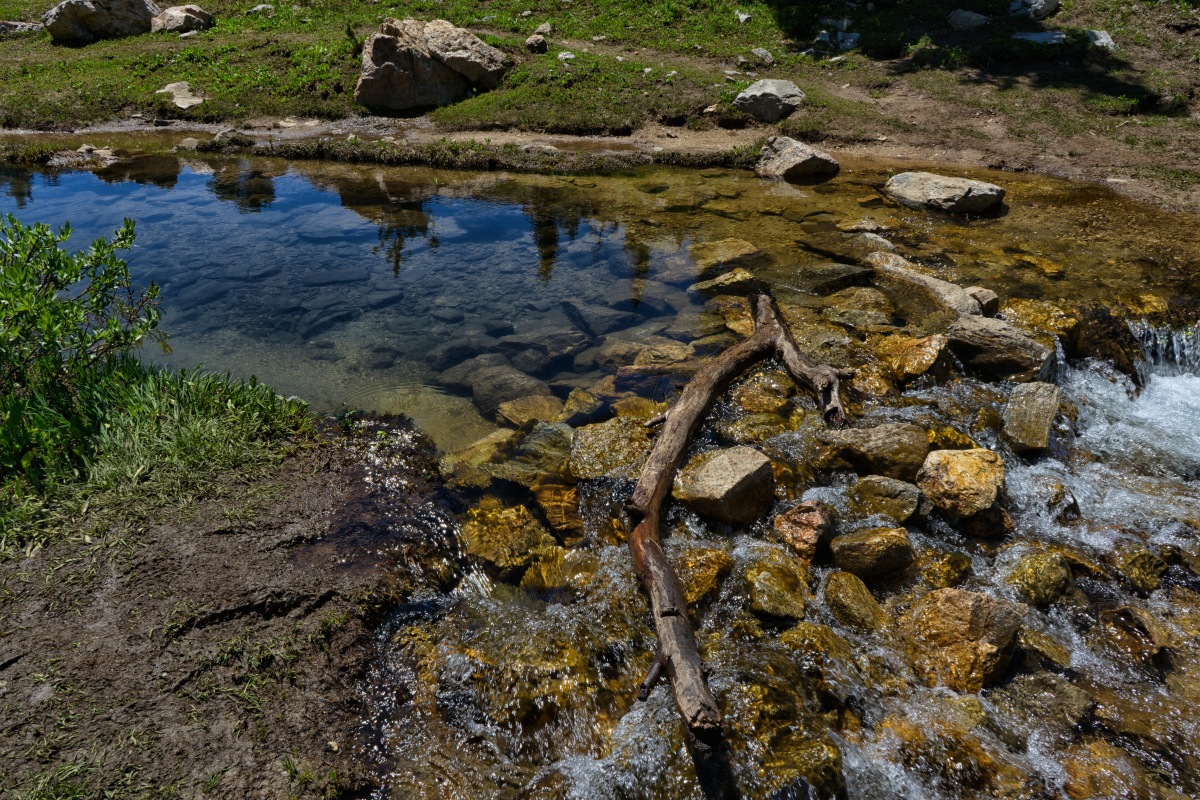
There was still a lot of water in this stream and made it difficult to cross without getting wet. I did not want wet feet so if I thought I couldn’t cross and keep my feet dry I took some time to walk upstream or downstream looking for a better place to cross. In the photo above I wasn’t sure I could cross and stay dry so I walked upstream a ways.

AlaskaBasinTrailHike21
Photo by: Marc Bowen

This (above photo) is what it looked like up-stream. Very pretty! but the water was moving too fast and the rocks were too slick to be hopping around on. Downstream wasn’t much better so I figured that where the trail crossed was still the best option. Using my trekking poles and planning each step, I made it across without getting my boots wet.

This whole end of the canyon was just stunning! Lots of rock formations and waterfalls.

AlaskaBasinTrailHike22
Photo by: Marc Bowen

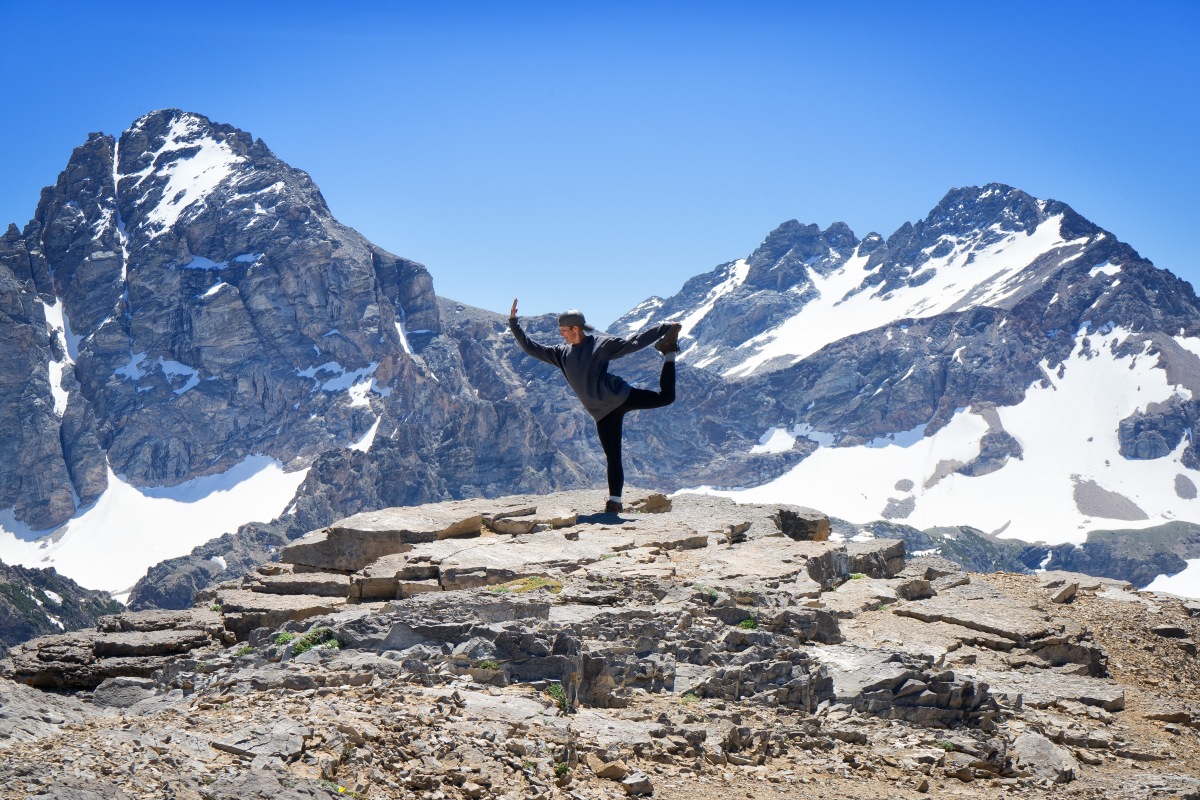
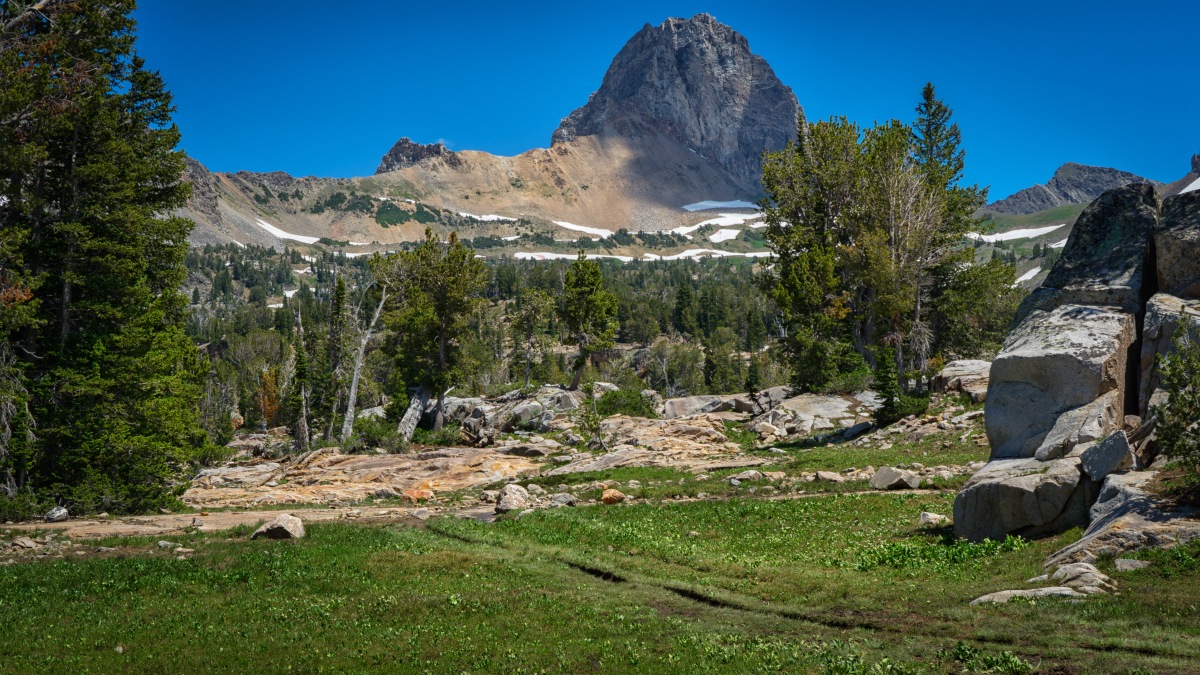
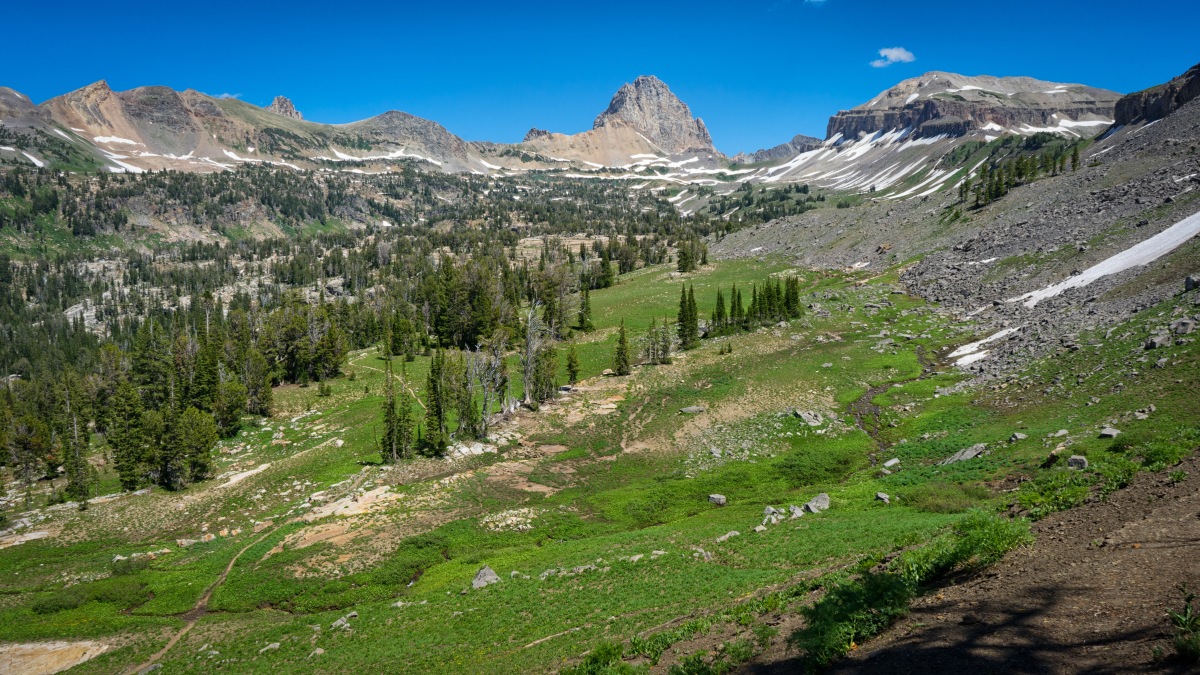
At eight miles I reached the top of the climb and as I entered the Alaska Basin area a stunningly beautiful view of the basin unfolded before me. Buck Mountain ( elevation 11,938) was just ahead to the left and is the most prominent peak in this area. Peak #11094 (un-named) is on the right.

AlaskaBasinTrailHike23
Photo by: Marc Bowen

Here the Alaska Basin trail or Teton Creek Trail becomes the Teton Crest Trail. It took me six hours to get to this point mostly because I stopped a lot along the way to admire the scenery and take a lot of pics but also because I was struggling a little physically.

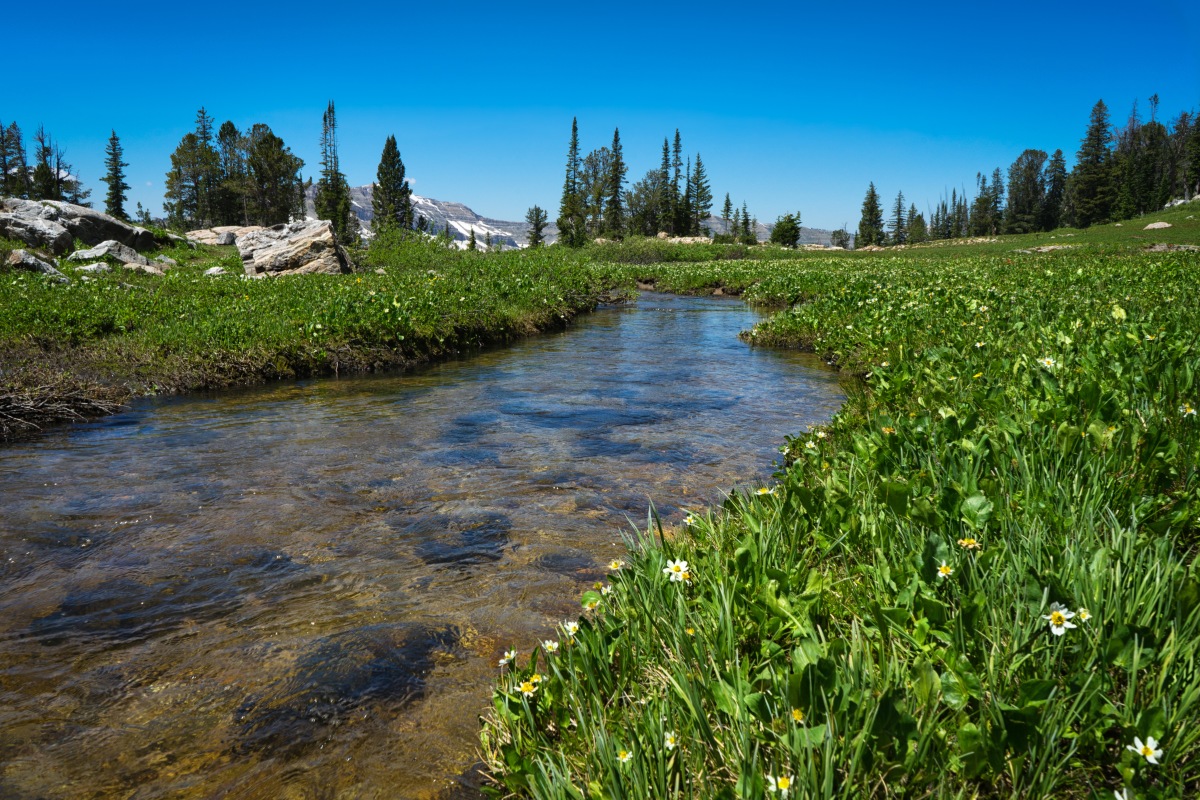
This basin is about 9500 feet in elevation. Probably only been a week, maybe two since the snow melted off. The wild flowers up here have just begun to grow. The air was so clean and crisp and still cool. Smelled great! A slight breeze and the stream were making pleasant sounds as they moved through this meadow.

AlaskaBasinTrailHike24
Photo by: Marc Bowen

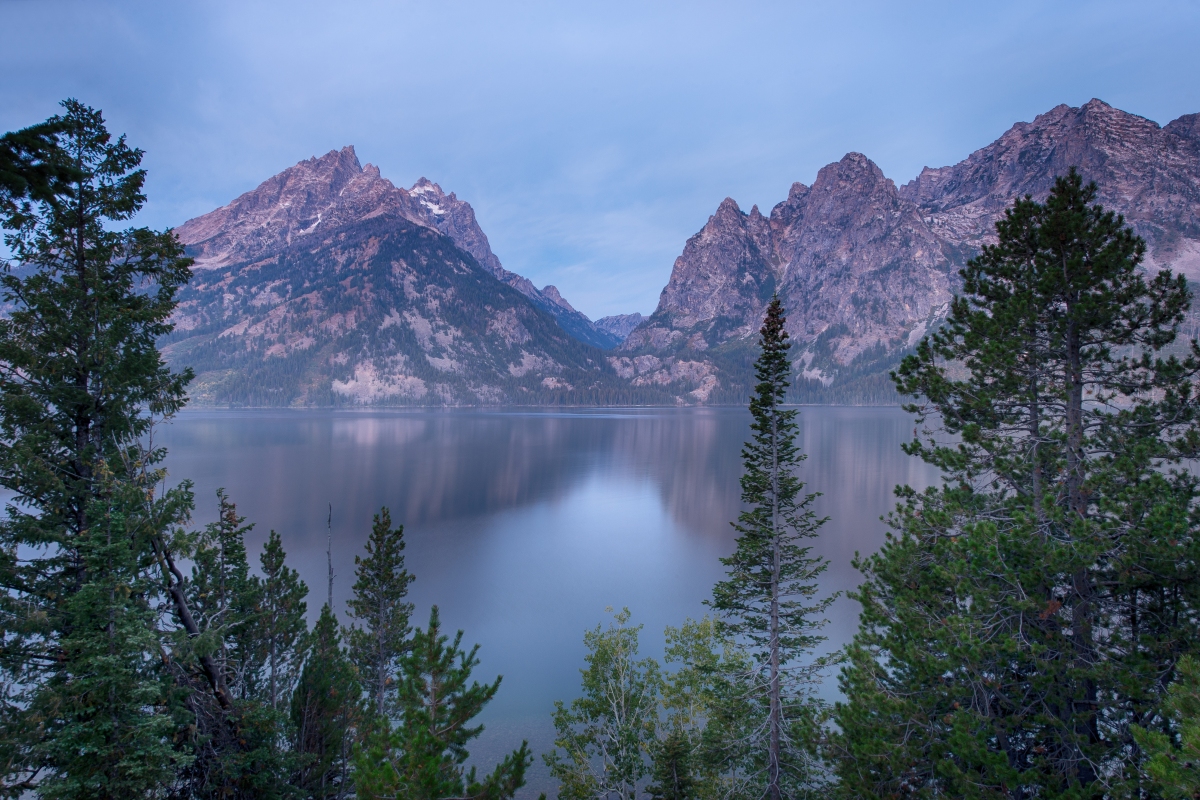
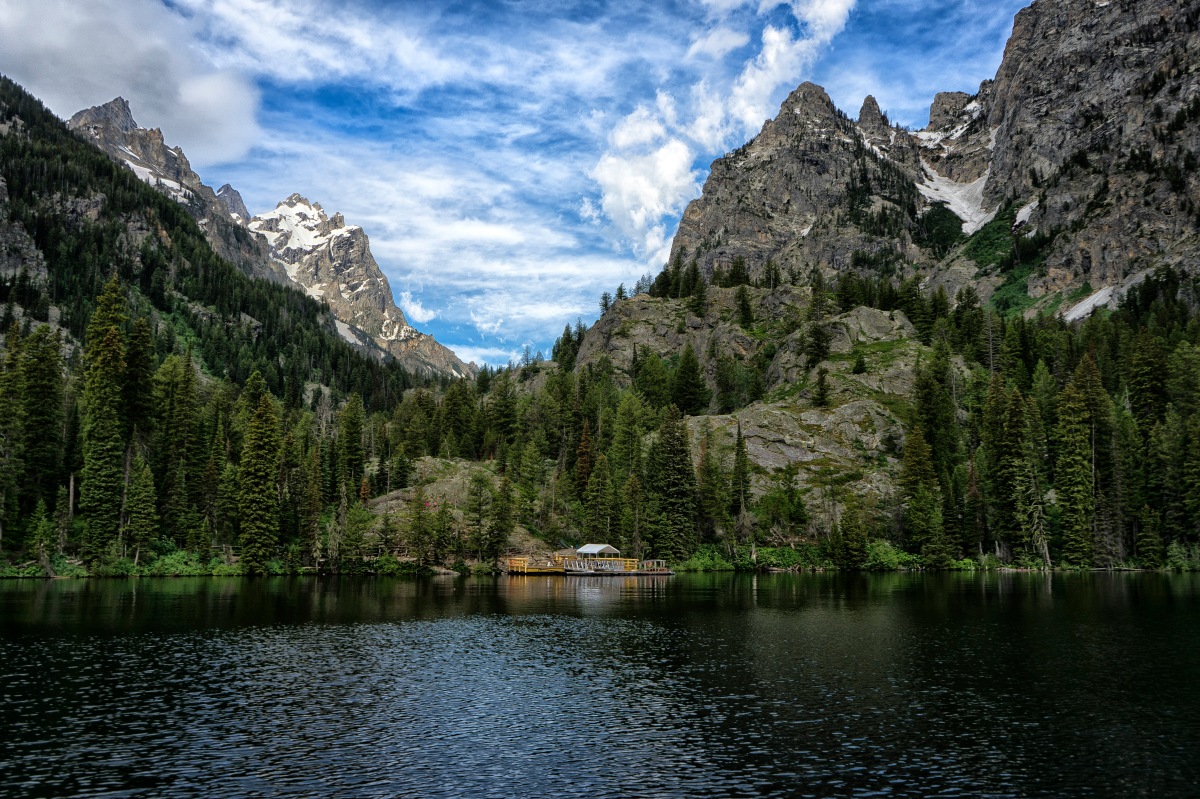
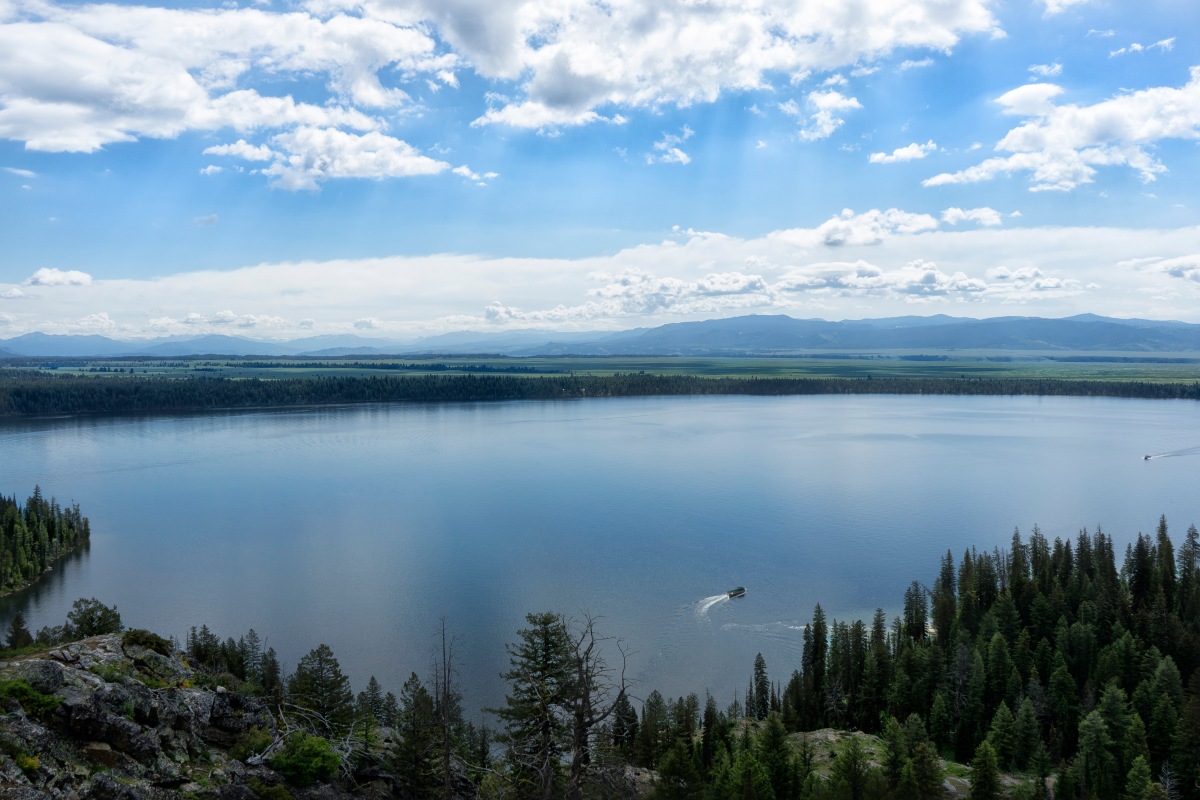
Looking back up the trail (above photo) where it forks and goes over Hurricane Pass and down into Cascade Canyon and Jenny Lake. The Alaska Basin sits on the west slopes of the Teton mountain range and is just on the outside of Grand Teton National Park which means that dogs are allowed to join hikers and you can camp here without a permit.

AlaskaBasinTrailHike25
Photo by: Marc Bowen

Another stream crossing

AlaskaBasinTrailHike26
Photo by: Marc Bowen

It is so beautiful up here in these alpine meadows! Lots of green grass and wildflowers just starting to bloom.

AlaskaBasinTrailHike27
Photo by: Marc Bowen

When I arrived at the Mirror Lake / Meek Pass fork my GPS said I had come 9 miles. At the fork I went left into the Basin Lakes area.

AlaskaBasinTrailHike28
Photo by: Marc Bowen

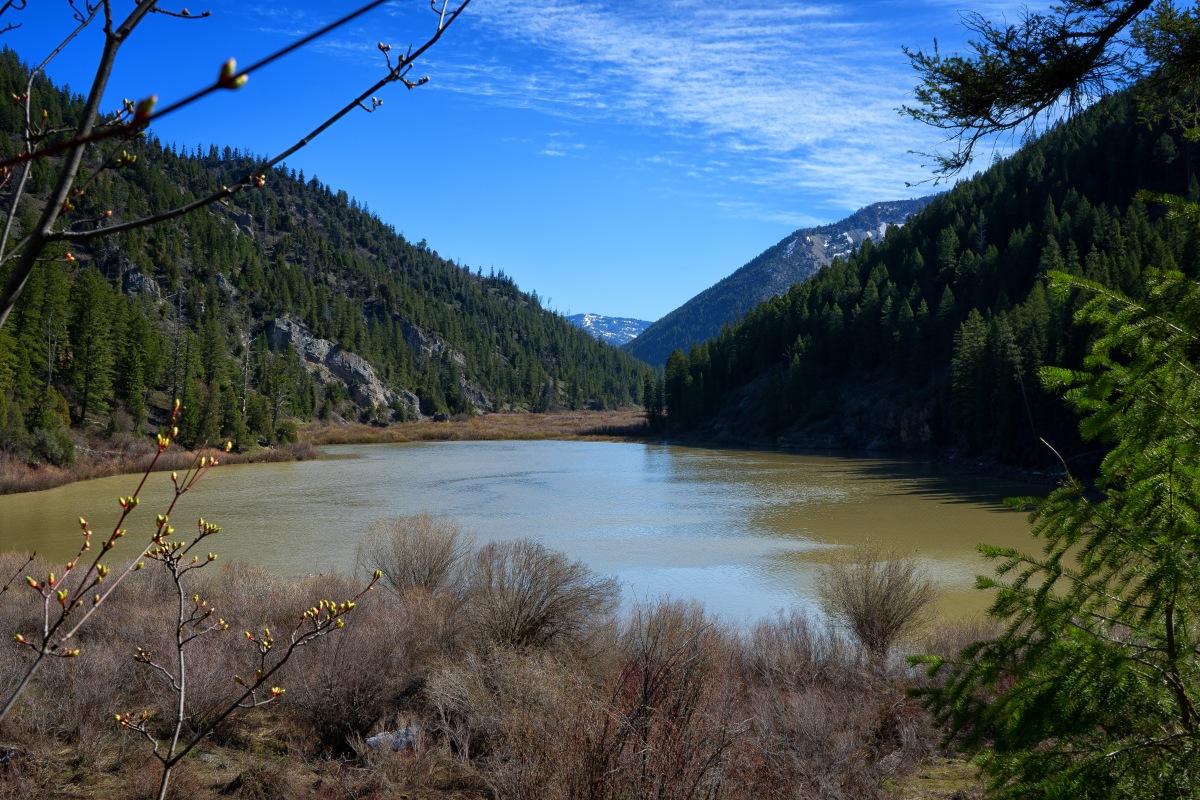
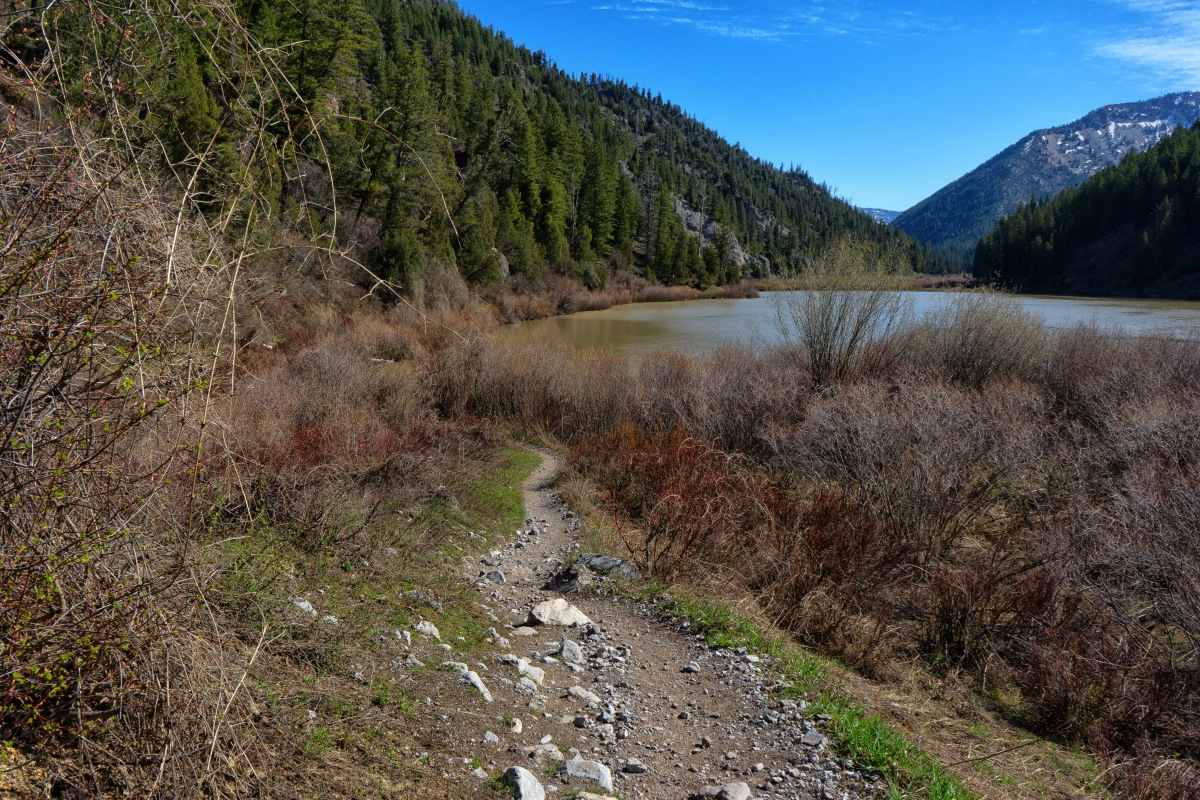
First of the Basin Lakes (above photo). These are just small lakes or ponds. The water wasn’t real clear and a little bit brown in color. Maybe because it was still under ice a few weeks ago.

AlaskaBasinTrailHike29
Photo by: Marc Bowen

The second basin lake is just a few hundred yards away.

AlaskaBasinTrailHike30
Photo by: Marc Bowen

This lake is not much bigger than the first and didn’t impress me much.

AlaskaBasinTrailHike31
Photo by: Marc Bowen

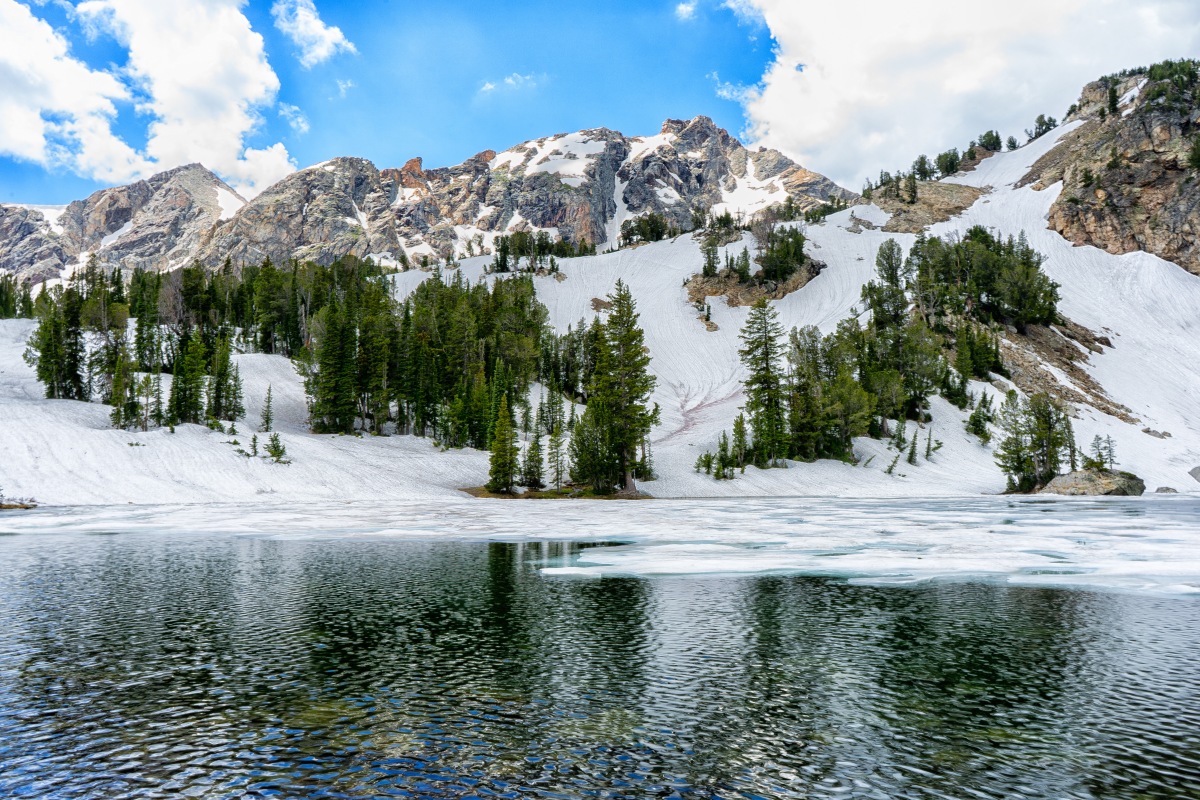
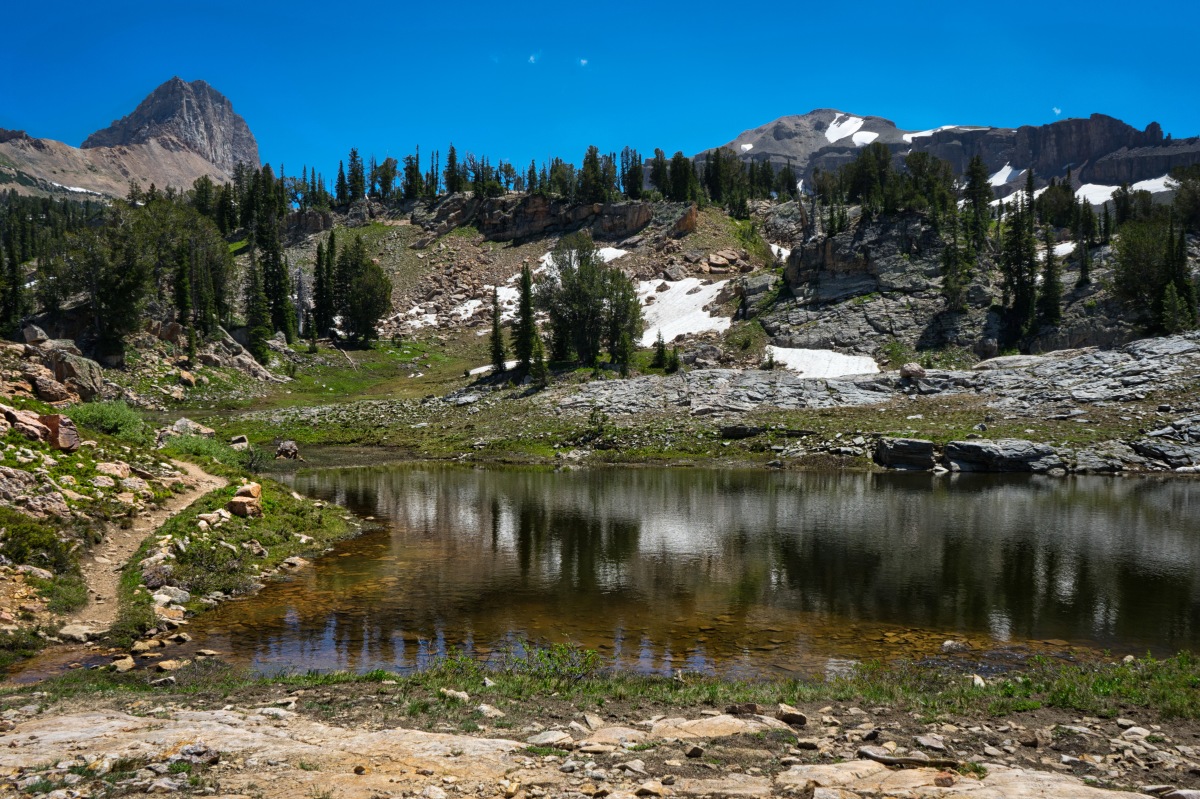
Just over a low ridge from the basin lakes is Mirror Lake (above photo). It was more of a blue/green in color and beautiful. There was a little bit of a breeze otherwise a great reflection would have shown why its called Mirror Lake. Mt. Meek can be seen a few miles away on the other side of the lake to the far right of the ridge.

AlaskaBasinTrailHike32
Photo by: Marc Bowen

I ate lunch, rested, scouted possible future camp-sites and then headed back out to the Teton Crest Trail. There is another lake just down that trail with two small islands on it.

AlaskaBasinTrailHike33
Photo by: Marc Bowen

It was at this point that I made the decision to continue southwest on the Teton Crest Trail and connect eventually with the Teton Shelf trail. I wanted to finish the loop rather than retrace my steps down the canyon. Hiking the loop would require me to climb to almost 10,000 feet before heading down the shelf. I wasn’t looking forward to any more climbing. My legs were telling me NO WAY. But heading back down the steep canyon trail would be just about as hard on my legs (especially my joints) as climbing up the trail and the shelf trail is a nice gradual descent with the exception of Devil’s Stairs. BESIDES… If given the choice I prefer to return by a different route whenever possible so I can see different country.

AlaskaBasinTrailHike34
Photo by: Marc Bowen

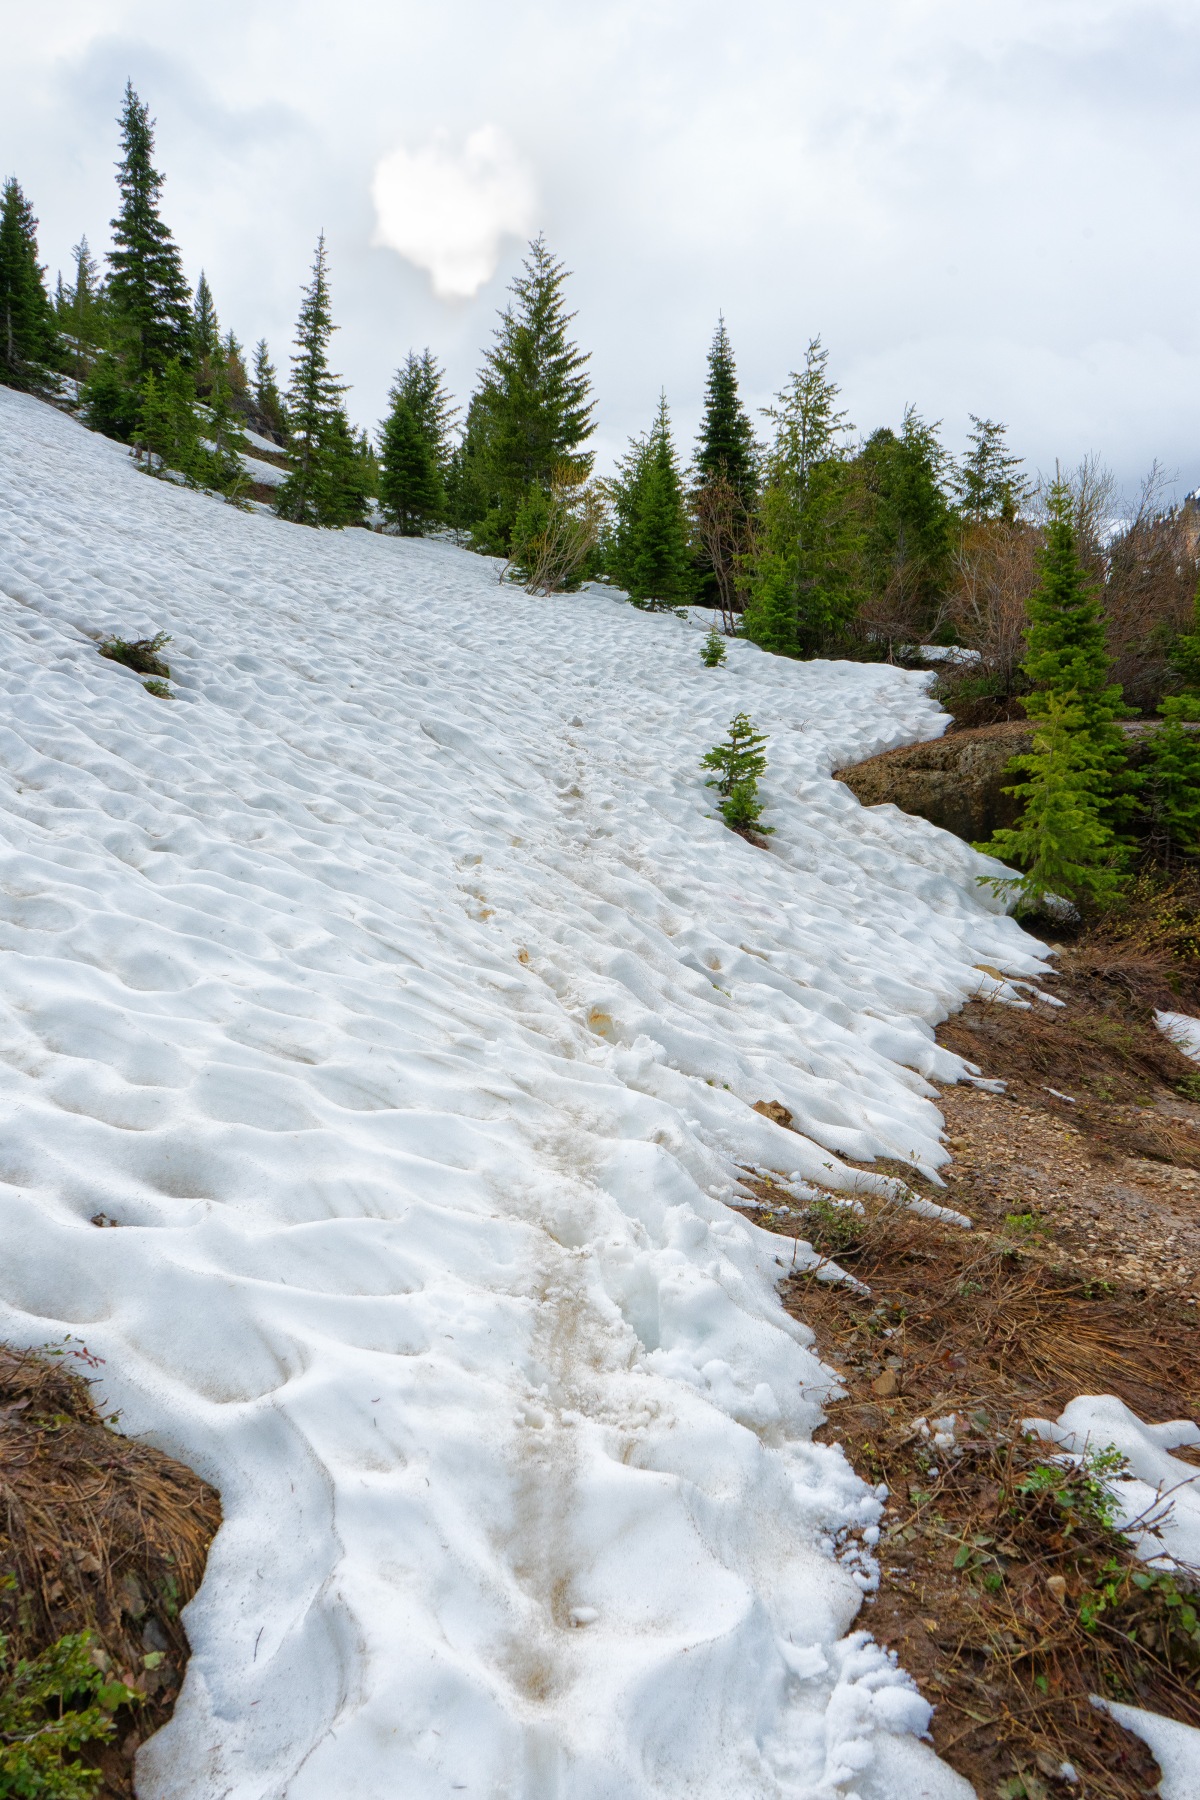
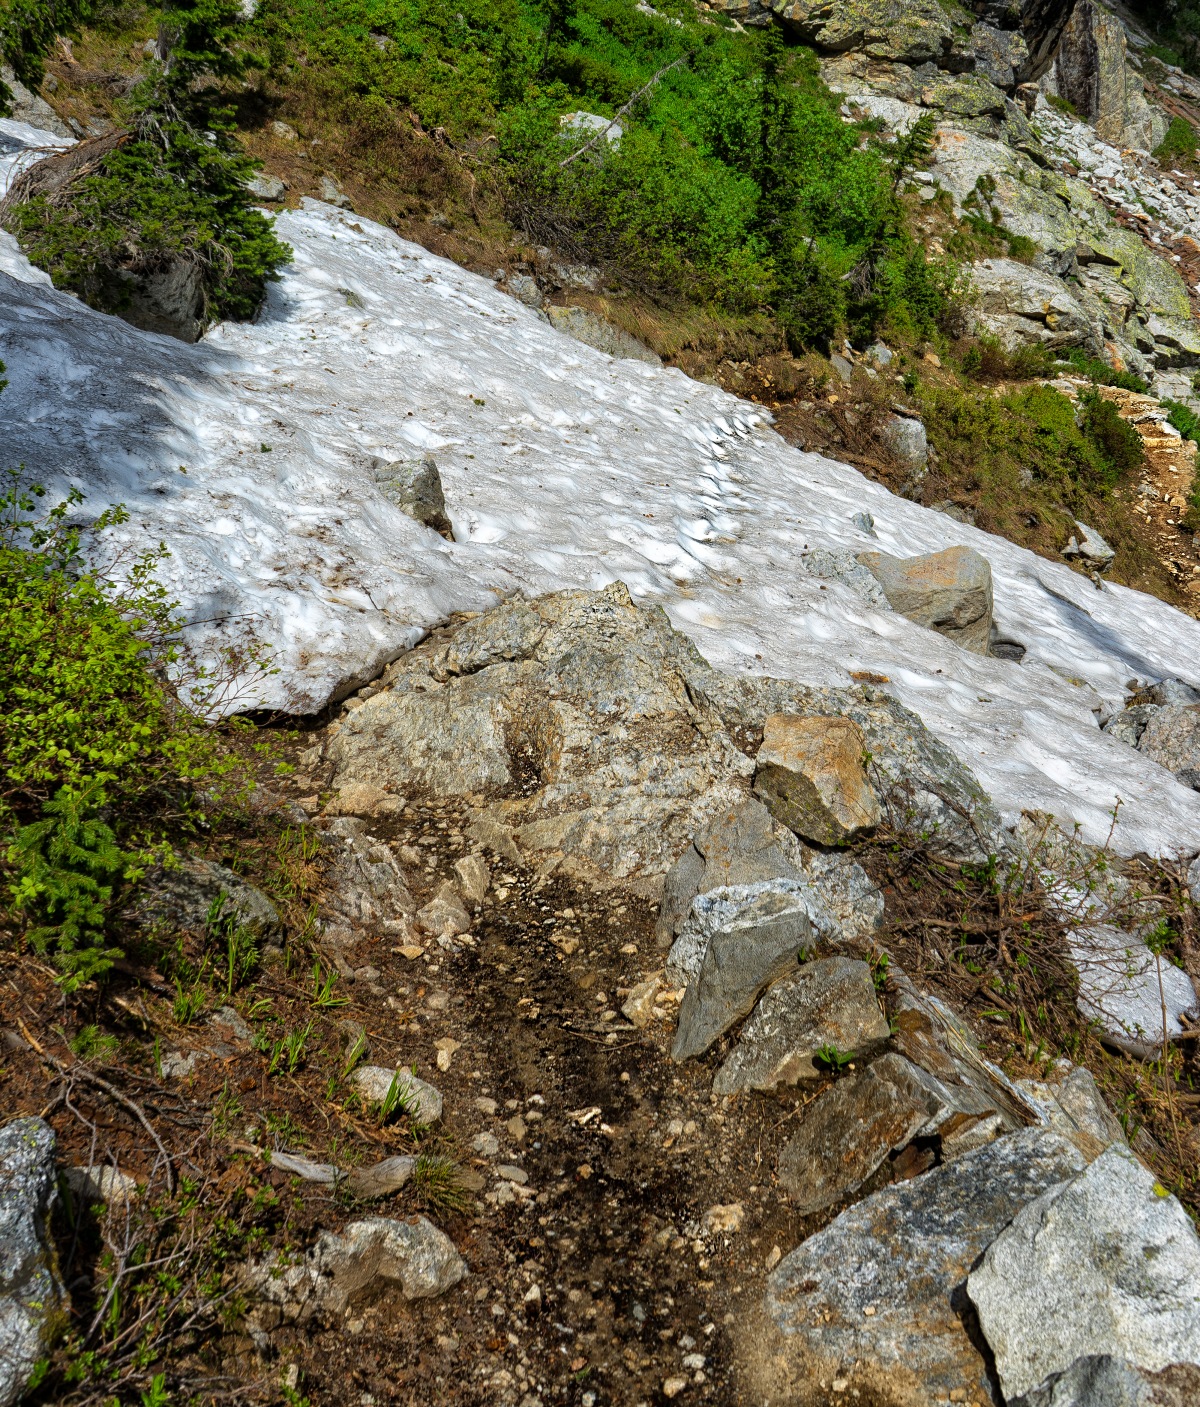
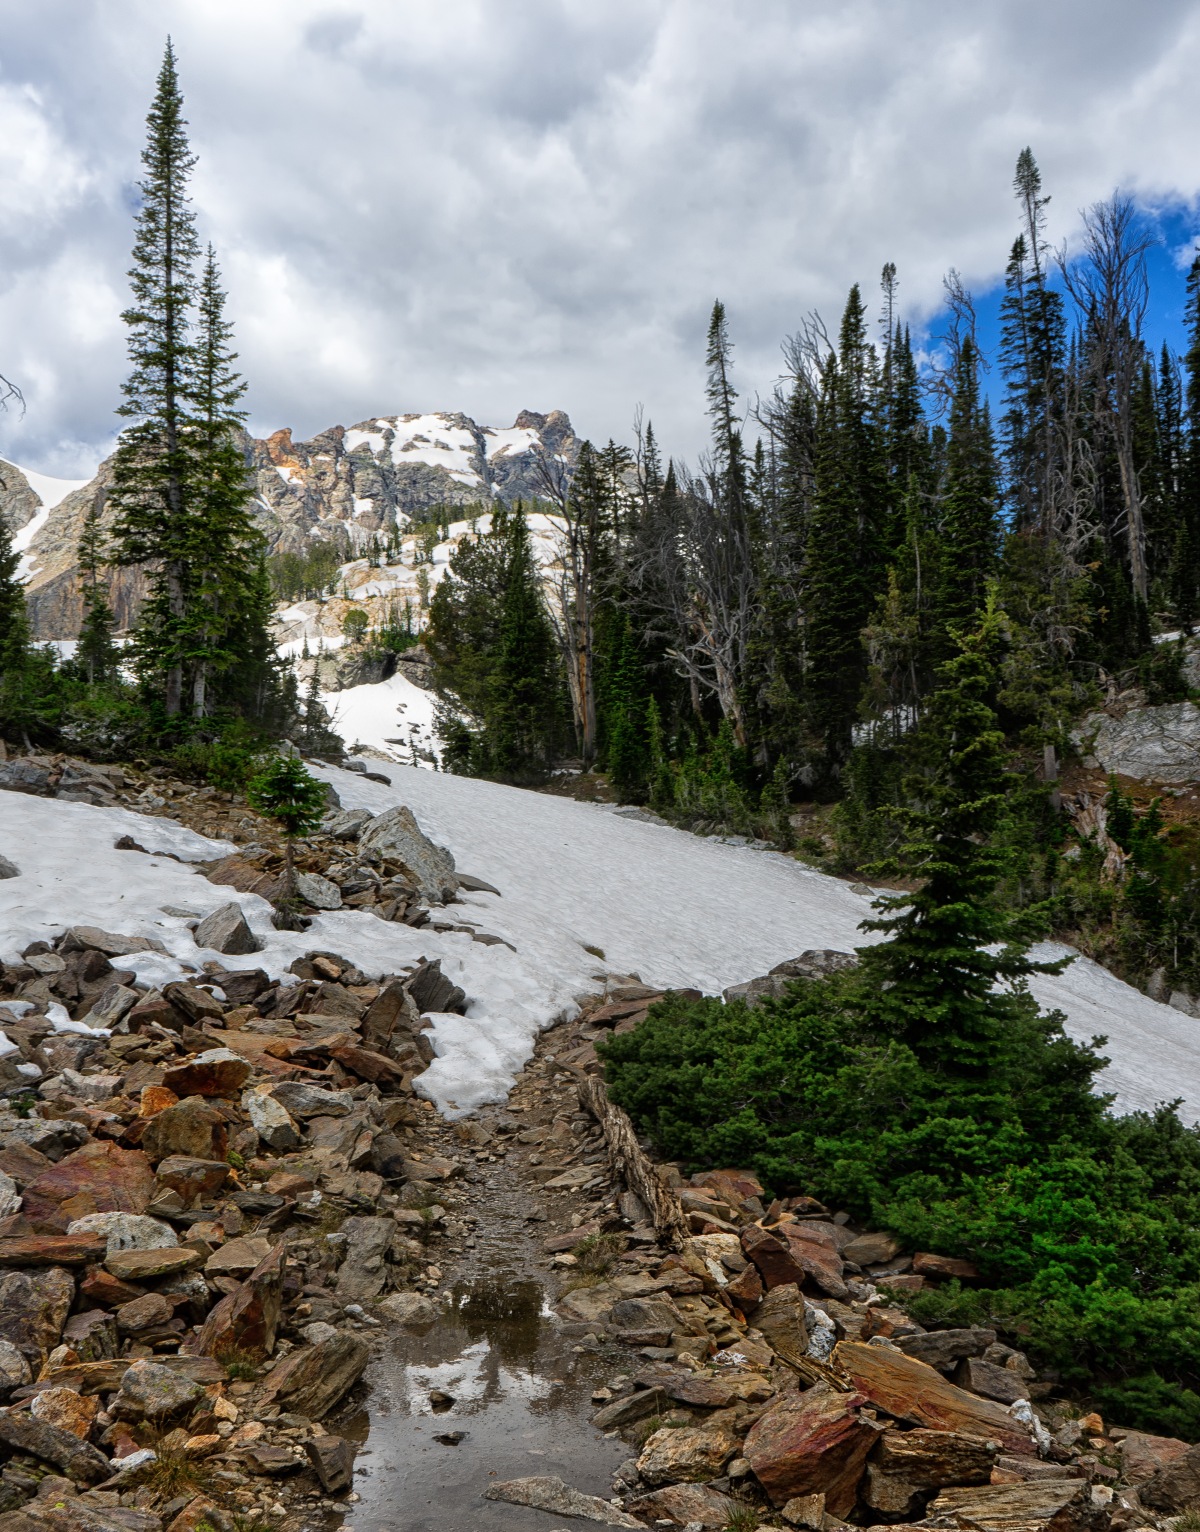
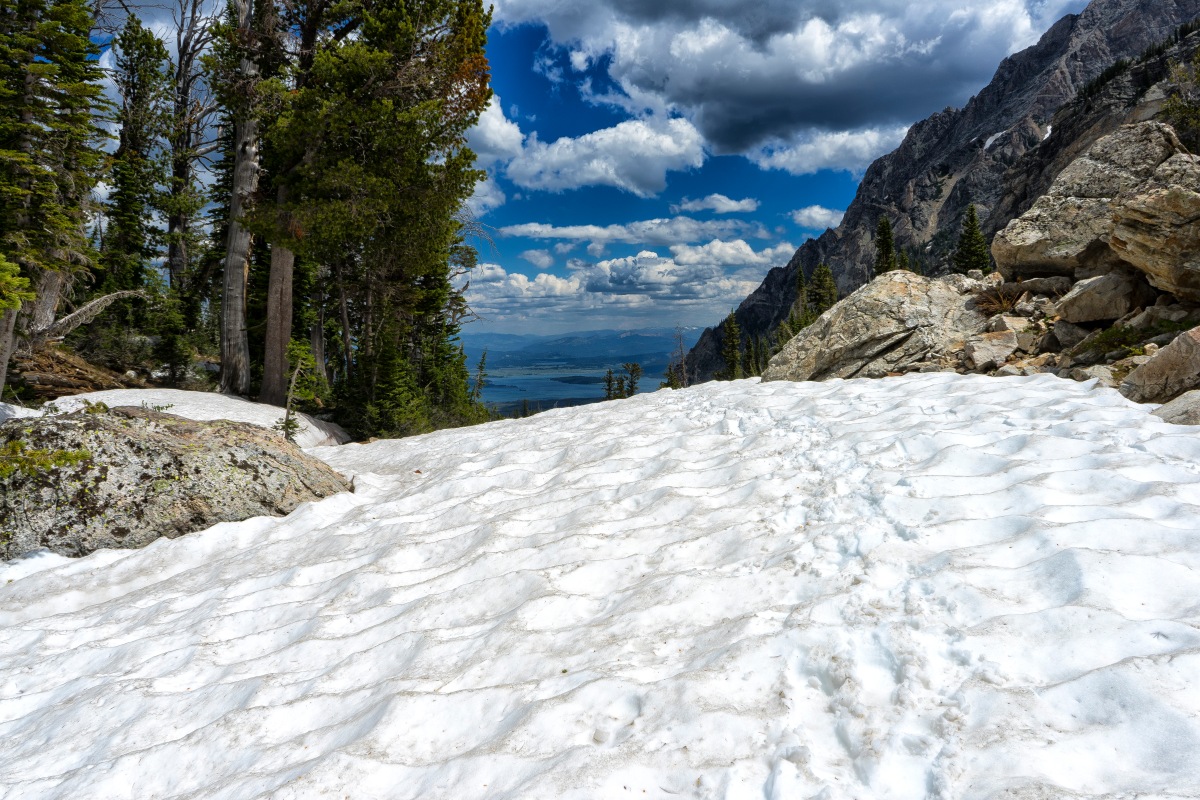
Still patches of snow through here.

AlaskaBasinTrailHike35
Photo by: Marc Bowen

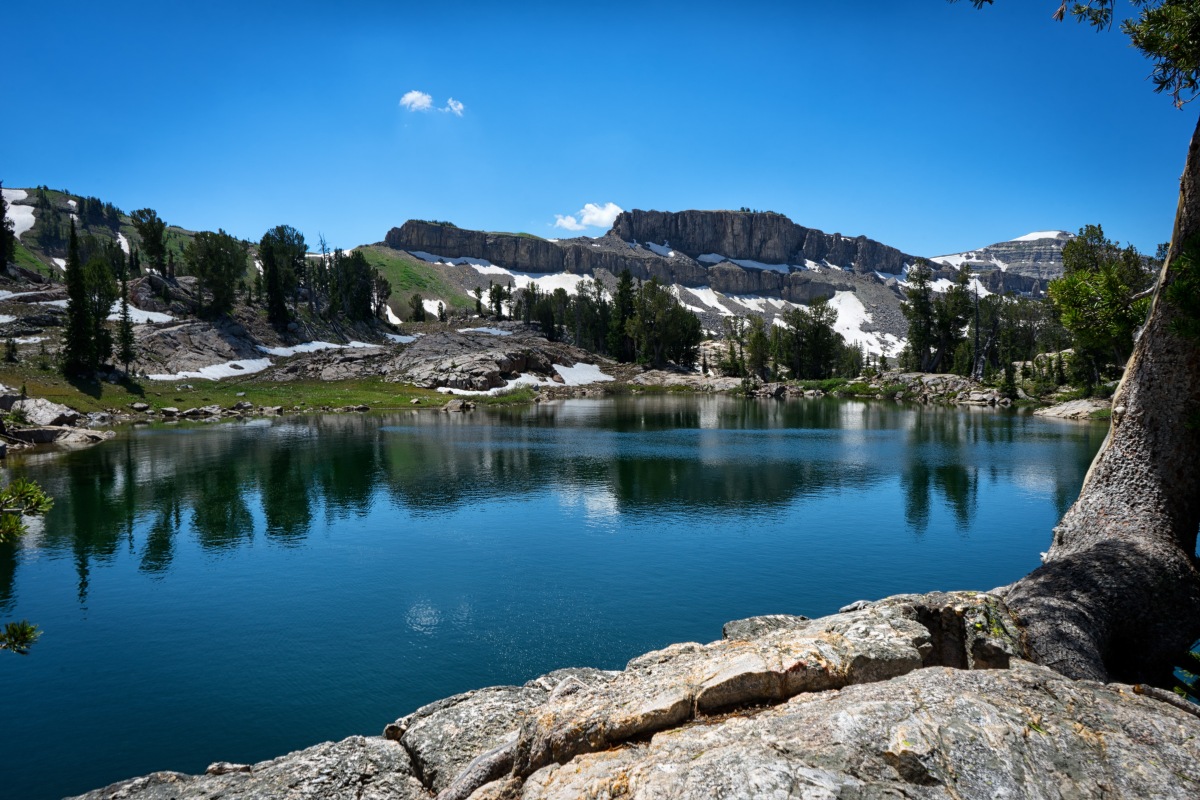
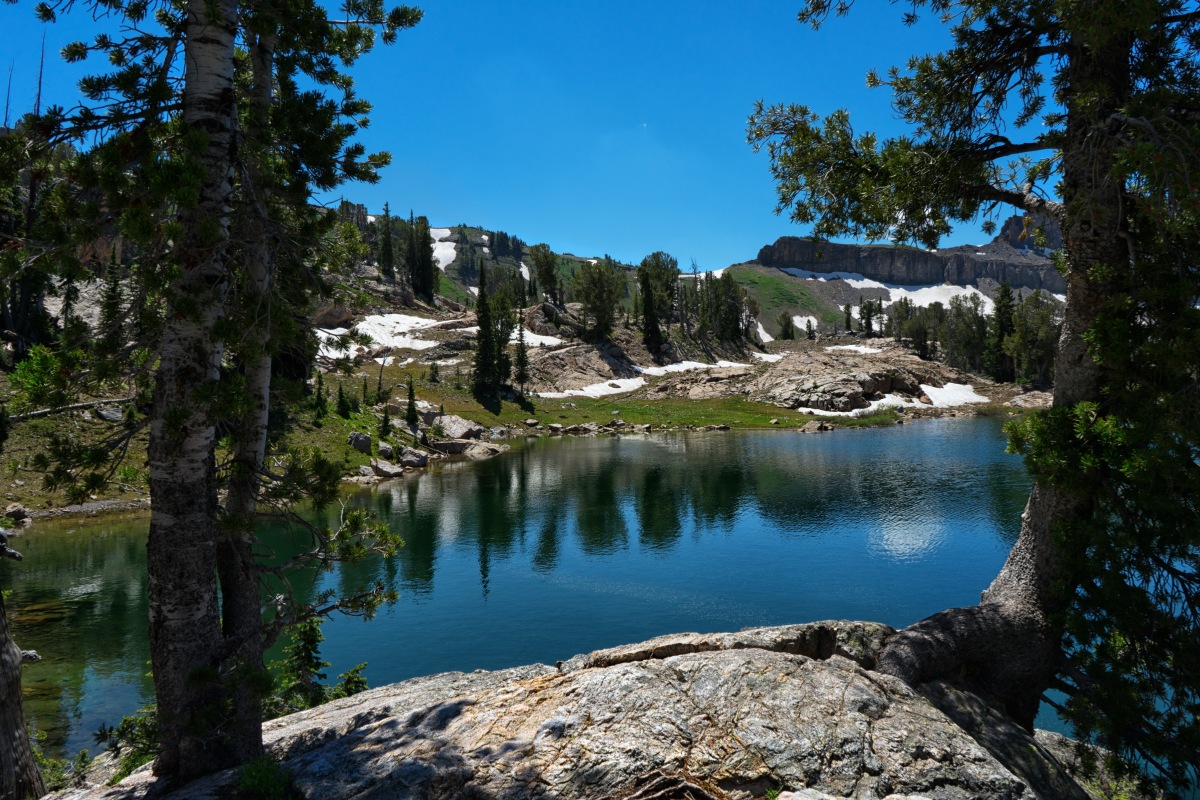
(above photo) The last of the Basin Lakes and this one’s a beauty!

AlaskaBasinTrailHike36
Photo by: Marc Bowen

From here another stunning view of Buck Mountain (elev. 11,939) looming over the basin.

Still no service on my phone at this point. Would have liked to notify my wife that I would be taking a different route back. Surprisingly there are a lot of places in the Tetons that I have had decent reception and have received phone calls, some at high altitude. Mostly the east side of the Teton range though. By this time it was after 4:00pm and I knew it might be pushing dark before I got back to my car.

AlaskaBasinTrailHike37
Photo by: Marc Bowen

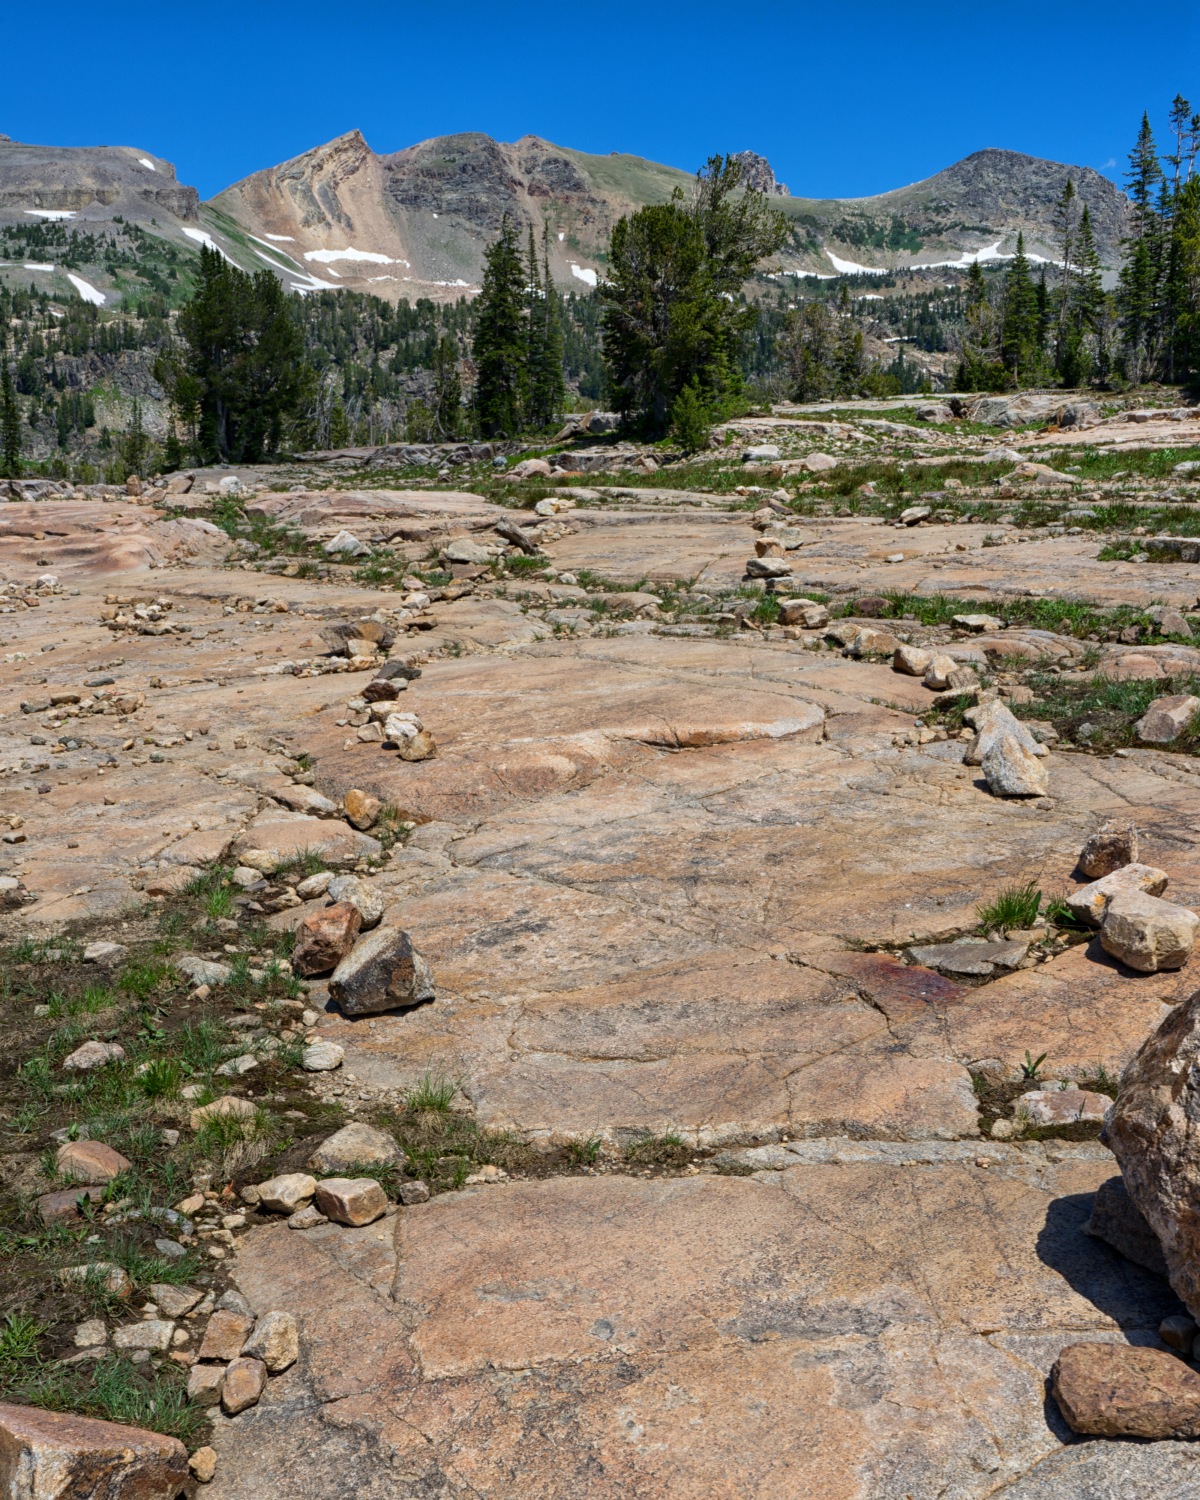
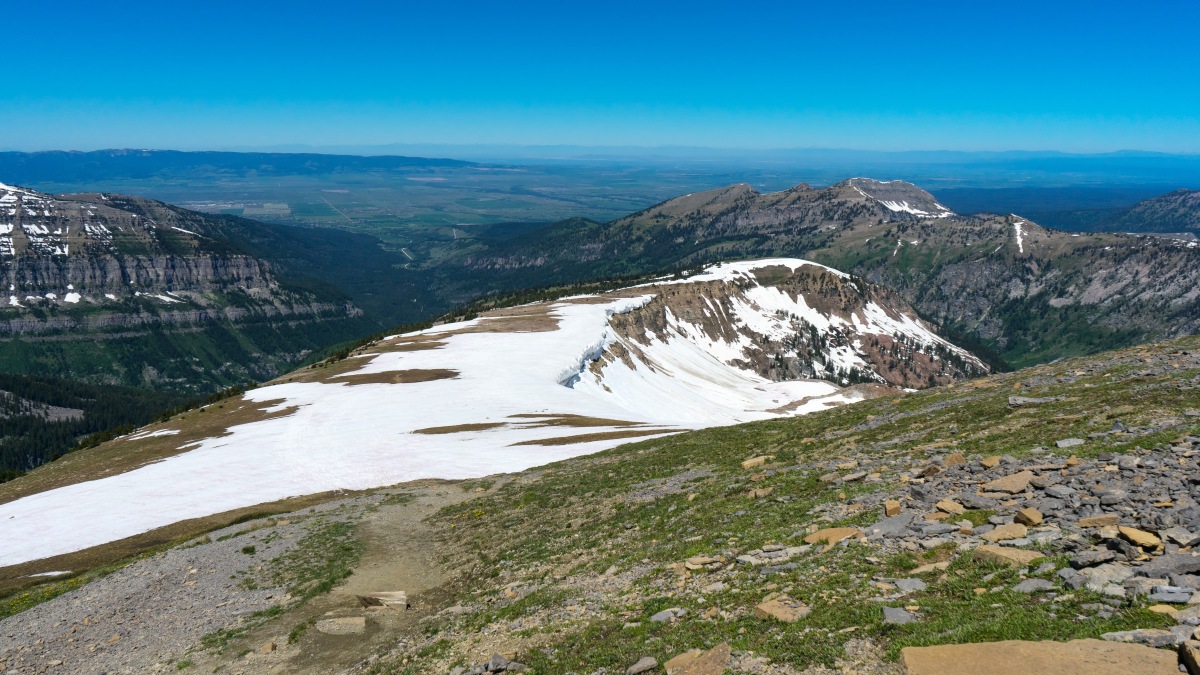
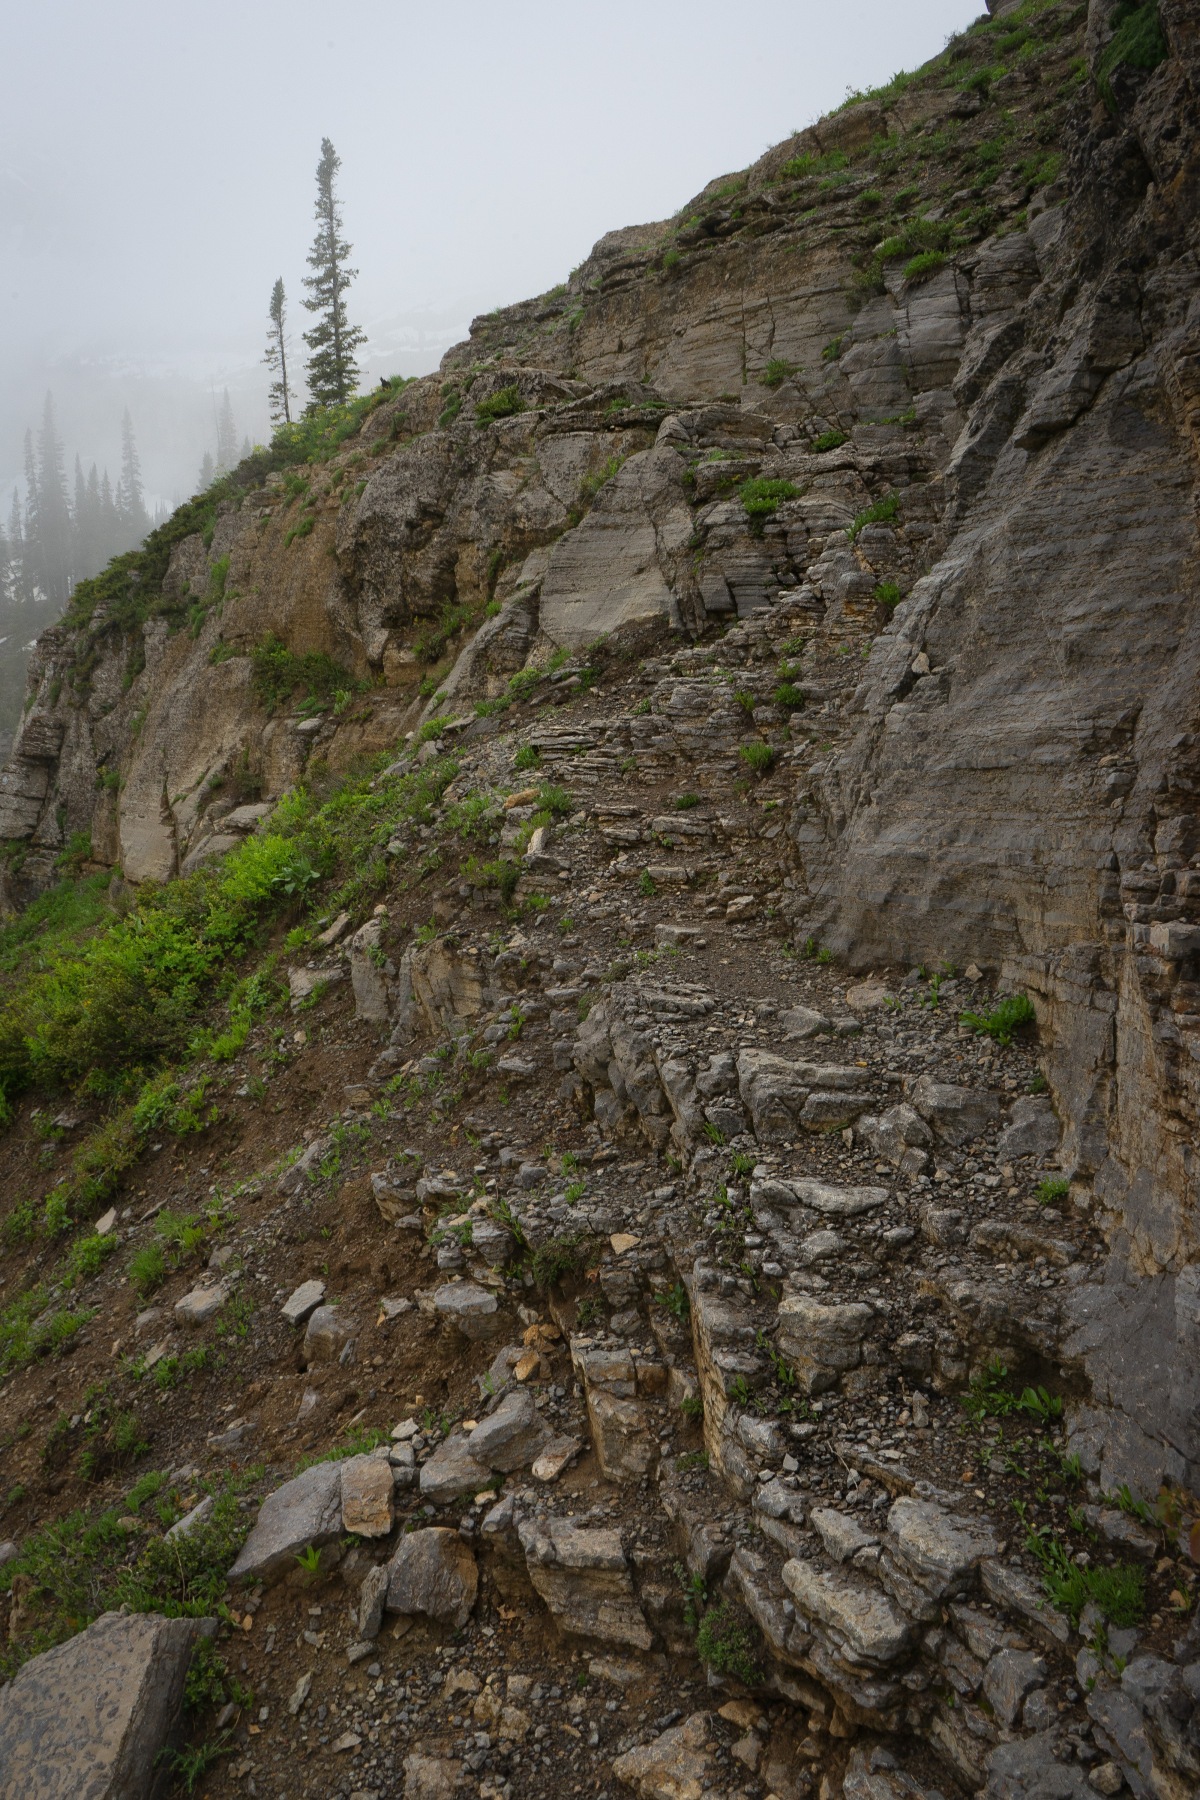
Looking back down the trail (above photo). In this area the ground is almost all rock and there would be no indication of a trail except for the smaller rocks outlining the path.

AlaskaBasinTrailHike38
Photo by: Marc Bowen

The trail (above) crosses another area of flat rock and then turns right and heads down the slope to cross the head waters of Teton Creek. Normally this wouldn’t be too much trouble to cross. But today the stream was overflowing with snow melt. Where the trail disappeared under the water the stream was very wide but not very deep. I watched two hikers take their boots off and carefully and painfully wade across. Then dry their feet the best they could before quickly putting boots and socks back on. If I’d had more time I might have done the same but also taken the time to let my feet completely dry before putting any foot-gear back on. I knew I had about eight more miles of hiking to do and my feet were already tired and a little sore. Wet feet would make things a lot worse.

So I ranged down the stream a ways looking for other possible crossings. But the stream became narrower, deeper and faster as it lost altitude. I did find a spot where I thought about taking a running leap over the stream but worried I wouldn’t make it with the weight of my backpack. I measured off what I thought the width of the stream was at this point and did a couple of practice jumps, but staggered badly whenever I landed.  I probably would have resorted to throwing my pack over to the other side of the stream first if I didn’t have a camera and gear strapped to it. There was a good-sized rock on my side that I could run and launch from and hopefully land on a flat rock on the other side. Hanging over that rock was a stand of willows that I hoped would break my fall if I fell or overshot the rock. I eventually jumped over the stream into the willows on the other side and fell into them with a bad cramp in my calf but didn’t get wet or break anything. Should have taken a photo but was so preoccupied trying to get across that I forgot.

AlaskaBasinTrailHike39
Photo by: Marc Bowen

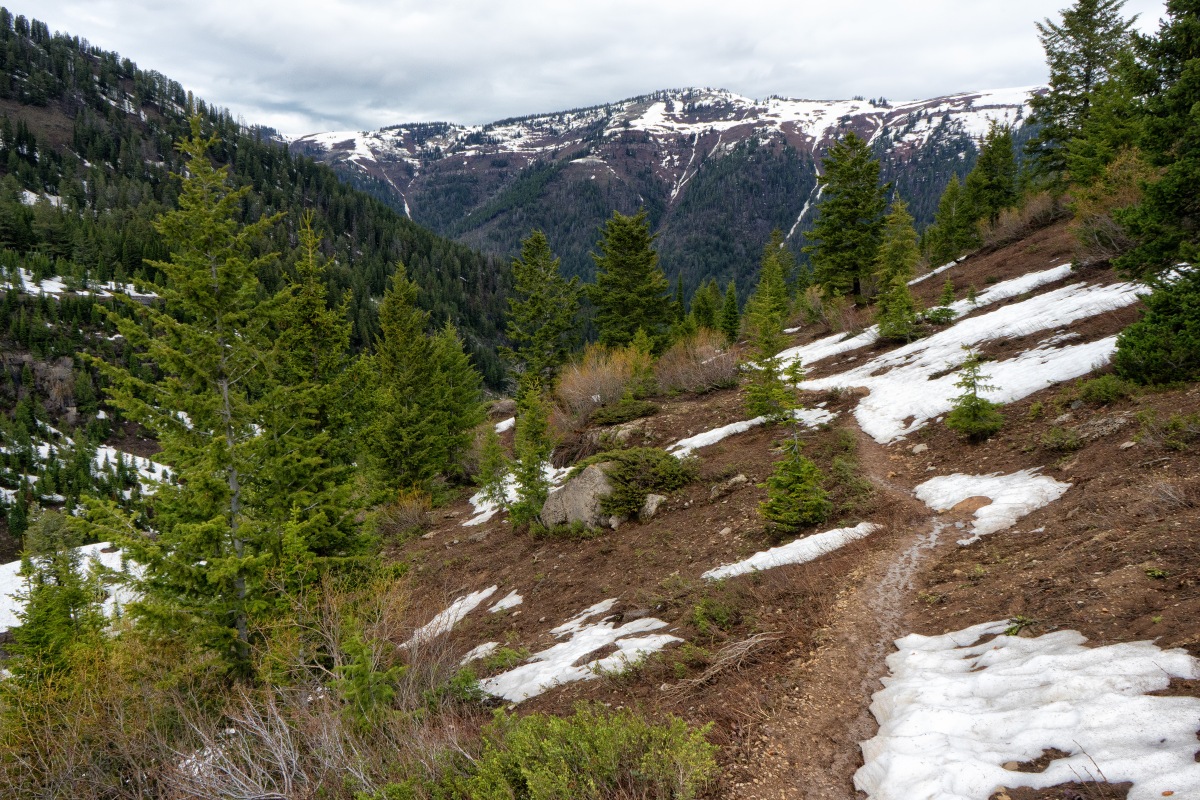
After crossing the stream the trail begins a gradual climb with views of Teton Canyon.

AlaskaBasinTrailHike40
Photo by: Marc Bowen – Battleship Mountain

(Above photo) Battleship Mountain to my right across Teton Canyon.

AlaskaBasinTrailHike41
Photo by: Marc Bowen

(above) Looking back down the trail toward the Alaska Basin and Buck Mountain.

AlaskaBasinTrailHike43
Photo by: Marc Bowen

Just up ahead (above photo) the trail begins to switch-back up a 400 foot ridge toward Mt. Meek Pass.

AlaskaBasinTrailHike42
Photo by: Marc Bowen – Teton Shelf

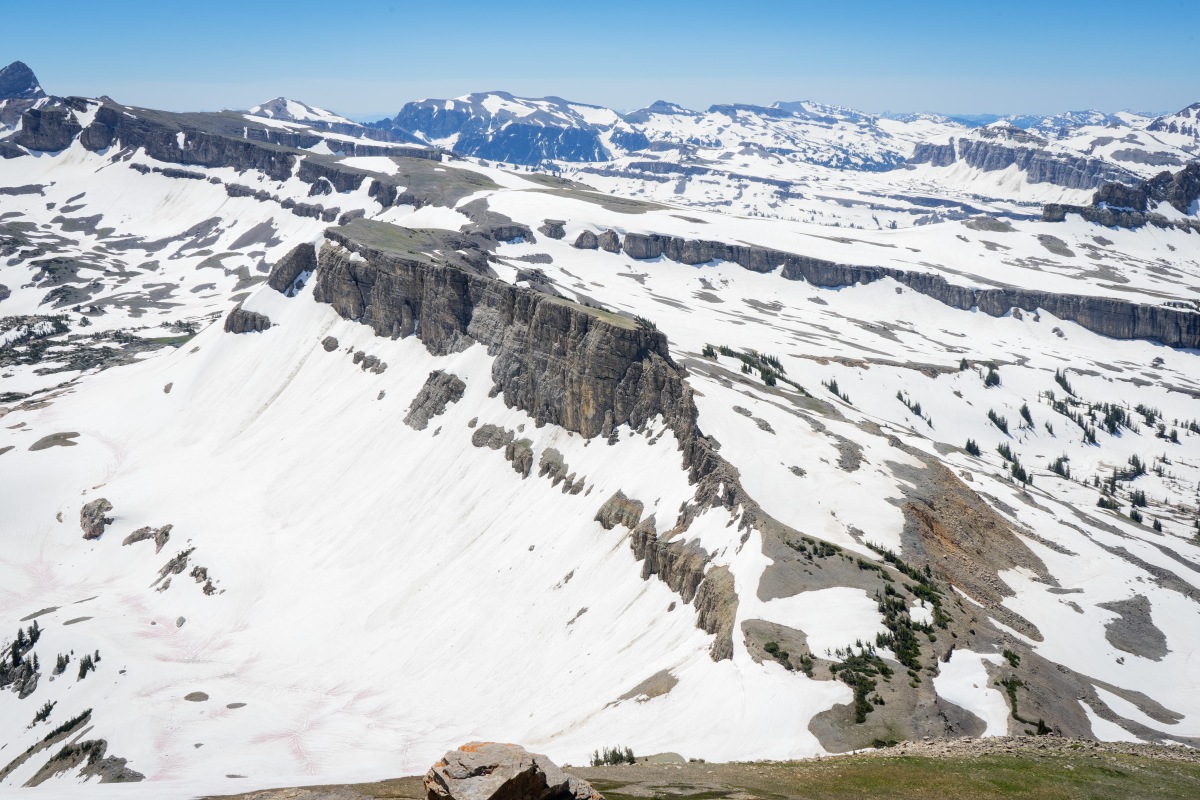
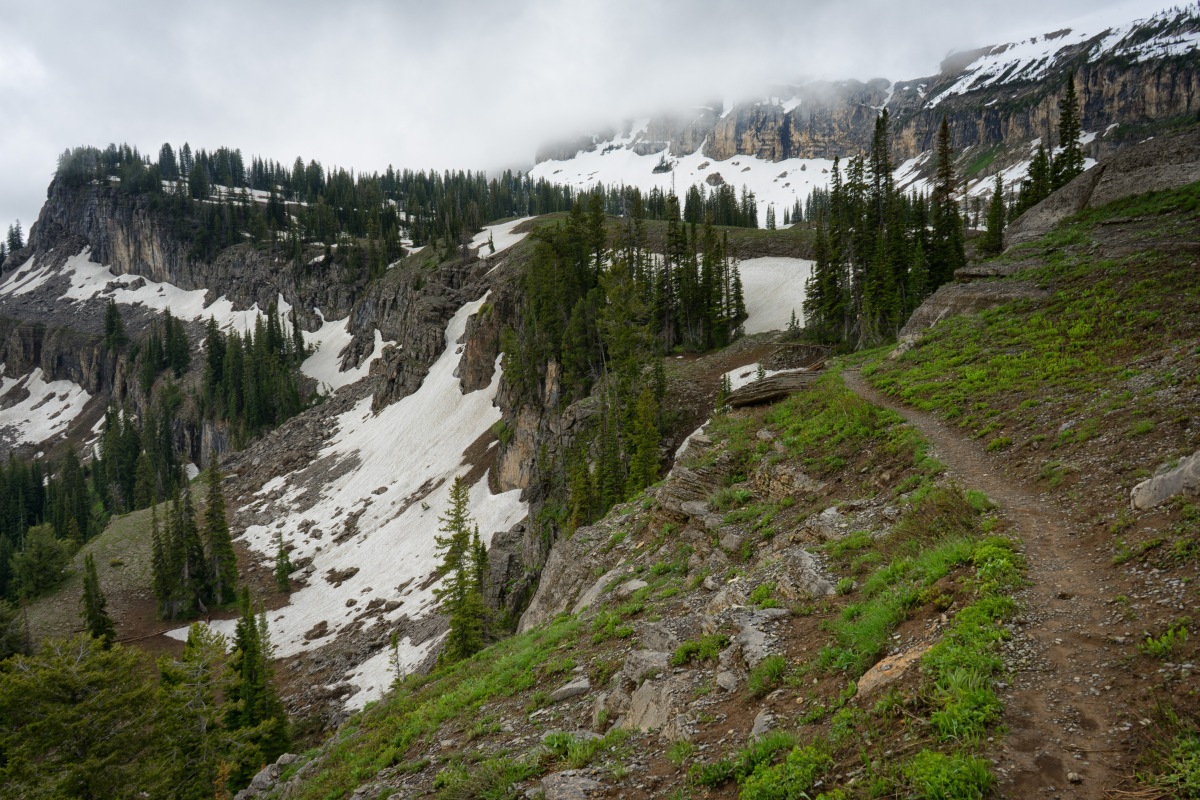
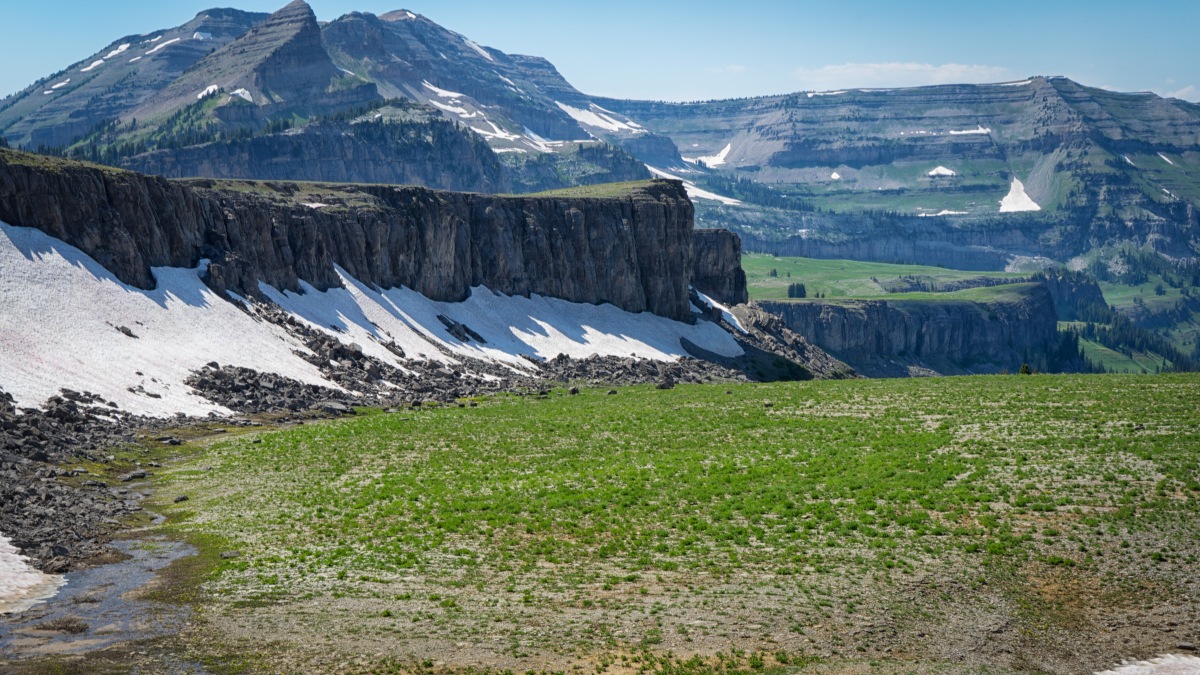
From the bend in the first switch-back. A view (above photo) of The Wedge on the far left. The line of cliffs across the middle of the scene is the edge of the Teton Shelf.

AlaskaBasinTrailHike44
Photo by: Marc Bowen – Alaska Basin

(above) About halfway up the ridge looking back at Buck Mountain. The trail I’m on can be seen below coming from the basin.

AlaskaBasinTrailHike45
Photo by: Marc Bowen

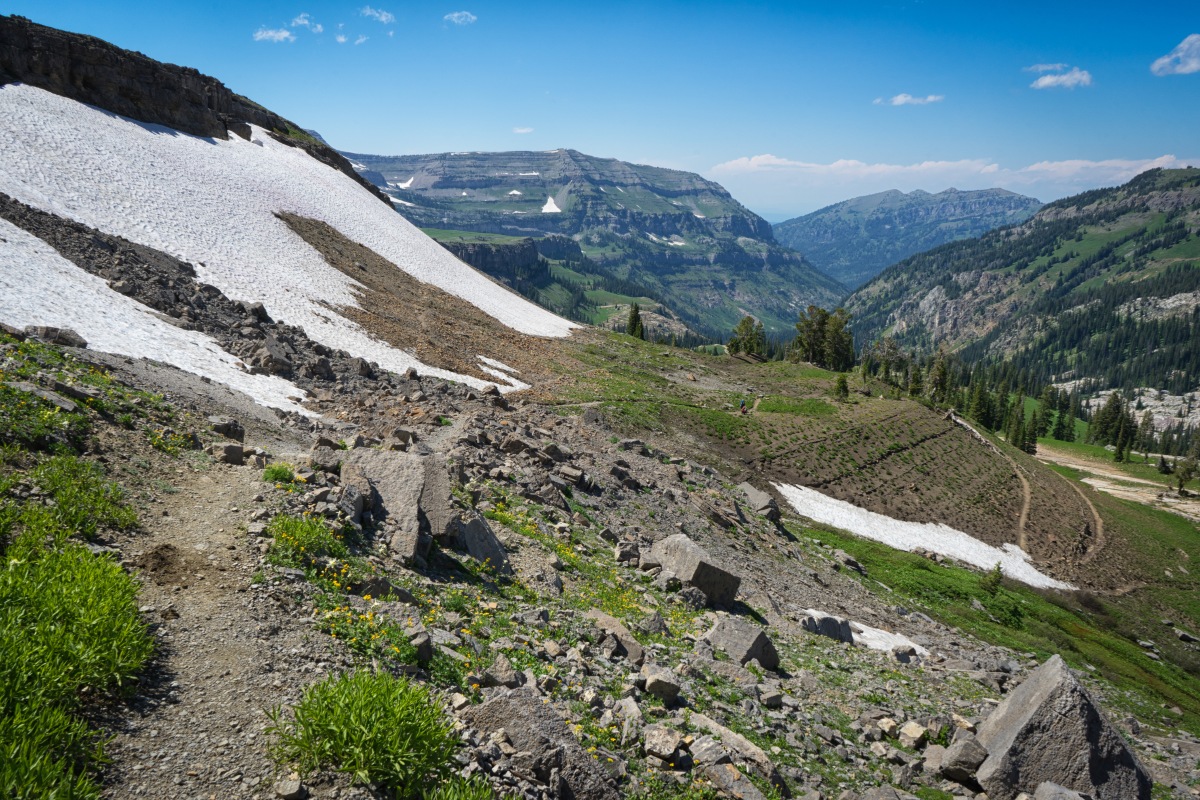
Looking back (above photo) at the trail switch-backing up the ridge.

AlaskaBasinTrailHike46
Photo by: Marc Bowen

Another view (above) of the basin from farther up the ridge.

AlaskaBasinTrailHike47
Photo by: Marc Bowen

Another view (above photo) of Battleship Mountain across the canyon. I could also see, to the right of Battleship Mountain and in the far distance the flat-top peak of Table Mountain (elev. 11,106) where I was three weeks ago.

AlaskaBasinTrailHike48
Photo by: Marc Bowen

Getting close to the top of the Teton Shelf and closer to The Wedge

AlaskaBasinTrailHike49
Photo by: Marc Bowen

The trail (above photo) breaks out onto the top and heads toward Mt. Meek pass just to left of Mt. Meek (elev. 10,682).

Almost to the pass the trail forks right and the Teton-Shelf Trail begins.

AlaskaBasinTrailHike51
Photo by: Marc Bowen

I saw several groups of hikers coming up this trail. One group was a family with two dogs and the dogs were packing their own food on their backs. I thought that was kind of cool. Everyone including the dogs carrying their own provisions.

The Teton Shelf is up high, wide open and beautiful! The mountains are magnificent, and the views are too. Young plants everywhere haven’t bloomed much yet but when they do in a week or two it will be wild-flowers as far as the eye can see.

My feet had been bothering me for a while now and I knew that the many hours of hiking were starting to produce blisters. My feet and toes were really starting to hurt.  I wouldn’t be able to hike the remaining six miles without doing something about my foot issues.

AlaskaBasinTrailHike54
Photo by: Marc Bowen – The Wedge

I stopped, took my boots and socks off and let the air get at my feet for about ten minutes. Then I put hydro-sealed bandages on the areas starting to blister and abrade. These bandages are great. Much better than moleskin in my opinion. They are like a thick second skin and have to be peeled off like skin when they have served their purpose. I also took the time to fill my Life-Straw bottle from the ice-cold stream coming off the snow.

As I started hiking again my feet felt much better so I picked up the pace a little. I was worried about getting down Devil’s Stairs before it got too dark.

AlaskaBasinTrailHike55
Photo by: Marc Bowen

I was moving pretty good, making good time, and enjoying the gorgeous views and the evening breeze when I was suddenly brought to my knees with back spasms. I crawled over under a tree until I could catch my breath then prayed earnestly for divine aid. Being alone and not having seen another person for several hours I was worried. With this kind of pain I knew I wasnt getting down off the mountain without help. The back pain was so bad that I couldn’t even stand let alone walk. My wife and I have talked many times about the possibility of me being stuck on the mountain overnight on one of my hikes. For that reason I always pack a small sleeping bag and waterproof bivy. I also have a large heavy-duty poncho that doubles as a tarp tent with my trekking poles used as tent poles. Also included in my backpack is a light-weight hoody, a fleece jacket, a water-resistant outer shell, gloves, warm knit hat, parachute cord, knife, first aid kit, wind/rain proof lighter, headlamp, flashlight, food, water, bear spray, and more to survive at least one night. Even though we talked about this possibility she would still wonder what happened and she would have no way of knowing I was on a different trail then the one she would expect me to be on.

It was getting late and the sun would be dropping behind the ridge soon. As I knelt there on the side of the trail asking God and his angels to help me get off the mountain safely, asking specifically for the back spasms to be taken away…the spasms stopped. Nearly crying with relief I fervently thanked God for his love and mercy, then stood up, took inventory so I didn’t leave anything behind and headed out. I was a little weak and shaky but otherwise walking.

AlaskaBasinTrailHike56
Photo by: Marc Bowen

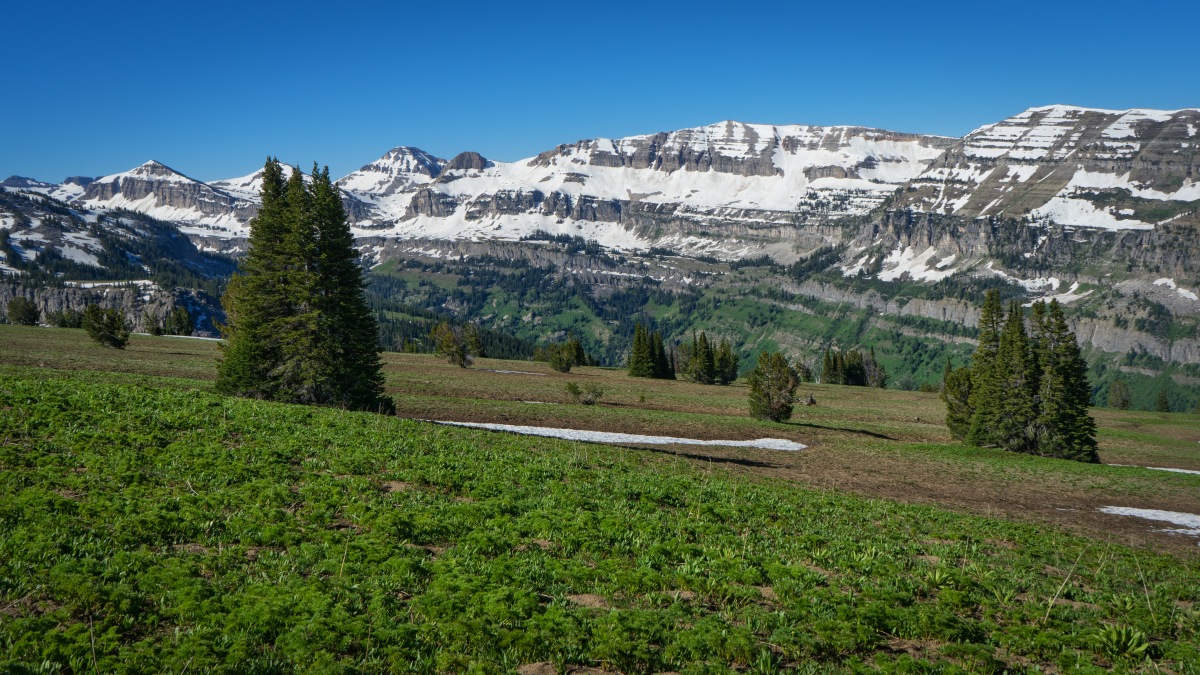
Toward the end of the shelf and near the top of Devil’s Stairs I stopped, thinking this scene in front of me (above photo) looked familiar and recognized that I had been here before, coming from the other direction a month ago. But it looked a little different back then (below photo).

TopDevilsStairs3
Photo by: Marc Bowen

Same place (above photo) One month ago.

I made it to the top of the stairs just before the sun went down behind the ridge.

AlaskaBasinTrailHike57
Photo by: Marc Bowen

Soon I was heading down Devil’s Stairs. Very tired but being extremely careful. Definitely did not want to stumble, slip or fall here!

AlaskaBasinTrailHike58
Photo by: Marc Bowen

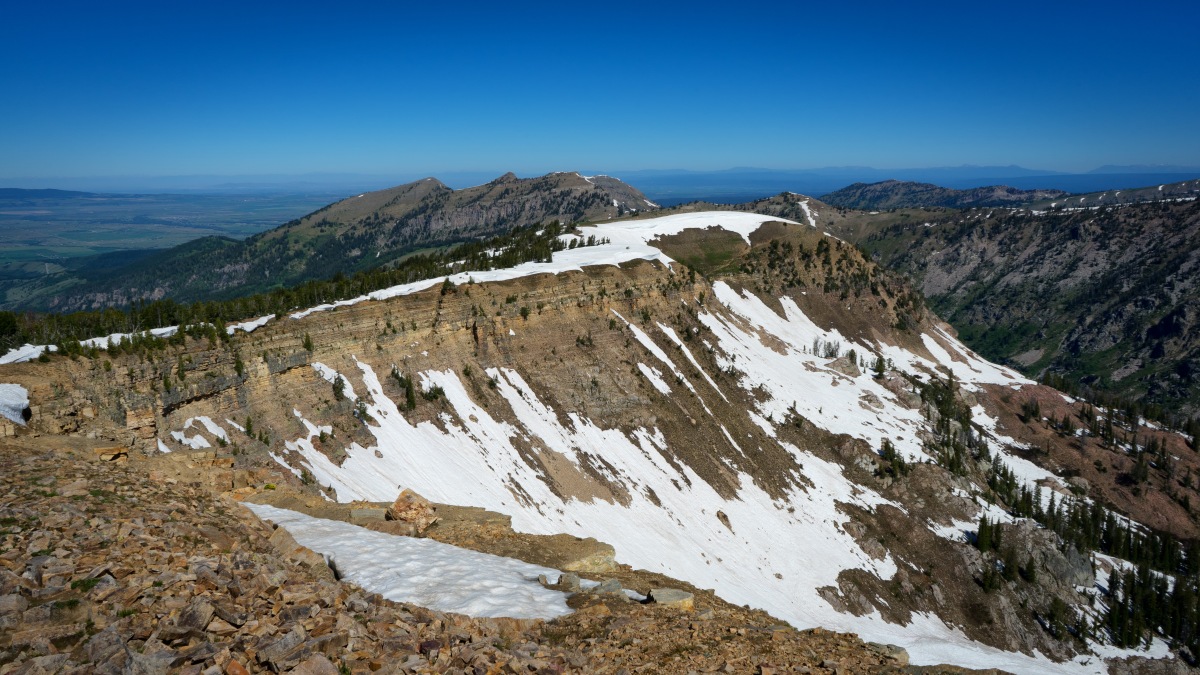
Looking back up the canyon (above photo) I could see the basin in the distance. Buck Mountain is in the upper left corner of the photo.

As I got down to the bottom of Devil’s Stairs I slipped and fell. Needless to say If that had happened anywhere on the stairs my hike may well have been over. I fell on my back, my fall cushioned somewhat by my backpack, ended up wearing some more dirt but that was about all.

AlaskaBasinTrailHike59
Photo by: Marc Bowen

I continued to descend carefully into the canyon. It’s about 1000 feet from the top of the stairs to the main trail below. Even though I was exhausted it didn’t keep me from admiring all the wildflowers covering some of the slopes on the way down.

AlaskaBasinTrailHike60
Photo by: Marc Bowen

Made it down safely. Rested with pack off (almost fell forward after wearing my backpack for so long). I drank lots of water, snacked on Hammer Gel which is a high carb quick energy gel that I squeeze into my mouth. Then I headed out with about three miles to go to get to the parking lot. It was getting pretty dark down in the canyon.

I initially was able to move at a fast pace maybe 5-6 mph. My feet and back were pretty much numb with pain by then but I kept moving forward. As it got darker I kept hearing noises in the thick brush both sides of the trail. Thought about bears in the brush. Several times I thought I saw movement in my peripheral vision. I didn’t really care and wasn’t worried. God had helped me get this far. I just needed to keep my legs moving and leave everything else up to Him. I moved fast as long as I could, then stopped and rested for one minute looking around. It wasn’t completely dark yet, more like twilight. I decided I could still see better without my headlamp so didn’t turn it on. By this time I was so exhausted my thoughts were drifting and unclear. I really don’t remember a whole lot about this part of the hike. I just put one foot in front of the other and wouldn’t be surprised if unseen hands held me upright as I certainly felt like I couldn’t go any farther on my own.

I reached the bridge that is one mile out from the parking lot and had another back spasm. It didn’t last long. One last rest, water, gel with pack off. Wanted to ditch my backpack at this point but didn’t. Just kept going, dragging my trekking poles across the rocks to make plenty of noise. As I staggered into the parking lot and loaded my gear in the car my first thought was how greatful I was to Him who carried me off the mountain. My second thought was that my son and I would probably not be backpacking this trail in two weeks.

This was another tough hike for me. Easier in some ways than Table Mountain. But all the miles just totally beat me into the ground. Any gas I had left in the tank evaporated with the back spasms. Even so… I have no regrets. I love to hike. Walking new trails. Exploring new country and oh… the views from the high places.

I look forward to hiking the next trail and climbing the next mountain.

img_5487

Image

Hiking Table Mountain’s Face Trail

By Marc Bowen


Hike to Table Mountain summit using the Face Trail

  • Distance: (from trailhead to summit and back) 9.2 miles R/T
  • Trailhead elevation: 6963 ft
  • Summit elevation: 11,106 ft
  • Elevation gain: 4143 ft
  • Difficulty: very strenuous


So there is a background story for this hike. My daughter is one of the leaders at her girls camp this year and every year they split up the girls into different groups, each group doing a different hike. These hikes have varying degrees of difficulty. One group hikes Lower Palisades Lake Trail (easy), another group hikes up Darby Canyon (moderate), another Devils Stairs (strenuous) and another Table Mountain (very strenuous). My daughter was one of the leaders for the group heading up Table Mountain and asked me if I would help. She had been to the top of Table Mountain several years ago but this would be my first time and I was excited to go.


Getting to the Table Mountain Trailhead

From the town of Driggs Idaho drive about seven miles up Ski Hill Road then turn right on Teton Canyon Road. This road is unpaved most of its four-plus miles. I’ve driven up this road multiple times and it always has its share of wash-boards and pot-holes but it is a wide two-lane road and definitely drivable in a car. There are several camp grounds and a Boy Scout camp along the way. The road crosses two bridges. The first bridge is within the first mile up the canyon. About four miles in and just before the second bridge is the trailhead for the Huckleberry Trail which follows the North Fork of Teton Creek most of the way to Table Mountain.

The Huckleberry Trail is the longer route, a little over 7 miles out to the summit as opposed to the Face Trail, 4.6 miles. It may be the longer route but it is considered an easier hike because of the gradual increase in elevation.

So it turned out that the Huckleberry Trail was closed because of washouts and deep snow. As a result we were all to meet at the Face Trail trailhead at 6:30am.  To get to the Face Trail trailhead you keep driving and almost immediately around the next bend you cross a one-lane bridge to a parking lot and restroom. Teton Canyon Road ends here. There are two trailheads off this parking area. The main one to the right of the restroom is hard to miss. The large sign declares this as the South Teton Trail and leads to Devils Stairs and Alaska Basin (See photo below).

AlaskaBasinTrailHEAD
Photo by: Marc Bowen

This (above photo) is the trail I used a week ago to get to the Devil’s Stairs trail. For more info on that hike go to Devil’s Stairs Trail

The Face Trail sign is small and not easily seen and takes off just to the left of the restroom (see below).

7900409946_bfcc53d8cd_z
Photo credit: copyright Annes Travels, 2012

I didn’t get a photo of this sign (above) so I posted Anne’s.


Huckleberry Trail or Face Trail?

Before making a decision as to which trail to use there are a few things to consider. The Forest service posted a sign not recommending the Face Trail. The Huckleberry Trail is a maintained trail and a less strenuous hike. So if you’re content hiking 14 miles round trip on a moderately strenuous trail then that would be a good choice. You could take the Huckleberry Trail out and the Face Trail back but I guarantee that your joints, feet and toes will hate coming down that way. This trail is extremely steep, with loose rock and dirt much of the time. This creates the perfect scenario for losing your footing. My trekking poles saved me many times from falling and I saw more than one hiker hit the ground hard. My choice would be to go up the Face Trail and return on the Huckleberry trail. Taking that route you would have different scenery out and back, shorten the hike from 14 miles to a little over 11 miles AND get the hardest part of the hike out of the way first. But on this day, because of the Huckleberry Trail closure we didn’t have but one choice. Face Trail all the way.

We started our hike about 7am and just a few yards in we immediately entered a dense area of vegetation with trees, grass and brush encroaching the trail on both sides. This is bear country so I had my bear spray and we made plenty of noise. Within a few 100 yards the trail begins to climb very steeply.

TetonCanyonCampGroundView
Photo by: Marc Bowen

On one of many rest stops I took the above photo. The trailhead and Teton Creek campground were almost directly below us. I could also see Driggs and the Teton Valley in the distance.

TableMountainFaceTrail
Photo by: Marc Bowen

Besides being really steep the trail is very rocky, some of it loose rock. The wild flowers were blooming on this lower portion of the trail.


TableMountainFaceTrail2
Photo by: Marc Bowen

About a mile up the trail I took the above photo from a view-point just off the trail. This is looking up the canyon along South Teton Creek. The Alaska Basin Trail follows this creek up the canyon and eventually into the Basin Lakes. In the far distance I could see the Devil’s Stairs area and the beginnings of what is called The Teton Shelf. The rock formation called The Wedge can be seen just slightly above and right of the middle of the photo. Also Mt. Meek is the triangle-shaped peak just left of the middle of the photo.

TableMountainFaceTrail3
Photo by: Marc Bowen

There are a few pockets of aspen in a few areas where the slopes are not quite as steep.

TableRockFaceTrailNicole
Photo by: Marc Bowen

It was a nice change of pace to walk into this beautiful grove of aspens where the trail leveled out for a few hundred yards.

TableMountainFaceTrail5
Photo by: Marc Bowen

One last push up steep trail before the easier slopes of the meadows. In the photo above you can see the change in elevation. The Driggs area was plain to see from this perspective and Teton Canyon Road coming in from the valley.

TableMountainFaceTrail6
Photo by: Marc Bowen – looking back down the trail

A little over two miles up the trail and about 8200 feet in elevation we entered the meadows area.

TheWedgeTetonCreekShelf
Photo by: Marc Bowen – Teton Shelf in the distance

Where the snow has melted there were masses of wild flowers growing. These meadows will be full of color in a few weeks.


YWTableMountainHike2
Photo by: Marc Bowen – View (left to right) of Table Mountain, Middle and South Tetons

The views are absolutely breathtaking in these open meadows but we really got excited when we could finally see our destination in the distance. Top left corner of the above photo is Table Mountain (elev. 11,106 ft). It’s name pretty obvious from its shape. We could also see the Middle Teton (elev. 12,805) and the South Teton (elev. 12,514)  looming up over the ridge to the right of Table Mountain.

YWTableMountainHike
Photo by: Marc Bowen

At about three miles from the trailhead the trail forks. Left takes you down the Huckleberry Trail. Right takes you on up the trail to Table Mountain. There were large snow fields in this area with the trail buried under 6-8 inches of snow.


TableMountainFaceTrail7
Photo by: Marc Bowen – some deep snow covering large areas of trail

There was a stretch where we couldn’t even see the trail because of the deep snow. We knew what direction we needed to go so could guess about where the trail had to be. A few days before this hike I downloaded a new app to my phone called GAIA GPS. GPS apps work offline as long as your phone has a charge. It was my first hike using this app and I was able to see on the map where the trail was under the snow and where my position was in relation to the trail. Then I could choose whether to follow the trail across the snow or skirt the snow fields knowing I could get back onto the trail when there was better footing.


TableRockYWcamp
Photo by: Marc Bowen – view of Table Mountain, The Grand and Middle Teton

Finally above tree-line there is a long shelf about a mile long leading up to Table Mountain.


TopHuckleberry
Photo by: Marc Bowen

To the left of the shelf you can see down into the North Teton Creek drainage and the area where the Huckleberry Trail switchbacks up and over the ridge in the middle distance.

TableMountainFaceTrail8
Photo by: Marc Bowen

To the right of the shelf I could see back towards Driggs and down into Teton Canyon.

TableMountainFaceTrail9
Photo by: Marc Bowen

Another view (above) looking back down the trail and shelf. We chose to rest and eat our lunch at this point. Everyone but me chose to leave their packs here at this spot. It’s nice not to be carrying any more weight then necessary when making the last steep scramble to the summit. I chose to keep my pack on only because I have a Capture-Pro clip attached to my backpack strap which holds my camera securely and allows me to have both hands free to use trekking poles or use hand holds on a rock face while bouldering or climbing.

TableMountainFaceTrail10
Photo by: Marc Bowen

Another view (above photo) looking down the trail just before making the final climb to the summit.

TableMountainFaceTrail11
Photo by: Marc Bowen

From this position (above photo) near the top I could see Battleship Mountain (upper left corner), elevation 10,679 and Mt. Jedediah Smith above and behind, elevation 10,610.

TheWall
Photo by: Marc Bowen

In the above photo part of Buck Mountain (elev. 11,939) can be seen in the upper left corner and in the upper right corner are Mt. Meek, Mt. Jedediah Smith and Battleship Mountain. As you can see there is still plenty of snow up this high.

TetonValleyViewfrmSummit
Photo by: Marc Bowen – Summit!

From the summit of Table Mountain I could see a LOT of country! Looking east (above photo) towards Driggs and in the distance the St. Anthony Sand Dunes and on the far horizon over 150 miles away is the Lost River mountain range. Also I could see hikers headed back down the trail (lower left corner of above photo).

TopCascadeCanyon
                              Photo by: Marc Bowen – Upper reaches of Cascade Canyon                                                   

There were absolutely gorgeous views (above photo) looking northeast down into the top of Cascade Canyon. I could even see out into the Jenny Lake area in Grand Teton National Park. Mount St. John (elev. 11,430) can be seen on the far side of the canyon and Mount Owen (elev. 12,927) on the near right side.


TableMountainNicole
Photo by: Marc Bowen 

It was bright and sunny on top but the wind was blowing so hard up there at times it felt like it would blow us off the mountain top.


TableMountainNicole2
Photo by: Marc Bowen

My daughter posed in front of The Grand when the wind wasn’t blowing quite so hard. While standing on a mountain summit there is certainly a feeling of not only being on top of the world but a sense of freedom too.

TableMountainMarc1
Photo by: Nicole Klingler

I handed my camera to my daughter for her to take this photo of me standing on the summit looking at the massive face of The Grand (elev. 13,776)  seems so close (actually about a mile away).

The hike back was anticlimactic and despite the steep hike back down the Face Trail (which I would never recommend), and the repurcussions, i.e., sore body, aching joints, blistered feet, bruised toes and lost toenail, I look at this experience as one I will never regret. Some may ask me why I would put my body through that much stress to climb to the top of a mountain and I might answer, because the views are better up there. Why would I push my body to utter exaustion from hiking to the end of a long trail? I might also answer, to see where it goes. (Actually there are many answers and many reasons. I could and should probably write a blog post about those reasons someday). And Maybe I do these things just to feel the way a marathon runner or triathlete feels when they cross the finish line.  OR  famous mountaineer George Mallory’s reason for climbing the highest mountain in the world…. Continue reading “Hiking Table Mountain’s Face Trail”

Image

Devil’s Stairs Trail

By Marc Bowen


I left home this morning at 5:30am and drove to Driggs then onto Ski Hill Road for a few miles until turning right onto Teton Canyon Road to the south Teton Canyon trailhead. Teton Canyon Road is about five miles long and unpaved most of the way to the trailhead. It was necessary for me to drive at fairly slow speeds because of potholes and quite a few cows on the road. I passed Treasure Mountain Boy Scout Camp and several campgrounds along the way.

AlaskaBasinTrailHEAD
Photo by: Marc Bowen

It had rained during the night so everything was wet which I didn’t mind. Everything was washed clean with no dust to speak of. I arrived in the trailhead parking lot at about 7:00am and there was only one other car parked there.


TrailheadSign
Photo by: Marc Bowen

The one trail leading up the canyon from here goes a lot of places. My destination today was the Devils Stairs trail which branches off this trail about three miles up the canyon.

I headed up the trail along Teton Canyon Creek and I banged my trekking poles together at times usually in the thickest parts of the trail to try to warn off any bears that might be on or near the trail ahead of me.

AlaskaBasinTrail2
Photo by: Marc Bowen

The first bridge (above photo) crosses a small clear running stream. Just past the bridge is a trail that goes to the left.

FALLSAlaskaBasinTRail
Photo by: Marc Bowen

A very short distance up this trail is a pretty little set of waterfalls.


BridgeOverTetonCreek
Photo by: Marc Bowen

The next bridge (above) was larger and crossed Teton Canyon Creek. The forest becomes real dense in this area.

TetonCreek
Photo by: Marc Bowen – Looking upstream from bridge

The vegetation was lush and green, almost like a rain forest and there were many varieties of wild flowers. Those flowers are just beginning to bloom. A few more weeks and this will all look like one giant flower garden.

AlaskaBasinTrail
Photo by: Marc Bowen

The sound of the stream was my constant companion along here and the canyon begins to open up to a decent size with steep slopes on both sides and snow-covered mountain peaks in the distance. Spruce, Fir and Aspens line the trail in between verdant meadows. Just. Absolutely. Beautiful!

MooseTracks
Photo by: Marc Bowen – Moose tracks

Again, just like my Darby Canyon hike (see Darby Canyon Wind Cave Trail) most of the way up the trail for the first mile or two I followed the tracks of a moose.

AlaskaBasinTrail3
Photo by: Marc Bowen

There were several of these big clearings along the way that allowed a good look at the Teton Shelf in the distance. All along this stretch there were multiple stream crossings with most of the streams originating from half a dozen waterfalls flowing down the steep canyon walls.


AlaskaBasinTrail5
Photo by: Marc Bowen

At one point as I began to cross an old avalanche of snow covered with dirt and debris I noticed in the distance two cow moose.

Moose1
Photo by: Marc Bowen

They looked past me to my left and I noticed a bull moose and another cow heading toward them.

Moose2
Photo by: Marc Bowen

I watched the two groups cautiously meet and then the bull went off into the willows.

Moose3
Photo by: Marc Bowen

The larger cow appraoched the cow that had come over with the bull and raised up on her hind feet to hit her with her front hooves then chased her off.

I was not carrying a long lens so was unable to zoom in for closeup shots but still enjoyed watching these beautiful creatures interact.

I then moved on down the trail into a thick stand of trees and as I rounded a bend in the trail I was startled to see another bull moose standing just off the trail looking at me.

Moose5
Photo by: Marc Bowen

He was close enough to me to make me wary. I took a quick photo (probably not the wisest first reaction) then I carefully moved as far away to the other side of the trail as much as the thick brush allowed. He watched me and then looked at a point behind me several times and then back at me. I didn’t dare take my eyes off him to see what he was looking at when all of a sudden he started trotting towards me. I picked up speed to try to put something like a tree or log between him and me then attempted to put some distance between us.

I got back on the trail and hurried around the bend before I dared look back to see where he was at. That was when I saw him coming down the trail behind me accompanied by another bull at a trot. My first thought was, ‘Are they following me?’ But then I thought maybe he had waited for me to move down the trail until he could join his buddy who had come up the trail behind me. Whatever the case I was still not comfortable being that close to them so I continued to put distance between us.

As I walked down the trail near the stream and an area filled with willows (prime moose habitat) I saw another bull moose in the willows tossing his head and antlers around but ignoring me. I did not slow down but kept moving. I thought, ‘Wow! How many moose are there in this area?’

TrailFork
Photo by: Marc Bowen

Roughly three miles up the trail is a sign. At this point you can continue another five miles up the canyon to the Teton Crest Trail and then on to the Basin Lakes or turn right and hike about a mile to Devils Stairs.

I turned right at this point and began a tough climb up the mountain toward the Stairs.

TetonValley
Photo by: Marc Bowen

Part way up the trail is a big flat rock just off the trail that gave me a great view looking back down the valley towards the trailhead.


Video by: Marc Bowen

The switchbacks going up are very steep and eventually the trail enters a couple of open meadows and then follows a stream up the steep face. As I crossed the stream and climbed higher the trail crossed a steep open slope.

DevilsStaircaseTrail4
Photo by: Marc Bowen

Then the trail begins to climb up several sets of rocky steps and it became fairly obvious why they are called The Devils Stairs as they look like steps made for a big beast.

DevilsStaircaseTrail3
Photo by: Marc Bowen – Devils Stairs

There was a sign below at the fork advising against bringing livestock up this trail and I can see why. It would be very dangerous for horses and the humans who ride them.

DevilsStaircaseTrail8
Photo by: Marc Bowen

I loved this trail! Beautiful views, steep drop offs and something new around each corner.


DevilsStaircaseTrail9
Photo by: Marc Bowen

The trail was also kind of difficult to navigate. I mistakenly started to follow it around an outcropping in the cliff and saw the trail disappear (photo below).I doubled back and saw I had missed the not so obvious switchback carved into the cliff face.

DevilsStaircaseTrailFog
Photo by: Marc Bowen

Parts of the trail just cling to the cliff  plus as I got closer to the top the clouds moved in giving an impression of an immense void.

DevilsStaircaseTrail10
Photo by: Marc Bowen

This (above) is the switchback in the trail I initially missed.


DevilsStaircase
Photo by: Marc Bowen

With the clouds moving in the trees disappeared for a few moments and everything got quiet.

DevilsStaircaseTrail
Photo by: Marc Bowen

Farther up the trail I could see the The Teton Shelf which extends for miles up towards the Basin Lakes.

TopDevilsStairs
Photo by: Marc Bowen

The trail finally ends at a wall of snow on the shelf which I had to hike around to get up on top.

The video below shows how foggy it was when I got on top.

Video by: Marc Bowen


TopDevilsStairs2
Photo by: Marc Bowen

After detouring around the wall of snow I decided to see how far up the shelf I could go before the snow got to deep. There is a loop trail that goes up the shelf to the crest trail and then comes back around and down the basin trail.

I kept losing the trail under the snow but I could guess pretty well the direction and approximate location. It was very foggy at times and visibility was low.

Video by: Marc Bowen


TopDevilsStairs3
Photo by: Marc Bowen

I decided to stick to walking in the snow so if I lost my bearings in the mist I still be able follow my tracks back out.

Most of these images I captured during breaks in the clouds so they are not always indicative of how foggy it was.

TopDevilsStairs4
Photo by: Marc Bowen

I walked another mile or so but decided to turn back. A thunderstorm was forecast for around 12pm and I told myself I better be off the shelf and at the bottom of Devils Stairs before noon.


DevilsStaircaseTrail2
Photo by: Marc Bowen

On my way back to the top of Devils Stairs I stopped to shoot some of the few wild flowers blooming.

DevilsStairsTrailFlowers
Photo by: Marc Bowen

The video below shows the view from the top of the stairs and three waterfalls can be seen coming down the mountain side across the canyon.


Video by: Marc Bowen


I had just dropped off the rim and cleared the staircase when it started to rain pretty hard. I found cover under a clump of trees where I was out of the rain, ate a snack and drank water. After about 15-20 minutes I decided the rain might last awhile so I got my rain gear out put them on and continued down the trail in the rain.

I talked to a couple of hikers at the bottom of the trail who had encountered too much snow farther up the basin trail and had to turn around and come back down. So it’s still too early to hike up into the basin. The top of the Staircase is over 8000 feet and the Basin lakes are over 9000 feet. Will probably be another month before the upper elevations open up.

The trail was very muddy heading back down to the trailhead. I eventually took my rain gear off when the rain quit.

There were many hikers coming up the trail, about half of them with dogs and no leashes. I would be worried my dog might run off after a bear or mountain lion. Not a good idea in my opinion but I get the reasons why they might want to bring their dog with them.

When I got back to the parking lot I noticed that to the left of the restrooms is a trail with a sign saying ‘Face Trail’. Found out it’s a trail that goes up a VERY steep 4000 foot climb to Table Mountain. I will be climbing Table Mountain next week but will do so by way of the Huckleberry Trail which is longer but also an easier climb. Definitely going to be getting into snow up there as Table Mountain is over 11,000 feet in elevation but I’m still looking forward to the experience.

Well I have to say, I enjoyed this hike immensely! Thats despite the fact that I  kind of wandered around up there on the Teton Shelf losing my way at times, getting rained on and sort of chased by a moose or two!

581879_248725208806148_2459317194719508741_n

Image

North Menan Butte Trail (“R”Mountain)

By Marc Bowen


Volcanic Tuff Cone

In east Idaho near the town of Menan are twin buttes known as the North and South Menan Buttes. The north butte is also known by locals as “R” Mountain because of the big white ‘R’ painted on its north face. The south butte (the smaller of the two buttes ) is privately owned. The north butte is publicly owned and is designated as a National Natural Landmark. The buttes are two of the worlds largest volcanic tuff cones.

I wrote about these tuff cones and hiking this area in great detail on my blog last year. You can read that post by clicking this link: Hiking The Volcano – N Menan Butte

Hiking The Butte


ButteTrail
Photo by: Marc Bowen (shot on 4/10/18)

This hike is 4.2 miles out and back with 1,089 feet of elevation gain. The trail leads up the west face and then follows the rim around the entire crater and back. The hike to the rim of the crater from the trailhead will get your heart pumping. I have hiked this trail 6 times in the past 8 weeks (in the months of April and May). It’s close to my home and I can hike it early in the morning and be home by 9 or 10am. It’s a great workout and is good preparation for some more difficult hikes in the months to come.

The images in this post I shot over a period of two months. The images are dated as I thought it would be fun to show the surrounding landscape as the seasons change.


MButte11
Photo by: Marc Bowen (shot on 5/30/18)

Coming up the west side of the butte you know your near the top when you get to a line of steel posts connected to each other with a chain (above image to the right of the big rock formation). The footing is very poor in places and the chain gives you something to hold on to.


NMenanButteCave
Photo by: Marc Bowen (shot on 4/23/18)

Because of the geology of this place caves and varied rock formations are a common sight. This one (above) is to the left of the trail near the top.


NButteTrailHeadParkinglot
Photo by: Marc Bowen (shot on 4/30/18)

Just past that formation looking back down the slope at the trailhead parking area.


MButte3
Photo by: Marc Bowen (shot on 5/30/18)

Once you’ve made it to the top of the trail you will be standing on the rim of the buttes cratered center. Now you’re on the rim trail and can go left (above photo), right (scroll down to next photo) or even walk a trail down through the middle of the crater (not shown).

MButte2
Photo by: Marc Bowen (shot on 5/30/18)

I have arranged my photos in a sequence as if hiking to the right around the crater. As you hike this direction you can see (in this photo above) across the crater into the valley to the east toward Rigby, Ririe and the distant hills.


MenanButteSouthIF
Photo by: Marc Bowen (shot on 4/23/18)

As the trail curves around the south side of the butte you can see South Menan Butte, the town of Menan is across the river in the middle right in the above photo and Idaho Falls is in the middle distance at the base of the hills.

MButte8
Photo by: Marc Bowen (shot on 5/30/18)

If you compare this panoramic image (above) with the one above it you can see the difference 5 weeks makes. Crops are growing and summer colors and foliage have arrived.


MenanButteNE
Photo by: Marc Bowen (shot on 4/23/18)

Looking back to the east from the trail across the crater, part of the valley between Rexburg and Rigby can be seen.


WindBowl
Photo by: Marc Bowen (shot on 4/10/18)

As the rim trail curves east you will arrive at a formation of rocks called the ‘Wind Bowl’. This is a fantastic formation and almost seems like the landscape should be part of another planet. Great area to do some ‘bouldering’ … Looking south across the bowl you can again see South Butte.

MButte7
Photo by: Marc Bowen (shot on 5/30/18)

There is a time span of six weeks between the above two photos.

Below is a video clip of the Wind Bowl recorded on 4/10/18.  ‘click’ to play


MButte6
Photo by: Marc Bowen (shot on 5/30/18)

Above is a another photo of the Wind Bowl from a different perspective.

Below is the most recent video clip of the Wind Bowl.


MButte10
Photo by: Marc Bowen (shot on 5/30/18)

(above photo) Looking east towards Rigby and Ririe and the point where the Henrys Fork and South Fork of the Snake River come together. You can see some of the current flooding. Snow melt has caused all the rivers and streams to run at higher than normal levels the last month or so.

Tetons
Photo by: Marc Bowen (shot on 4/10/18)

Again in the above photo the view is to the east as this is the east side of the butte. Part of the Teton mountain range can be seen on the horizon.


MButte5
Photo by: Marc Bowen (shot on 5/30/18)

I took the above photo as I hiked the trail around the north side of the butte heading west. This is looking south across the crater to the south rim and South Butte beyond that.


MButte4
Photo by: Marc Bowen (shot on 5/30/18)

If you look north from the trail on the north rim the St. Anthony Sand Dunes can be seen in the distance with the city of Rexburg to the right of that (above photo).


ArcoDesert
Photo by: Marc Bowen (shot on 4/10/18)

In the above photo I am looking west across the desert towards the Lost River Range of mountains.


RockForm
Photo by: Marc Bowen (shot on 4/10/18)

Another one of the many rock formations in the area and another view into the buttes crater.


NMenanButteTrail
Photo by: Marc Bowen (shot on 4/10/18)

I shot the above image as I was hiking south along the west rim of the crater. The orange-colored rock formation across the crater on the other rim is the area where the Wind Bowl is located.


NicoleMenanButte2CROP
Photo by: Marc Bowen (shot on 5/15/18)

My daughter Nicole (above photo) joined me on the May 15th hike. Looking out over the parking lot below and the Deer Parks Wildlife Management Area across the highway.

Below is a video clip shot from the northwest rim in April of this year.


MButte9
Photo by: Marc Bowen (shot on 5/30/18)

Another view (above photo) looking down on the parking lot / trailhead and the Deer Parks WMA.


DeerParksWMA
Photo by: Marc Bowen (shot on 4/23/18)

Above is another view from the same area but shot over a month earlier.


MenanButteTreeCROP
Photo by: Marc Bowen (shot on 4/30/18)
MButte12
Photo by: Marc Bowen (shot on 5/30/18)

The above two images were shot a month apart at slightly different angles.


MButte1
Photo by: Marc Bowen (shot on 5/30/18)

I shot this last image as I was headed back down the west face of the butte.

As I mentioned before I usually hike this trail early mornings with cool temperatures, beautiful light and colors surrounding me, and few people around. Sometimes I’ve had the butte all to myself and its a perfect time to change perspectives and remember whats most important in my life. Just being outside breathing the fresh air and having the sun shine upon me energizes my soul and changes my mood for the better.

IMG_4672


Image

Darby Canyon Wind Cave Trail

By Marc Bowen


First Attempt

Yesterday morning I drove to the Darby Canyon parking lot arriving about 7:30am. It rained the whole drive there. The night before I had checked the forecast saw the forcast for rain but it was supposed to quit raining around 7am. Well by 7:30 it was still raining hard, no sign of stopping and the road in was very muddy. No other cars were in the parking area when I arrived. I decided I would tip my seat back, set my alarm and sleep an hour. If it was still raining hard I would head home and try again the next day. One hour later it was still pouring so I started the car and was heading out of the parking lot just as a big gray moose stepped out in front of me, looked at me than trotted across the road and into the trees. That was cool. I’m glad I was able to stop and enjoy the sight of this huge, beautiful animal moving across the road in front of me.

Getting There

It wasn’t raining this morning when I left home but the skies were overcast. I left home around 5:30am, arrived in Driggs about 6:30am. About halfway between Driggs and Victor I turned left on 3000 South. From the Darby Canyon sign there is about four miles of pavement and nearly five miles of dirt road to the Darby Canyon parking lot. The road wasn’t as muddy as yesterday and I arrived at the parking lot about 7:00am.


DarbyCanyonParkingLot
Photo by: Marc Bowen

Again mine was the only car in the parking area. There was definitely a wet chilly feel to the air as I got my gear ready, locked my car, took inventory and made sure I wasn’t forgetting anything. I stashed my car keys in a safe place ( ruin my day if I lost them along the trail somewhere).


The Trail

  • Location – South Fork Darby Canyon
  • Hike (R/T) miles – 5.2
  • Elevation gain – 1800 feet
  • Difficulty rating – 8.80 (moderate)

**above info provided by TetonHikingTrails.com


DarbyCanyonWindCavesTrailhead
Photo by: Marc Bowen

The trailhead begins at the edge of the parking area. This trail prohibits the use of bikes as the area is designated wilderness. The wilderness marker is just up the trail a ways.


DarbyCanyonWindcavesTrail
Photo by: Marc Bowen

Within the first quarter-mile I came to a clearing where I could see Darby Creek and the snow-line not too far up the mountain side. I was pretty sure I would be hiking in snow sooner than later. Even though I had my doubts about being able to get all the way in to the wind cave I was determined to go as far as I was able. The air was fresh, cool and clean and it was wonderful to be on the trail again regardless of the outcome.


DarbyCreekBridge
Photo by: Marc Bowen

I crossed this bridge over Darby Creek just as it began to rain a little. (above photo)


darbycreek
Photo by: Marc Bowen

Standing on the Darby Creek bridge I shot this image looking upstream.


WildernessSign
Photo by: Marc Bowen

A few turns in the trail later I arrived at the boundary sign for the Jedediah Wilderness and a slippery crossing of South Fork Darby Creek.


SouthForkDarbyCreekCROP
Photo by: Marc Bowen

I carefully took this shot (above) while laying across two poles over the water of the stream.

WindCaveTrailDarbyCreek
Photo by: Marc Bowen

Just up the trail I entered a small gorge and began a rather steep climb. The trail climbs about 1200 feet in about a mile and a half as it enters South Fork Darby Canyon.

DarbyCreekPano
Photo by: Marc Bowen

(above) Panoramic looking down into the gorge.

Video clip below of the gorge


LedgeOverCreek
Photo by: Marc Bowen

Another shot into the gorge (above) and you can see into the main canyon beyond where the trailhead is located. From this point on just about every switchback had deadfall that hadn’t been cleared from the trail yet. I had to climb over , under or around much of it. It was mostly on the steep northwest facing slope. Everything was wet so it made for some careful traversing.

DBCTrail
Photo by: Marc Bowen

(Above) where the trail wasn’t wet and muddy it was covered in snow. I only saw one set of human tracks and a pair of what I assume were dog tracks ahead of me, probably several days old. There were also a fairly fresh set of moose tracks heading up the canyon. These sets of tracks were a good thing for several reasons. One, it gave me an idea where the trail was in areas where the trail was covered in snow. Two, the snow had a hard crust on it but was melting underneath so by observing where the moose chose to place it’s feet I could tell whether the surface of the snow would hold my weight or not.


DBSwitchback
Photo by: Marc Bowen

Some slopes were fairly bare of snow with just some random patches. I took a break on the edge of this switchback to drink, eat a snack and put my outer jacket shell on as it had begun to rain. It wasn’t pouring so I didn’t put my heavy poncho on. With the jacket I was still able to access my camera (with rain cover) attached to the front of my backpack shoulder strap.

DarbyCanyonWindcaves1
Photo by: Marc Bowen

(Above photo) looking up the canyon from the east rim. The wind cave can be seen near the top of the other side of the canyon.

DarbyCanyonPanoCROP
Photo by: Marc Bowen

This (above) is the halfway point of the hike. From here the trail continues south and then forks to the right around the top of the canyon and back to a series of switchbacks heading up toward the cave.

WaterFallDarbyCanyon
Photo by: Marc Bowen

Water runs out of the mouth of the cave and down the cliffs below (above)

DBWindCave
Photo by: Marc Bowen

There was still plenty of snow between me and the wind cave. I could already see from here that if I was lucky enough to make it all the around to the wind cave it would be too treacherous to try to get up to it and inside. Snow was piled deep in front and raging water running underneath.

Below is a video clip showing both the cave and the waterfalls underneath.

DarbyCanyonSnow
Photo by: Marc Bowen

I was able to make my way a little farther along the canyon rim but at this point the trail went underneath a slide of deep snow and no more tracks that would indicate where the trail was. The tracks here are my tracks as I carefully walked farther along. But it was steep and I kept breaking through the crust into deep snow up to my waist. I got a bad feeling about going any farther so decided  this was where I would turn around and head back down the mountain.

DarbyCanyonWindcavesTrail2
Photo by: Marc Bowen

Hiking back down the trail.

CanyonWaterfall
Photo by: Marc Bowen

As I neared the part of the trail that drops back down into the main canyon I noticed water from snow melt coming down the mountain on the otherside of the canyon.

DBCFungi
Photo by: Marc Bowen

Found this orange fungus in the canyon bottom and thought I would take a pic to see what it was later.

I met several groups of hikers headed up the trail as I headed down. Some asked questions about the trail ahead and I warned them about the deadfall and deep snow.

Even though I was unable to get all the way to the cave it was still an enjoyable hike. I didnt mind the rain, mud and snow. My whole purpose today was to get out and hike and satisfy my wanderlust. Finishing this hike was secondary.


16681732_429532607392073_7506432278378786825_n


Image

Palisades Creek Trail

By Marc Bowen


Its been two months since I wrote my first blog post of the year. At that time there really wasn’t very many places to hike in Eastern Idaho that didn’t have snow on the ground. I did an easy but fun hike in the snow on Cress Creek Trail the first part of March. I wrote about it complete with plenty of pictures at:  Late Winter Hike – Cress Creek Trail

Since that hike and after the snow melted I started hiking the North Menan Butte Trail once every week for the past four weeks to work on getting back into hiking shape. That hike is a four mile loop with some stamina required for the first hard pull up the butte. I decided it was time to do a longer hike. I knew by now that the Palisades Creek trail would be clear of snow or at least the lower part should be. I’ve hiked this trail before and wrote about it last year. See: Late Spring Hike To Lower Palisades Lake

The lower part of the trail starts just north of Palisades Creek camp ground several miles off the highway near the town of Irwin. There are two lakes off this trail. Lower Palisades Lake which is about four miles out and Upper Palisades lake which is about seven miles out. Today I chose to hike to the lower lake and back for a total of eight miles. Although I was tempted to go all the way to the upper lake I didn’t think my body was ready for the nearly 14-mile round trip yet.

The Trail

PalisadesCreekTrail1
Photo by: Marc Bowen – flooded trail

The trail follows Palisades Creek almost all the way to the lower lake with only about a 600 foot elevation change. This time of year because of snow melt the stream becomes a river and parts of the trail become a stream (above photo). Keeping my feet dry was not possible. My boots are fairly waterproof if I’m not standing in water or in deeper than my ankles. Using my trekking poles to balance on a few branches and logs I placed strategically I managed to get through this part of the trail without soaking my socks.


PalisadesCreekTrail2
Photo by: Marc Bowen

This is the first of five bridges I crossed as the trail meanders across the creek at times. These bridges are built for horse traffic as well as human. Since this isn’t technically designated ‘Wilderness’ mountain bikers use this trail also. Motorized vehicles are prohibited because this is, at the very least, a ‘wilderness study area’.


PCMtnGoats
Photo by: Marc Bowen

As I hiked up the trail, just around the bend I noticed three mountain goats in the morning light standing on the cliffs above the creek. One looking right at me. They are not easy to see in the photo without the white circles around them.


PalisadesCreekTrail3
Photo by: Marc Bowen

As the trail follows the creek up the canyon I walked through many different kinds of landscapes. Some parts of the trail lead through beautiful groves of trees letting just a little morning light shine through. In the lower levels of the canyon trees and shrubs are just beginning to sprout leaves.


PalisadesCreekTrail4
Photo by: Marc Bowen

About 1-1/2 hours into the hike there is an area where I like to stop, take my pack off, eat a snack and drink a bunch of water. The canyon is narrow here with steep cliffs on both sides. Its cool and refreshing because you are right over the river and mostly in shade.


PalisadesCreekTrail5
Photo by: Marc Bowen

Every time I have stopped here I have seen at least one mountain goat on the face of the cliff above (above photo). This one was asleep on a ledge. Hard to see in photo so I circled it in red. I did not have my long lens with me. I did have a small but powerful set of binoculars strapped to my chest for easy access which allowed me a close look at this beautiful animal.


PalisadesCreekTrail6
Photo by: Marc Bowen

This canyon is so narrow in some places that it doesn’t allow a lot of light into it. It’s  a beautiful place with lots of rocky canyon walls and cliffs. I can see why mountain goats are so prevalent in this area. Its the perfect environment. If I was a mountain goat I would want to live here.


PalisadesCreekTrail7
Photo by: Marc Bowen

Crossing the next bridge had me spying a group of three goats on the cliffs above (circled in red). Also the trail on the other side was under water so I had to do a little bushwhacking to stay dry. The bad thing is every time I leave the trail into the brush I seem to pick up unwanted hitch-hikers. I brought home a tick from this hike just like I did on several occasions last year. Despite the toxicity I am going to start applying ‘DEET’ to my clothes from now on.


PalisadesCreekTrail8
Photo by: Marc Bowen

The third bridge I crossed is similar to the others, well-built to withstand all the traffic this trail gets on the weekends and everyday in summer. My job schedule is such that I can hike on a week day and if I start the hike just after daylight I very seldom see anyone. I saw no one on the trail going either direction today. I did encounter snow on the trail in some places the farther up the canyon I hiked.


PalisadesCreekTrail9
Photo by: Marc Bowen

Between the third and fourth bridge there was more water on the trail. My trekking poles got me up this stretch with no problems. Can’t say enough about the advantages of using poles.

The higher up the canyon I hiked I noticed the canyon temperatures were low enough that most of the trees and brush were still bare of leaves.


PalisadesCreekTrail10
Photo by: Marc Bowen

I shot the above image looking upstream while standing on the fifth bridge. There is a small foot bridge (not shown) crossing a tributary of the creek just before you reach this bridge. So technically this is the fifth bridge I crossed although the fourth isn’t much of a bridge.


PalisadesCreekTrail15
Photo by: Marc Bowen

After crossing the fifth bridge the trail starts climbing into five switchbacks. Standing on one of the switchbacks in the trail I looked back and shot the above photo. You can see the flooded trail I came up just to the right of the stream and some pretty cool clouds above.

There is a campsite at the top of the switchbacks just before the lower lake comes into view. There were two people camping there having breakfast when I walked by. They were the only other people up there besides me today.


Lower Palisades Lake

LowerPalisadesLake2018
Photo by: Marc Bowen – Lower Palisades Lake

Lower Palisades Lake sits at the far end of the lower canyon at an elevation of about 6,100 feet. It was created by a huge rockslide ages ago. The lake is very muddy right now but will clear up in another week or two.


PalisadesCreekTrail14
Photo by: Marc Bowen – trail to the upper lake

The trail rounds the left side of the lake and crosses the bridge at the lake outlet, continuing 2.7 miles through the upper canyon and splits off to Upper Palisades Lake. My son and I plan to hike to the upper lake sometime next month, stay the night and do some fishing. I did a solo hike up there late May of last year but didnt spend the night. See last years post: Palisades Creek Trail To Upper Palisades Lake

On the hike back I took a short video clip (above) of part of the trail. You can hear the stream near by and see the rocky cliffs hanging over the trail.

As I hiked further down the trail I looked off to my left and up a side canyon as the sunlight streamed across the cliffs in the distance. I saw two glowing white spots on the cliff face and verified that they were mountain goats. Their agility that allows them to stand and eat in places with seemingly no place to stand amazes me. Click on the video below and see if you catch a glimpse of these beautiful creatures on the cliff walls in the far distance.

Just in case you missed them in the photo below i have them circled.

PalisadesCreekTrail16
Photo by: Marc Bowen

I took this video clip below to show the part of the trail with the worse flooding.


It was wonderful to get out and hike today. Other than being a little tired I Feel GOOD! I’m always excited to start a hike and when one hike ends I’m excited to start the next one.

There seems to be this great need in me to get out and hike along a stream, up a canyon or up a mountain to not only see whats at the end of the trail but to enjoy the journey as well.

24852108_574117546266911_1441651312125339846_n


Image

Late Winter Hike – Cress Creek Trail

By Marc Bowen


I’ve written about Cress Creek Trail before. If you haven’t read that post please do so. Just click this link:  Cress Creek Nature TrailIt’s the first hike I do each year mostly because its close to home and at lower elevation. It’s an easy first hike even in the snow and can be walked early in the year or even during the winter.

CressCreekNatureTrail
Photo by: Marc Bowen

Two days ago I had planned to come here but we had a late winter snow storm that dropped 7-8 inches of snow. So I waited a few days before driving over from my home which is about 15 minutes away.

The  Cress Creek parking lot can hold a dozen cars but I was the only one here on this Monday morning which was fine by me.

CressCreekTrail
Photo by: Marc Bowen

There were already tracks headed up the trail from either earlier this morning or sometime yesterday. Cress Creek Nature Trail is a 1.3 mile loop and is set up as an interpretive trail with 18 interpretive signs along the way. The hike starts by heading east. The first half mile of trail is paved and then turns to a well maintained gravel pathway (Of course being covered in snow today I couldnt really tell the difference).


CressCreekTrail3
Photo by: Marc Bowen

A little over a half-mile up the trail you can continue west over the stream or take a left turn up the gully. From here the trail is one big loop so either way you choose will eventually bring you back to this point.


CressCreek
Photo by: Marc Bowen

As I stood on the bridge and looked south along the stream I could see into the valley and the snow covered farm land.

CressCreekPond
Photo by: Marc Bowen

Looking  north up-stream from the bridge the green color from plant life was bright despite winter temperatures. This stream is spring fed and water cress and other plant life grow year-round because of the mild water temperature. There were quite a few deer tracks around this water source. I didnt see any moose tracks although they do frequent this area.

CressCreekTrail2
Photo by: Marc Bowen

One of the many interpretive signs in the area stands at the fork in the trail and next to the stream. Today I chose to go left at the fork and follow the stream up the gully headed north.


CressCreekTrail4
Photo by: Marc Bowen

This part of the trail crosses two bridges in this gully before switch-backing up the hill a-ways. There were less tracks in this direction and deeper snow as the elevation increased. The change in elevation is about 280 feet by the time you reach the highest point of this trail.

CressCreekBeginings
Photo by: Marc Bowen

The trail crosses another bridge after a couple of switch-backs and this is the upper most part of the stream seen from the trail.

TrekPoles
Photo by: Marc Bowen

From the last bridge the trail makes a couple more turns up the hill until you reach the highest point of this hike. The views are beautiful, the snow pristine. There are few tracks other then those made by deer. The temperature was only around 30 degrees but because of no wind and plenty of sunshine it was comfortable enough for a long sleeve shirt, no coat and no gloves. I carry those items in my pack should they be needed.


CressCreekTrail5
Photo by: Marc Bowen

Fresh, clean snow, beautifully flocked trees and clear mountain air! Just what a body and soul need to recharge.

SnowyTrail
Photo by: Marc Bowen

The trail drops back down the hill and then heads back west toward the springs and the fork in the trail. Along the way are trails to a couple of overlooks.

SouthForkSnake
Photo by: Marc Bowen

Each of these overlooks have a flat area with steel picnic table and railings where you can look out over the valley and the South Fork of the Snake River below. On a clear day you can see all the way over to the Menan Buttes ( on the horizon ). The deer have been all over this area leaving their tracks in the snow.

FromBridgeCressCreek
Photo by: Marc Bowen

As I returned to the parking area I took a few minutes to walk across the road to a bridge that spans the canal next to the river. There is a ditch road that can be walked for quite aways along the canal and river.

This is a great hike for families. We all need to take time to unplug, get the kids away from TV, video games and phones and walk these trails as a family and make some good memories. My wife and I have walked this trail with our kids and grandchildren and we all enjoy the time spent together exploring our beautiful world.


IMG_4915

Image

Paintbrush Canyon and Holly Lake

By: Marc Bowen


Hike to Holly Lake

  • Trail location: Leigh Lake Trail
  • Roundtrip length: 13 miles
  • Trailhead elevation: 6875 feet
  • Total elevation gain: 2575 feet
  • Highest elevation: 9424 feet
  • Trail difficulty: 18.15 (strenuous)

*above info provided by TetonHikingTrails.com


Getting There

I left home this morning at 4:30 am so I would arrive at the trailhead by 6:30 am. The drive just before sunrise is beautiful as usual . I have been choosing to go to Jackson by way of Rexburg and Driggs in the early mornings to avoid animals on the road. The road over the mountain between Swan Valley and Victor, although a slightly shorter drive time,  tends to have more animals on the road before daylight (in my experience). I do enjoy seeing wildlife, just not in my headlights on a winding mountain road in the ‘wee’ hours of the morning.

CathedralGrp
Photo by: Marc Bowen – Jenny Lake Rd

To get to the Paintbrush Canyon Trailhead I drove through the Moose Wyoming entrance on Teton Park Road, then turned left on Jenny Lake Road (which is a beautiful scenic loop drive by the way), then right on String Lake Road. I parked in the String Lake parking lot and then began hiking the Leigh Lake Trail.

LeighLakeTrailheadSign
Photo by: Marc Bowen

For the first .8 miles the trail follows along the shores of String Lake and there are some great views of Mt. Moran along the way.

StringLake2017
Photo by: Marc Bowen – String Lake & Mt. Moran

Mount Moran was very beautiful in the morning light. I have hiked this trail before on the way to Leigh Lake, Bear Paw and Trapper lakes. To read more about that hike please click the link Hiking the Leigh Lake Trail to Bear Paw & Trapper Lakes.

String Lake and Leigh Lake are connected by a short but wide stream. At this point in the hike there is a fork in the trail. Go right if you want to go to Leigh Lake and the Leigh Lake portage area or left across the foot bridge to the String Lake Loop trail and the Paintbrush Canyon trailhead.

LeighLakeOutlet
Photo by: Marc Bowen – Leigh Lake outlet


Paintbrush Canyon Trailhead

After I crossed the foot bridge across the Leigh Lake outlet I followed the trail in a gradual climb through Lodgepole pine forests and then took a right fork in the trail at the Paintbrush Canyon Trailhead. Along this part of the trail I enjoyed brief views of Leigh Lake and the valley and hills to the east.

LeighLakefromtrail
Photo by: Marc Bowen – Leigh Lake

A little distance up the trail from the beautiful Leigh Lake views the trail began to turn toward Paintbrush Canyon and was almost overgrown with huckleberry plants in some places.

PaintbrushCanynTrail2
Photo by: Marc Bowen – Huckleberries along Paintbrush Canyon trail


At this point I had a few glimpses of Mt. Moran through the trees to the right of the trail.

PaintbrushCanynTrail3
Photo by: Marc Bowen – Mt. Moran from Paintbrush trail


And Rockchuck Peak to the left of the trail.

PaintbrushCanynTrail5
Photo by: Marc Bowen – Rockchuck Peak


PaintbrushCanynTrail4
Photo by: Marc Bowen – Huckleberry plants can grow to 6.5 feet tall

In this area of the trail the huckleberry plants are huge . The plants were as high as my head in some places. No ripe berries on them yet that I noticed but a good place to make a lot of noise to avoid surprising a bear. I wasn’t stressing it because there were plenty of  hikers ahead of me and behind me.


WaterFall3
Photo by: Marc Bowen – Paintbrush Canyon Creek

I could hear Paintbrush Canyon Creek long before I was able to see it. The water had a slight aqua tint to it making the falling water very nice to look at.


TrailRockchuckPeak
Photo by: Marc Bowen – Lower Paintbrush Canyon campsite area

There are a few campsites in this area of Lower Paintbrush Canyon. Some are first-come-first-serve and some sites can be reserved.


TrailView
Photo by: Marc Bowen – Leigh & Jackson Lakes in the distance

(Above photo) Just off this part of the trail I saw that someone had their tent pitched facing down the canyon so that they would wake up to this view in the morning!


Bridge
Photo by: Marc Bowen

This bridge (above) was the second bridge I crossed at this point in my hike.


WaterFall2
Photo by: Marc Bowen

Directly to the left of the bridge is a beautiful little waterfall.


WaterFall2bridge
Photo by: Marc Bowen

To the right of the bridge Paintbrush Canyon Creek streams off in the direction of Mount Moran.


TreesleaningFromTrail
Photo by: Marc Bowen

Not too far after I crossed the bridge the canyon opens up for a short way and I noticed a lot of the trees here were leaning way over to my left, all in the same direction, or were completely broken off.

WtrfallRightoftrail
Photo by: Marc Bowen

As I looked to my right I could see more damaged trees and tree stumps. In the above photo you can see all this and piles of snow. I’m assuming the snow is what’s left of an avalanche that came down the ravine and took out a lot of these trees.

By the way. The reason this canyon is called Paintbrush Canyon is because it is usually filled with wildflowers. Columbine and Indian Paintbrush are a very common site everywhere. Just not now. Too early probably. Maybe in a few more weeks.


Trailalongsidecreek
Photo by: Marc Bowen

The canyon then narrows and the trail follows the creek for several bends. As I stopped to take the above photo, 3 trail-runners (men) moved at good speed past me and up the canyon. I’m always amazed and impressed by people who run these trails. This trail is strenuous enough just walking. I can’t imagine running up it!


PaintbrushCanyonCreek
Photo by: Marc Bowen – Paintbrush Canyon Creek
WaterFall4
Photo by: Marc Bowen – Paintbrush Canyon Creek

As the trail increased in altitude I noticed the stream began disappearing under snow fields and then reappearing again.


PaintbrushCanyonCreekHDWTRS
Photo by: Marc Bowen

As the snow melts, the water rolls off these canyon walls and adds volume to the swift flowing Paintbrush Canyon Creek.


streamcrossing
Photo by: Marc Bowen – Paintbrush Canyon Trail

Some of the stream crossings require some ‘rock-hopping’. This is where I’m glad I use trekking poles. I can stabilize myself and prevent myself from falling when stepping on wet or loose rocks in the stream.


PaintbrushCanynTrailiPhonepano
Photo by: Marc Bowen (iPhone Pano)

I used my iPhone for the above photo to get a multi-shot panoramic view as I followed the trail up into more snow fields.


RockCairn1
Photo by: Marc Bowen – rock cairn – looking back down the trail

At the beginning of a large snow field someone had made the above cairn. Looking just ahead up the canyon the trail disappears underneath a snow field and from here I could not see where the field ended or the trail emerged. I decided to walk in a straight line up the canyon and soon I saw another rock cairn up some distance in front of me near a rock slide.

RockCairn2
Photo by: Marc Bowen – rock cairn

As I stepped back onto the trail just past this cairn I turned and enjoyed this view with lakes and mountains in the distance.


PaintbrushCanyon2
Photo by: Marc Bowen

From here I could easily see Leigh Lake (closest) and Jackson Lake in the distance.

snowovertrail
Photo by: Marc Bowen

At this elevation the switch-backs in the trail start crossing snowy areas and created some tense moments while traversing the snow. The snow is rather hard and can be slick. I took the above photo as an example. Again, trekking poles were a great help to me.

CanyonWalls1
Photo by: Marc Bowen  – View from the trail
Switchbacks
Photo by: Marc Bowen

These last parts of the trail were quite a ‘slog’. I worked up some serious sweat on these switch-backs.


PaintbrushCanynTrail6
Photo by: Marc Bowen – trail from String Lake to Holly Lake

I was compensated for this strenuous portion of the hike with some stunning views!


UpperCanyonPath
Photo by: Marc Bowen

The trail eventually disappears again under snow. I followed the tracks of previous hikers up this gully.  Again it was difficult walking on the slick hard snow. I noticed traces of the actual trail up the slope to my left (I found out later that underneath this whole area of  snow is a scree field). As I walked near boulders sticking up out of the snow I used my trekking poles to test the snow in those areas. I saw a few places where a hiker’s feet had broken through the snow up to their thighs near some of the rocks. As the day grew warmer the footing was becoming treacherous.

UpperCanyonPath2
Photo by: Marc Bowen

I made the decision to try and get out of the snow and climb-up the slope to where I had seen traces of the actual trail. But this was so steep and slick that I realized why some previous hikers had chosen to hike up the bottom of the gully. So I climbed still further up the slope until I reached a ridge of rock with very little snow and worked my way to the top of the gully. My decision to travel this ridge turned out to be a bad one.

As I climbed over a few large boulders and planted my right foot down between a few smaller ones, I lost my balance and fell. As I fell I immediately tried to jerk my foot out from between the rocks fearing my leg would snap. I was able to get one of my trekking poles between my upper-body and the ground and keep me from going all the way down. But not before taking a chunk of flesh off my shin and the strain on my right leg causing a horribly painful and long-lasting cramp in my calf that took my breath away. After the cramp went away I was relieved that I hadn’t broken the leg. I pulled my pant-leg up to look at my shin which looked nasty enough that I didn’t want to look at it again. I stood up and experienced no small amount of pain as I put weight on the leg and that had me worried. I wasn’t sure how this pain would affect my hike back down the mountain. I didn’t have a lot of choices so I carefully worked my way off the rocky ridge and then down the steep snowy slope (literally by the seat of my pants).

At this point I saw a sign sticking out of the snowy ground indicating that Holly Lake was just a half-mile away. That got the adrenaline going in me and I decided I had come this far and was not going to head back before seeing the lake.

PaintbrushCanynTrail1
Photo by: Marc Bowen – trail to Holly Lake

I found the trail again and a section where the snow had melted and stopped to rest, looking over my back-trail and the beautiful view.

trailtoHollyLake
Photo by: Marc Bowen

As I hiked further up the trail I followed the tracks of someone going up the slope of snow ahead of me to the left (above photo).

UpperPaintBrushCanyon
Photo by: Marc Bowen

After hiking up the slope and down the other side I saw a small lake before me and a group of people relaxed, sitting on rocks and enjoying the view.

HollyLakePOND1
Photo by: Marc Bowen

I chatted with several of the people there at the lake. Everyone was rather proud of themselves for making it this far and most were resting and eating lunch before heading back down.

Paintbrush Canyon Trail continues on up the mountain behind the trees to the left of the lake (above photo) and eventually over the divide at an elevation of 10,700 feet. I was told by a hiker, who had hiked up that section of trail a-ways, that he watched some people climb up and over the wall of snow covering the divide. He said they had crampons and ice-axes but had fallen a few times before disappearing over the top. Crazy!

One of the guys I met at the lake was hiking alone as I was. His name was Leon. He had a heavy accent and I asked him where he was from. He said he was from Brazil and had traveled here to spend a week hiking the Tetons. He said he had hiked all over the world including the Swiss Alps and Patagonia in Chile.

As we chatted everyone else had headed back down the mountain and we decided we should probably do the same. Then two woman arrived, one of them saying, ” You guys do know this isn’t Holly Lake don’t you?” Apparently the lake we were sitting at has no name. I asked her where Holly Lake was located and she pointed up the mountain saying the trail to the lake was impassable because of the snow but was probably a 15-20 minute hike if we worked our way up through the trees, over the hill and into the cirque where we would find the lake.

I turned to Leon and suggested we work together to find the lake. We both had maps on our phones but with the trails covered with snow all we could tell from the map was the general direction of the lake which had already been pointed out to us.

On our way there we also ran into a park ranger who had just been up there so we back-tracked his trail to get there.

HollyLakeOutlet2
Photo by: Marc Bowen – Holly Lake outlet

Leon ahead of me (above photo) hiking in to the ‘real’ Holly Lake.

HollyLakeiPhonePano
Photo by: Marc Bowen – Holly Lake (iPhone Pano)

This lake was definitely bigger then the lake with no name.

HollyLake3
Photo by: Marc Bowen – Holly Lake

Holly lake sits at an elevation of 9424 feet. Not sure how deep it is but it was still half covered in ice and snow….The clouds were gorgeous in the early afternoon. But every time a particularly large bunch of clouds rolled through the temperature would drop, the wind would start blowing, sometimes so hard that I had to quickly grab my hat before it blew away down the mountain. Then the sun would shine, the wind would die and I would relax , eating my lunch and totally soaking in the views around me. I reflected on all my blessings, being healthy enough to do these hikes I enjoy, my wife and family, my faith, and all god’s beautiful creations…And…I suddenly noticed my leg didn’t hurt anymore!

HollyLake1
Photo by: Marc Bowen – Holly Lake

This is a beautiful lake and I am so glad that someone kindly let me know that I was at the wrong lake because I would have been sorely disappointed when I got back home and found out after all that pain and effort, I missed the lake that was my goal by a half mile!

I would love to come back here sometime when there is less snow and hike over the divide into Lake Solitude on the other side.

This has been a great adventure and I’m glad I survived it! As Always I look forward to the next one!!


Image

Across Jenny Lake to Cascade Canyon

By Marc Bowen


About three weeks ago I hiked the Taggart Lake-Bradley Lake Loop trail in Grand Teton National Park. If you would like to read about that hike please read my blog post at Hike into Taggart and Bradley Lakes . Today I talked my daughter Nicole into taking a day off from her busy schedule and driving to a trailhead just a mile up the road from where my last hike began.

Jenny Lake Trailhead

Glacially carved Jenny Lake is the second largest lake in the park covering about 1191 acres. It’s also one of the deepest at 423 feet. It’s named after a Shoshone woman named Jenny who married a trapper by the name of Richard “Beaver Dick” Leigh. They were both part of the Hayden Expedition to the area in 1872. Richard worked as a guide and Jenny assisted with camp logistics. Nearby Leigh Lake is named after Richard Leigh. Sadly in 1876 Jenny and their six children died of smallpox.

JennyLakeOverlookhdr
Photo by: Marc Bowen – Jenny Lake in early morning before sunrise (photo taken 1 year ago Aug. 2016)

We parked in the Jenny Lake boat launch area, put on our packs and gear and headed down to the east boat dock. Our destination today would be Cascade Canyon.


Cascade Canyon Trailhead

Cascade Canyon is located on the west side of Jenny Lake and we had two options for getting there. We could hike 2.5 miles around the south end of the lake on the Jenny Lake Loop Trail or take a shuttle boat across the lake to Cascade Canyon Trailhead.


Boatlaunch
Photo by: Marc Bowen – Jenny Lake shuttle boat launch


Many hikers take the shuttle especially if they are hiking all the way up the canyon to the Forks. The shuttle boat cuts-off 2.4 miles of walking each way and makes what would be about a 15-mile hike a 10-mile hike instead.


JennyLakeShuttleNicole2
Photo by: Marc Bowen

The shuttle costs $15 round trip and boats launch every 10-15 minutes from 7am to 7pm daily all summer long. Lake cruises are also available.

Boatwake
Photo by: Marc Bowen

The 12-minute ride across the lake was nice with absolutely stunning views of the Tetons!


WestBoatDockJennyLake
Photo by: Marc Bowen – Jenny Lake west shore boat dock, GTNP

The Jenny Lake west shore boat dock sets at the base of Cascade Canyon and the mountains tower over this area.


JennyLakeShuttleNicole
Photo by: Marc Bowen – Nicole shooting scenery on the Jenny Lake shuttle


MarcCameraGTNP
Photo by: Nicole Klingler – Marc on the Jenny Lake shuttle


WestBoatDockJennyLake2
Photo by: Marc Bowen – Jenny Lake west shore boat dock, GTNP

There is a lot to do and see when you leave the west boat dock. Hidden Falls is a half-mile away and Inspiration Point is a mile away. We found out that there is actually an upper Inspiration Point and a lower Inspiration Point. If hiking to the upper point you take the Cascade Canyon Trail and the lower point is just off the trail to Hidden Falls.


CascadeCanyonNicole
Photo by: Marc Bowen – Nicole on Cascade Canyon Trail, GTNP

We headed up Cascade Canyon Trail on our way to the upper Inspiration Point. This trail is beautiful and the first 1/4 – 1/2 mile was pretty steep and winds through pristine conifer forest and patches of huckleberries.

MarcCascadeCanyonTrail1
Photo by: Nicole Klingler – Marc hiking Cascade Canyon Trail, GTNP

About one mile from the boat dock is the side trail to Inspiration Point. We were so busy taking pictures that we walked right past this left fork without seeing it and continued on and up the canyon.

MarcCascadeCanyonTrail4
Photo by: Nicole Klingler – Marc in Cascade Canyon, GTNP


Cascade Canyon, Grand Teton National Park

This trail takes you 5 miles up the canyon to north and south forks in the trail. At the forks a left takes you down the south fork of Cascade Canyon and a right takes you in the direction of Lake Solitude.


CascadeCanyonNicole3
Photo by: Marc Bowen – Nicole on Cascade Canyon Trail, GTNP

There were breathtaking views of Mount Owen (12,928 ft) and Mount Teewinot (12,325 ft) as they towered high over the canyon floor.


CascadeCanyonNicole2CROP
Photo by: Marc Bowen – Nicole in Cascade Canyon, GTNP

At this point the canyon starts widening as the trail follows the stream at a gentle grade up the canyon.


CascadeCanyonCreek2
Photo by: Marc Bowen – Cascade Canyon Creek, GTNP

Just beyond this point there is some flat water and a lot of willows, perfect habitat for moose. We actually saw a big bull moose just off the trail a short distance farther up from here. He was magnificent, shoulder deep in the brush, dark brown with antlers covered in dark brown velvet. I took a few shots at him with my camera but the resulting images were not satisfactory.

We talked to some hikers coming down the canyon and they warned us of a female black bear with cubs just off the trail about a mile farther up. By now we knew we had missed the trail to Inspiration Point and decided this was probably as good a time as any to turn around and head back down the canyon.


Inspiration Point (upper)


InspirationPoint
Photo by: Marc Bowen – Jenny Lake from upper Inspiration Point

Roughly a mile back down the trail we found the side trail to Inspiration Point that we had missed. A few minutes later we were there.  Quite a view of the lake and valley from up there. In the above photo shuttles can be seen running between the east and west boat docks.


InspirationPointPano
Photo by: Marc Bowen – Inspiration Point

When Nicole and I got to this point there were quite a few people out enjoying the view. I used my iPhone to get this pano and thought it was a good representation of the view we had from there.


Hidden Falls, Grand Teton National Park

From Inspiration Point we hiked back down towards the boat dock with the intention of heading over to Hidden Falls. The skies up until this point had been cloudy off and on but now we started feeling a few drops of rain which wasn’t a concern at first. But as we started getting closer to the dock and the side trail to Hidden Falls, a heavy rain began to fall. We could hear thunder echoing down the canyon walls and see flashes of light a short distance up the canyon from us. Lightning! I love watching storms from my front porch but having lightning in the area while hiking is a real concern. There really isn’t a ‘safe’ place to be. As the storm continued the rain turned to hail and we saw dozens of people moving fast toward the boat dock. I knew the boats weren’t going anywhere until the storm ended. People were gathered under trees, umbrellas, coats or what ever they could hold over there heads. Every time lightning flashed I wondered where it was going to hit next. Nicole and I moved into the brush under thick, dense pine trees put rain gear on and waited it out and as the rain began to subside we headed up the trail to Hidden Falls.


HiddenFallsNicole
Photo by: Marc Bowen – Nicole at Hidden Falls, GTNP

Hidden Falls drops about 200 feet down a series of ‘stairs’. We could hear the roar of the falls long before we could see it. There was so much water coming down the falls while we were there that it was creating a thick cloak of mist.


HiddenFalls
Photo by: Marc Bowen – Hidden Falls, GTNP

After we left the falls we took a side trail to what is now called  ‘lower’ Inspiration Point. The storm had completely passed to the east and in the photo below you can see the dark clouds of the thunderstorm across Jenny Lake.

LowerInspirationPoint
Photo by: Marc Bowen – Nicole at Lower Inspiration Point

After a quick hike back to the boat dock we waited for the next boat, boarded and crossed the lake again. Then back to the parking lot, we loaded our gear into the car and headed back home.

Despite the lightning, rain and hail it was a great day for a hike! I really like Cascade Canyon. Definitely one of the most scenic I’ve hiked so far. I’m sure I will be back. But next time I’m there I want to hike all the way up the canyon then north to Lake Solitude, one of the most beautiful lakes in the park.

Till next time…

Get out and hike!


Image

Hike into Taggart and Bradley Lakes

By Marc Bowen

Taggart Lake-Bradley Lake Loop hike

  • Location – Grand Teton National Park
  • Taggart Lake Trailhead elevation – 6625 feet
  • Hike length (in and out) – 5.5 miles
  • Total Elevation Gain – 585 feet
  • Highest Elevation – 7190 feet
  • Trail Difficulty Rating – 6.67 (moderate)

*The above info courtesy of TetonHikingTrails.com


Last year toward the end of July my wife Renae, daughter Nicole and I hiked the Taggart Lake – Beaver Creek Loop which is a pleasant loop hike of about 4 miles. It’s 3.2 miles if you just hike into Taggart Lake and then back out the same way (click on the link for more info on last year’s hike). One week later some friends and I hiked into near by Bradley Lake on the Bradley Lake Loop Trail which is just under 5 miles in and out.

This time I decided to hike to Taggart Lake and go part way around on the Beaver Creek Loop then double back and take the Bradley Lake Loop along the east shore of Taggart Lake and then over the glacial moraine into Bradley Lake.


TaggartLakeTrail1
Photo by: Marc Bowen

Early Monday morning I drove the 58 miles from my home to the trailhead parked my car in the parking lot, put my gear on and headed up the trail. The aspens don’t have all their leaves yet but are still quite beautiful.


TaggartCreekBridge
Photo by: Marc Bowen

Taggart Creek is not too far up the trail and I seldom cross the bridge without stopping to capture the beauty of this stream. It’s a good thing there is a bridge because fording the stream would have been difficult with all the water coming down this year.


TaggartCreekFallsJune2017
Photo by: Marc Bowen

The light of the morning sun was gorgeous, filtering through the trees and across the tops of the mountains.


FlowersOnTrail2
Photo by: Marc Bowen

Just around the bend from the bridge over Taggart Creek were wildflowers that were looking fresh and happy. It had rained the night before and all the colors were crisp and bright. Just through the trees in the back ground I could see some mountain peaks glowing with morning sunlight.


TaggartLakeTrail2
Photo by: Marc Bowen

From there the trail climbs over a low ridge and on toward the majestic Teton mountain range. One of my favorite things about hiking in this area are the magnificent views from just about anywhere on the trail. Hard to beat!


TaggartLake1
Photo by: Marc Bowen – Taggart Lake, elev. 6902 ft, average depth 80 ft, size 110 acres

If you get here early the lake is usually ultra-calm and will produce some awesome reflections.


TaggartLake2
Photo by: Marc Bowen – Taggart Lake

I arrived at the trailhead this morning about 6:30am and was the first car in the parking lot. So I had the trail and this lake all to myself for about the first hour. There was a lot of moose sign around so I half expected to see one at sometime or another. While photographing the lake I heard some heavy pounding on the trail behind me and turned expecting a moose but saw a woman out for a morning trail run. Trail runners are becoming a pretty common sight on the mountain trails.


TetonsFlowers
Photo by: Marc Bowen

As I headed north along the northeast shore of Taggart Lake the trail began to wind and ascend through pines, Douglas Fir and meadows full of daisies.


TaggarttoBradleyTrail
Photo by: Marc Bowen

The trail continues to climb several hundred feet up a moraine (ridge) that separates the two lakes from each other.


SnowonTrail
Photo by: Marc Bowen

On the other side of this moraine and down the slope is Bradley Lake and on these north slopes the trail is still covered by snow in many places sometimes making it difficult to follow.


BradleyLakePano
Photo by: Marc Bowen (iPhone pano) – Bradley Lake, elev. 7027 ft, size 215 acres

After leaving Bradley Lake I continued the loop trail back to the trailhead and the formerly empty parking lot was now full of cars, trucks and tour buses which is typical any day of the week during the summer.

It was so nice getting back out and hiking again especially in the Tetons. They still remain my favorite hiking destination!